
If you’ve just unboxed your first Brother machine, the buttons, dials, and thread paths can feel overwhelming. But here’s the truth: learning how to use Brother sewing machine is faster and more intuitive than you’d think. Brother designs its home models with beginners in mind, packing helpful markings, automatic features, and clear threading paths right onto the machine.
Whether you bought a lightweight CS5055, a computerized CS7000X, or a sturdy XR9550, the core workflow remains nearly identical. I’ve walked dozens of new sewists through their first few seams, and by the end of this guide you’ll be able to thread, set up, and sew a straight line with confidence, no guessing, no skipped stitches.
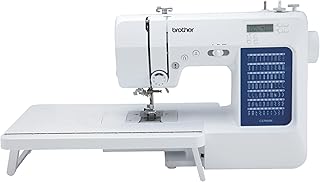
Brother CS7000X Computerized Sewing and Quilting Machine
Check PriceGetting to Know Your Brother Sewing Machine
Before you power anything on, spend five minutes identifying the key parts. Every Brother home machine shares a similar anatomy, and recognizing these landmarks will make threading and troubleshooting much easier.
- Spool pin: Holds the thread spool; usually on the top right.
- Take-up lever: A metal hook that moves up and down inside the front slot; it’s part of the upper threading path.
- Tension dial: Usually numbered 0–9; controls how tight the upper thread is pulled.
- Stitch selector (or LCD screen): Where you choose straight stitch, zigzag, and decorative stitches.
- Reverse lever/button: Lets you sew backward to lock a seam.
- Presser foot lifter: A lever behind the needle area that raises and lowers the foot.
- Bobbin compartment: Under the needle plate or in a front-loading case, depending on your model.
Even if your machine has a dozen decorative stitches, you’ll spend most of your time on the straight stitch and zigzag. Familiarity with these basics reduces the fear of “doing something wrong.”
How to Set Up Your Brother Sewing Machine Step by Step
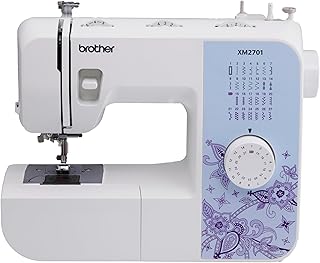
Brother XM2701 Lightweight Sewing Machine
Check PriceRushing through setup is the number one cause of thread jams and bent needles. Follow these steps in order every time you sit down to sew.
Plug In and Position the Machine
Place your machine on a sturdy table at a height where your elbows bend at 90 degrees when your hands rest on the sewing bed. Plug the power cord into the machine first, then into the wall. Many Brother models include a foot pedal; make sure it’s fully inserted and positioned flat on the floor. Turn on the power switch, usually on the right side, and watch for the light to come on.
Raise the Needle and Presser Foot
Use the handwheel on the right side to turn the needle up to its highest position. Then lift the presser foot with the lever. Leaving the foot up while threading prevents the tension discs from engaging, critical for proper thread flow.
Check the Needle
A bent or dull needle creates skipped stitches and fabric damage. Brother machines often come with a size 14/90 universal needle installed. If you’re sewing lightweight cotton, swap to a size 11/75; for denim, use a 16/100. Learning how to change the needle safely is one of the first maintenance skills every owner should master.
How to Wind the Bobbin on a Brother Sewing Machine
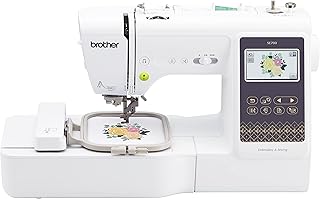
Brother SE700 Sewing and Embroidery Machine
Check PriceA well-wound bobbin is the secret to even stitches. Brother machines typically use a top-mounted bobbin winder on the right side. Here’s the no-fail sequence:
- Place an empty bobbin on the bobbin winder shaft and push it to the right until it clicks.
- Place a thread spool on the spool pin, then guide the thread around the pre-tension disk (a small metal nub on the top left).
- Wrap the thread clockwise around the bobbin a few times by hand, then snap the thread tail through the small hole in the top of the bobbin.
- Hold the thread tail upward, press the foot pedal or start/stop button, and let the bobbin wind until full. The machine will automatically slow or stop on many models.
- Trim the thread tail close to the bobbin, then slide the bobbin back to the left to disengage the winder.
Wind only Brother-approved bobbins; generic ones can wobble and cause uneven tension.
How to Insert the Bobbin Correctly
Most modern Brothers use a top-drop-in bobbin system under the needle plate. Pop open the clear cover, and drop the bobbin in so it unwinds counterclockwise. Pull the thread through the small slit and into the guide until it clicks into the tension spring. Replace the cover. If you have a front-loading case, hold the case with the “arm” facing up, drop in the bobbin so it unwinds clockwise, and feed the thread through the slot and under the tension spring before inserting the case into the machine. A gentle tug should show the thread feeding smoothly with a little resistance.
How to Thread the Upper Thread on a Brother Sewing Machine
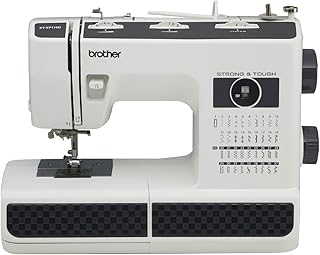
Brother ST371HD Sewing Machine
Check PriceBrother’s numbered thread path prints directly on the machine body, making upper threading nearly foolproof. For a detailed visual walkthrough, see our complete guide on threading a Brother machine. The quick steps are:
- Raise the presser foot and turn the handwheel to lift the take-up lever to its highest point.
- Place the thread spool on the spool pin and clip on the spool cap.
- Follow the numbered path: guide the thread down the first channel, around the tension dial from right to left, up the second channel, and hook it into the take-up lever (the metal arm with a hole).
- Bring the thread down the final channel to the needle, and pass it through the needle eye from front to back.
- Pull about 4 inches of thread out and lay it under the presser foot toward the back.
Many Brother models feature an automatic needle threader, a tiny hook that pushes the thread through the needle in one motion. Lower the threader lever gently, and don’t force it; misalignment can bend the mechanism.
Bringing Up the Bobbin Thread
Grab the upper thread tail with your left hand and turn the handwheel toward you one full rotation. The needle dips down and catches the bobbin thread, pulling it up in a loop. Use a pair of scissors or your fingers to tug the loop until the bobbin thread tail emerges. Pull both threads under the presser foot and behind the machine. Now you’re threaded and ready.
Choosing the Right Stitch and Settings
On mechanical models, turn the stitch selector dial to the desired letter or number. On computerized models, tap the stitch icon on the screen. For a first project, select the straight stitch (usually “A” or “01”). Then adjust:
- Stitch length: 2.5 mm is standard for most fabrics. Longer lengths (3.5–4 mm) work for basting; shorter (2 mm) for curves and topstitching.
- Stitch width: Set to 0 mm for a straight stitch; width matters only for zigzag and decorative stitches.
- Tension: Start at 4. If the top thread loops on the fabric underside, increase tension. If the bobbin thread pulls to the top, decrease tension.
Always test on a scrap of your project fabric before sewing the real seam.
Sewing Your First Seam
Place fabric under the presser foot with the bulk of the material to the left. Align the raw edge with a seam guide marking on the needle plate, the 5/8″ line is standard for garments. Lower the presser foot, hold the thread tails gently behind, and press the foot pedal slowly. Let the feed dogs move the fabric; you only need to guide it lightly.
To lock the seam, sew 2–3 stitches, then press and hold the reverse lever to backstitch the same distance. Release and continue forward. At the end, backstitch again, raise the needle to its highest point, lift the foot, and pull the fabric away toward the back. Cut threads with the built-in thread cutter or scissors.
Essential Tips for Using a Brother Sewing Machine Effectively
- Use the right needle: Match needle type and size to your fabric. Universal needles work for woven cotton; ballpoint needles are best for knits; microtex for silk.
- Press seams as you go: Ironing every seam opens fibers and sets stitches, turning homemade into handmade.
- Clean lint after every project: Pop open the needle plate and use the little brush that came with your machine to sweep out fuzz. Lint kills stitch quality faster than anything else.
- Oil sparingly: Most modern Brothers need no oiling; check your manual. Over-oiling can drip onto fabric.
- Keep the manual nearby: Your Brother manual includes a troubleshooting chart and stitch reference that answers 90% of “why is this happening?” moments.
- Slow down on curves: Reduce speed around corners; pivoting with the needle down (turn the handwheel to lower the needle into the fabric) gives crisp angles.
For visual learners, Brother’s official sewing guides offer excellent video tutorials that pair perfectly with the steps you’ve learned here.
Troubleshooting Common Issues
Even experienced sewists encounter problems. Most are quick fixes:
- Needle unthreads itself: The take-up lever wasn’t in the highest position when you started threading. Re-thread with the lever fully up.
- Looped or tangled stitches underneath: Usually caused by incorrect top threading or a mis-inserted bobbin. Rethread both with the presser foot raised.
- Fabric not moving: The feed dogs may have been lowered (a switch on the back of the machine). Raise them. Also check if the stitch length is set to 0.
- Machine jams and won’t sew: Turn off the machine, remove the needle plate, and gently cut away tangled thread. Never pull jammed thread through the top tension discs.
- Auto-threader not catching: Needle isn’t fully raised or the hook is bent. Make sure the needle is in the highest position and you’re pressing the threader down slowly until it clicks.
Frequently Asked Questions
Is a Brother sewing machine good for complete beginners?
Absolutely. Brother machines are designed with intuitive controls, clear numbering, and helpful automatic features like needle threaders and one-step buttonholes. The learning curve is gentle, and the manual is written in plain English, making them one of the most beginner-friendly brands on the market.
Do I need to oil my Brother sewing machine?
Most computerized and recent mechanical Brother models are self-lubricating and don’t require oil. Check your manual; if it recommends oiling, use only sewing machine oil and apply a single drop to the hook race area after cleaning out lint.
What presser feet come with a basic Brother machine?
Standard accessories usually include a zigzag foot (all-purpose), a zipper foot, a buttonhole foot, a button sewing foot, and a blind hem foot. That set handles 90% of garment and craft projects. Additional feet like a walking foot or rolled hem foot can be purchased separately.
Why does my thread keep bunching under the fabric?
Thread bunching, often called a “bird’s nest,” almost always means the upper threading is incorrect or the bobbin isn’t seated properly. Rethread both with the presser foot raised and ensure the bobbin thread clicks into the tension spring.
Can I sew thick fabrics like denim on a Brother home machine?
Yes, within reason. Use a size 16/100 denim needle, sew slowly, and hand-crank the flywheel over extra-thick seams (like hem junctions). A heavy-duty Brother model like the ST150HDH or PQ1500SL handles denim more easily, but even a standard machine will sew two layers with the right needle and patience.
Conclusion
Mastering how to use a Brother sewing machine comes down to building a small set of repeatable habits: raise the foot before threading, wind a tight bobbin, follow the numbered path, and test on scrap fabric every single time. Those four actions prevent most frustrations. Start with a simple project, a pillowcase, a drawstring bag, or just practice lines on a piece of muslin, and pay attention to how the machine sounds and feels.
Smooth, steady humming is your goal. As soon as you hear clunking or feel resistance, stop and check threading, needle, and lint buildup. Treat your Brother machine like a precision tool, not a toy, and it will reward you with years of reliable stitching. Bookmark this guide, keep the manual open, and within a week you’ll be sewing seams that look store-bought.