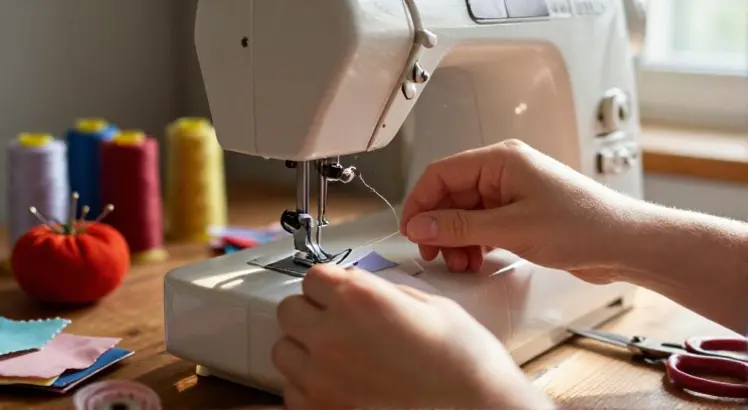
Staring at a tangled mess of thread under the presser foot is the quickest way to kill your sewing motivation. If you’ve just unboxed your Brother machine or are moving up from a simpler model, learning how to thread a Brother sewing machine correctly is the single most important skill you’ll master.
It’s not complicated once you understand the path, but skipping a tiny guide or missing the tension disc can lead to skipped stitches, thread nests, and pure frustration. This guide walks you through every step for top-loading and front-loading bobbin systems, so you can thread with confidence and get back to creating.
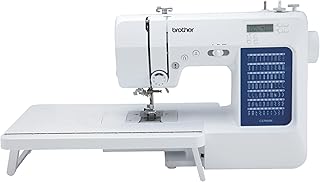
Brother CS7000X Computerized Sewing and Quilting Machine
Check PriceWhy Proper Threading Matters More Than You Think
Threading a sewing machine isn’t just a pre-sewing ritual; it directly impacts stitch quality. When the upper thread and bobbin thread interact perfectly, you get a balanced lockstitch. A single misstep, like forgetting to hook the thread into the take-up lever, throws everything off.
Common symptoms of incorrect threading include looping on the underside, thread snapping, uneven tension, and the dreaded “bird’s nest” under the fabric. Brother machines, especially the popular CS, XR, and SE series, are designed with intuitive thread paths, but you still need to follow the exact route. By mastering this process, you’ll prevent 80% of beginner sewing headaches before they start.
Understanding Your Brother Sewing Machine’s Thread Path
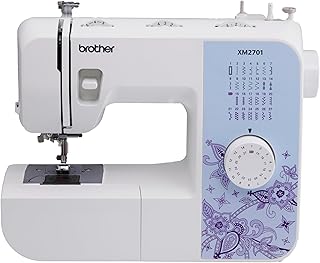
Brother XM2701 Lightweight Sewing Machine
Check PriceBefore you touch the thread, let’s locate the key players. Virtually all modern Brother sewing machines share a similar layout. You’ll find a spool pin on top (often horizontal or telescoping), a series of numbered thread guides, the tension dial or electronic tension slot, a take-up lever (that little metal arm going up and down above the tension area), and finally the needle. Many models also include an automatic needle threader, a small lever on the left side of the needle bar.
For the bobbin, you either have a top-loading drop-in system (the most common on Brother machines) or a front-loading case. If you’re unsure which one you have, check the needle plate: a clear cover that flips open means top-load, while a removable accessory box and metal case point to front-load. When you’re familiar with these components, the threading sequence itself becomes second nature.
Pre-Threading Prep: Safety and Setup
Start with the machine turned off. Unplugging might seem old-school, but it prevents accidental pedal bumps. Raise the presser foot lever, this opens the tension discs so the thread can slide between them properly. If you thread with the foot down, the thread won’t enter the tension mechanism, which causes all sorts of looped messes.
Raise the needle to its highest position by turning the handwheel toward you (counterclockwise). This lifts the take-up lever to a reachable spot and engages the threader if you’ll be using it later. Finally, choose a quality all-purpose thread and a matching bobbin thread, Brother machines perform best with name-brand threads like Gütermann or Mettler. Cheap, fuzzy threads shed lint faster and often break under tension.
How to Thread the Upper Thread on a Brother Sewing Machine
Now for the step-by-step upper threading. Models vary slightly, so it’s smart to follow the numbered guides printed directly on your machine. Most Brother machines have a diagram right on the front or top. If you’ve misplaced the manual, you can find a digital copy on the Brother support page. Here’s the universal sequence used by practically any Brother model made in the last 15 years.
Step 1 – Place the Spool and Guide the Thread
Push a spool of thread onto the spool pin. If the pin is horizontal, secure the spool with the soft spool cap (the larger one goes on first, then the smaller cap to hold it snug). If the spool is vertical, a felt pad underneath helps prevent wobbling. Pull the thread to the left and pass it through the first thread guide, usually a small metal hook or slit at the top back or left side of the machine. From there, draw the thread downward along the grooved channel, following the arrow markings.
Step 2 – Navigate the Tension System and Take-Up Lever
Continue pulling the thread down into the tension area. You’ll loop it around the tension disc or between the two metal plates of the channel. A key detail: wrap the thread from right to left, then bring it back up, ensuring it clicks behind the thin wire check spring (that little wire sticking out near the disc). Now look for the U-shaped take-up lever; guide the thread through its eye from right to left. This lever must be threaded. If it’s missed, the machine won’t sew. After the take-up, bring the thread straight down along the final channel toward the needle area.
Step 3 – Thread the Needle
Just above the needle, slip the thread behind the small wire guide or into the hook on the needle bar. Then thread the needle from front to back (most Brother machines work this way). Pull about 4 inches of thread out the back and leave it under the presser foot. At this stage, some sewists panic and pull too hard, just let it rest. For a detailed walkthrough of using that tiny lever to push a thread loop through the eye, check our automatic needle threader guide. Once the top is threaded, you’re halfway home.
How to Wind and Thread the Bobbin
A machine is only as good as its bobbin. Brother machines use Class 15 bobbins (SA156), either plastic or transparent, depending on the model. Never use a dented or mismatched bobbin, it leads to irregular tension. The process is split into winding the bobbin and then inserting it correctly.
Winding the Bobbin
Place an empty bobbin on the bobbin winding shaft (usually on the top right of the machine). Push it to the right until it clicks. Follow the bobbin winding thread path printed on the top: typically, you’ll take the thread from the spool, guide it through the bobbin winding tension disc, and then manually wrap the thread tail around the empty bobbin a few times from the inside out.
Slide the bobbin shaft to the left if it’s not already engaged. Hold the thread tail, press the foot pedal or start button, and let it wind until the bobbin is full and the machine slows down or stops automatically. Trim the tail and pop the bobbin off.
Inserting the Bobbin (Top-Loading Drop-in System)
Raise the needle and presser foot. Slide open the bobbin cover. Hold the bobbin so the thread unwinds counterclockwise (on most Brother models, the thread should hang to the left, forming a “P” shape when you look at the bobbin from above). Drop the bobbin into the case and guide the thread into the slit or slot, then around the corner, following the numbered guides printed on the needle plate.
Pull the thread toward the back to cut it on the built-in cutter. Leave about 3 inches of tail. Close the cover. That’s it. No separate bobbin case to fiddle with. If your machine has a front-loading bobbin case, you’ll remove the case, place the bobbin inside (unwinding clockwise), pull the thread under the tension spring, and insert the whole assembly, making sure it clicks. For more comprehensive Brother sewing machine basics, that guide covers different models in depth.
Bringing the Bobbin Thread Up
Now you need to catch the bobbin thread. Hold the top thread tail lightly with your left hand. With your right hand, turn the handwheel one full turn toward you. The needle will go down, catch the bobbin thread, and pull it up in a loop.
Use a pair of tweezers or your finger to gently pull both threads toward the back of the machine, placing them under the presser foot. You’re now fully threaded and ready to sew a test seam. Always test on a scrap of fabric first. If the stitches look balanced and there’s no looping, you’ve nailed it.
Common Threading Mistakes and How to Fix Them
Even experienced sewists occasionally thread incorrectly when they’re in a hurry. Here are the most frequent slip-ups and their solutions.
- Threading with the presser foot down. The tension discs remain closed, preventing the thread from seating between them. Always lift the foot before threading.
- Missing the take-up lever. If the thread isn’t hooked into that U-shaped arm, the machine makes a rhythmic knocking sound and stitches won’t form. Re-thread, making sure the lever is at its highest point.
- Bobbin placed upside down. For drop-in bobbins, the thread must unwind counterclockwise. Flip the bobbin over if needed, the direction determines tension.
- Using the wrong bobbin. Only use Brother SA156 bobbins or exact equivalents. Even a slightly deformed bobbin can jam.
- The automatic needle threader isn’t working. Make sure the needle is at its highest position and the hook is perfectly aligned with the eye. If the tiny hook is bent, it won’t pass through, gently nudge it into position or replace the threader.
Tips for Effortless Threading Every Time
Good habits turn threading into muscle memory. Here are a few practices that make the process smoother:
- Always follow the numbered guides. Brother prints the path right on the machine. Use it.
- Use a light to see small guides. A magnifying lamp helps if your eyesight isn’t perfect, especially for threading the needle eye manually.
- Cut thread at a 45-degree angle. A crisp, angled cut slides through the needle eye far easier than a blunt, fuzzy end.
- Hold the thread loosely. Don’t pull so tight that you yank the needle or bend the threader. Gentle tension is all that’s needed.
- Clean the machine regularly. Lint in the bobbin area or tension discs will sabotage threading efforts. Brush out the bobbin case every few projects.
Threading a Brother Sewing Machine with Thicker Threads
When sewing denim or leather, you might switch to topstitching thread or heavy-duty nylon. These thicker threads can be tricky. Use a denim or topstitching needle (size 90/14 or larger) to accommodate the thread diameter. You may need to thread the needle manually because the automatic threader sometimes struggles with heavyweight threads. Reduce the upper tension slightly to prevent breakage and test on a scrap.
For bobbin, stick to regular all-purpose thread; heavy thread in the bobbin can jam. This technique pairs well with a machine known for tackling tough fabrics, if you’re in the market, read reviews on the best heavy-duty models for home sewists.
Frequently Asked Questions
Why does my Brother sewing machine keep jamming after threading?
Jamming usually indicates incorrect upper threading or a bobbin issue. Re-thread completely with the presser foot up, check that the bobbin unwinds in the correct direction, and ensure you’re using a fresh, undamaged bobbin. Also, remove the needle plate and clean out any lint buildup, a tiny piece of thread stuck in the mechanism can cause repeated jams.
Can I use any bobbin in a Brother sewing machine?
No. Brother machines require Class 15 bobbins (SA156), which are slightly curved and specific height. Using universal or Singer-branded Class 15 bobbins can work if they match the exact dimensions, but inconsistent quality may cause tension problems. For best results, buy Brother genuine bobbins or high-quality equivalents labeled for Brother.
How do I thread the needle if the automatic threader is broken?
Simply thread by hand. Cut the thread end at an angle, moisten it slightly (or use a needle threader tool), and pass it through the needle eye from front to back. A separate hand-held needle threader works wonders. The machine will sew perfectly without the automatic feature, it’s just a convenience.
What do the numbers on the thread guide mean?
Those numbers indicate the order in which the thread should be passed. Start at 1, then 2, and so on. Skipping a numbered guide is the fastest way to mess up your threading. They’re placed by engineers to maintain correct tension and feed.
Conclusion
Once you’ve threaded your Brother sewing machine a handful of times, it will feel as natural as tying your shoes. The secret is to always raise the presser foot, take your time at the tension discs, and never bypass the take-up lever. Whether you’re threading top to bottom for a quick hem or winding a fresh bobbin for a major project, these steps will keep your machine humming. If you still run into issues, consult your manual or the Brother support page. Now, grab some scrap fabric, run a line of stitches, and admire the perfect tension. You’re ready to sew.