If you’ve recently invested in industrial equipment for your apparel business, learning how to use a commercial embroidery machine is the first step to turning plain fabrics into branded, high-value products. Unlike home embroidery models, commercial units are built for high-volume output, with faster stitch speeds, larger hoop sizes, and advanced editing features that can feel overwhelming at first. The good news? With a structured approach, even beginners can master the core workflows in a matter of days, not weeks. For context on whether embroidery machines are too challenging for new users, our recent guide breaks down common pain points and solutions.
What Is a Commercial Embroidery Machine?
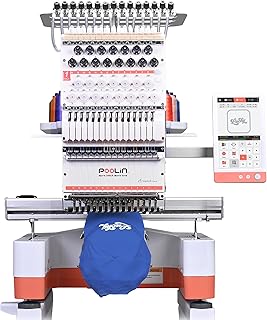
Poolin EOM 15-Needle Commercial Embroidery Machine
Check PriceCommercial embroidery machines are industrial-grade units designed to run 8–12 hours a day, 5–7 days a week, with minimal downtime. They typically offer stitch speeds of 800–1,200 stitches per minute (SPM), compared to 400–600 SPM for home models, and support larger hoop sizes up to 20” x 24” for oversized designs like jacket backs or banner graphics. Most units also include built-in digitizing software integration, automatic thread trimming, and multi-needle configurations (10–15 needles) that let you switch between thread colors without rethreading manually.
Key Components Every Operator Should Know
Before you start stitching, familiarize yourself with these core parts to avoid confusion during operation:
- Embroidery Hoop: Holds fabric taut during stitching to prevent puckering. Commercial hoops come in multiple sizes and are often quick-release for faster loading.
- Multi-Needle Head: Houses 10–15 needles pre-threaded with different colors, eliminating manual rethreading between color changes.
- Bobbin Case: Holds the underside thread that forms the back of each stitch. Commercial machines use high-capacity bobbins to reduce frequent refills.
- Control Panel: Touchscreen or button-based interface where you load designs, adjust stitch speed, and troubleshoot errors.
- Automatic Trimmer: Cuts jump threads between design elements automatically, saving hours of manual trimming per batch.
Pre-Use Checklist: Set Up for Success
Rushing into stitching without proper setup is the #1 cause of ruined fabrics and machine jams. Run through this checklist every time you start a new batch:
Workspace Preparation
Commercial machines are heavy (150–300 lbs) and vibrate during operation, so place yours on a level, reinforced table rated for at least 400 lbs. Keep the area around the machine clear of loose threads, fabric scraps, and tools to avoid tripping hazards or debris getting caught in the mechanism. Ensure you have adequate lighting to inspect stitch quality and hoop alignment clearly.
Machine Calibration and Maintenance
Check the long-term maintenance best practices for commercial embroidery machines to confirm you’re up to date on oiling moving parts, cleaning lint from the bobbin case, and checking needle sharpness. Before each use, run a quick calibration test: load a blank scrap of fabric, stitch a 1” x 1” square, and check that stitches are even, tension is balanced, and the design aligns with the hoop grid. Adjust thread tension dials if the top thread pulls to the back or the bobbin thread shows on the front of the fabric.
Step-by-Step Guide: How to Use a Commercial Embroidery Machine
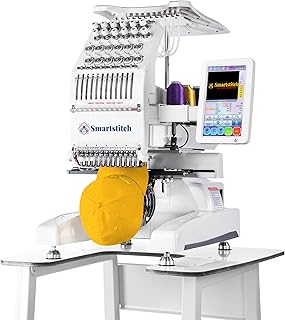
Smartstitch S-1201 Compact Embroidery Machine
Check PriceFollow these 6 steps for consistent, professional results every time you run a batch:
Step 1: Prepare Your Digitized Design File
Commercial machines cannot read standard image files (JPG, PNG). You need a digitized embroidery file in formats like DST, PES, or EXP, which maps out stitch type, direction, and density for the machine. If you’re using customer-provided logos, run them through digitizing software (most commercial machines include basic built-in digitizing tools) to adjust for fabric type: knit fabrics need lower stitch density than woven fabrics to avoid puckering. Always save a test copy of the file to a USB drive, then load it into the machine’s control panel.
Step 2: Hoop Your Fabric Correctly
Poor hooping is the leading cause of misaligned designs and fabric puckering. Start by selecting a hoop size that’s 1–2 inches larger than your design on all sides. Place a stabilizer (tear-away for woven fabrics, cut-away for knits) between the fabric and the hoop’s backing to add structure. Tighten the hoop until the fabric is drum-tight: if you tap it, it should make a sharp popping sound. Avoid over-tightening, which can stretch delicate fabrics like silk or chiffon.
Step 3: Load Thread and Needles
Use high-quality embroidery thread (rayon or polyester) to avoid breakage during high-speed stitching. Load each needle with the correct color matching your digitized design file, following the machine’s on-screen color sequence prompt. Insert a fresh 75/11 or 80/12 embroidery needle for each new batch: dull needles cause skipped stitches and fabric snags. Fill the bobbin with bobbin thread (lighter weight than top thread) and insert it into the bobbin case, pulling the thread through the tension slot as directed in your machine’s manual.
Step 4: Align and Test Your Design
Attach the hooped fabric to the machine’s arm, then use the control panel to move the hoop to the starting position. Most machines have a crosshair laser that lines up with the center of the hoop: align this with the center point marked on your design file. Run a test stitch on a scrap piece of the same fabric you’re using for your final product. Check for issues like thread breaks, misaligned elements, or uneven tension. Adjust the design placement or tension settings as needed before moving to final products.
Step 5: Run Your Full Batch
Once your test stitch is perfect, load your first final product and press the start button. Set the stitch speed to 70–80% of the machine’s maximum for your first few runs to catch any issues early. Watch the first 10–15 stitches of each new item to confirm thread tension and placement are correct. For multi-item batches, use the machine’s repeat function to reload the same design automatically, reducing setup time between pieces. If you’re using a multi-head machine, you can stitch 4–6 items simultaneously, but always monitor all heads for thread breaks or jams.
Step 6: Finish and Inspect Your Work
After stitching, remove the item from the hoop and trim any jump threads left by the automatic trimmer. Tear away stabilizer from woven fabrics, or cut away excess stabilizer from knits, being careful not to cut the fabric. Inspect each item under bright light for skipped stitches, thread breaks, or misaligned design elements. For bulk orders, pull 5% of items for random quality checks to ensure consistency across the entire batch.
Common Mistakes to Avoid When Using Commercial Embroidery Machines
Even experienced operators make these errors from time to time. Watch out for:
- Skipping test stitches: Always test on scrap fabric first – fixing a misaligned design on 50 finished t-shirts costs far more than a 2-minute test.
- Using low-quality thread: Cheap thread breaks frequently at high speeds, causing jams and wasted time rethreading.
- Ignoring stabilizer: Skipping stabilizer leads to puckered fabric and distorted designs, especially on knit materials.
- Over-tightening hoops: Stretched fabric bounces back after removal, leaving designs looking warped.
- Running machines unattended: Thread breaks or jams can happen at any time, and unattended machines can damage fabric or the unit itself.
Advanced Tips for Faster, Higher-Quality Output
Once you’ve mastered the basics, use these pro tips to speed up your workflow:
- Pre-wind bobbins in bulk at the start of each week to avoid stopping mid-batch to refill.
- Use color-coded thread spools that match your most common design palettes to reduce setup time.
- Invest in a hoop stand to reduce arm fatigue during long loading sessions.
- Save custom design settings (tension, speed, stabilizer type) for repeat clients to maintain consistency.
Frequently Asked Questions
How long does it take to learn to use a commercial embroidery machine?
Most beginners can master basic operation (hooping, loading designs, running simple batches) in 3–5 days of practice. Advanced features like custom digitizing or multi-head operation may take 2–3 weeks to feel comfortable with.
Can I use a commercial embroidery machine for home projects?
Yes, but it’s not cost-effective for small batches. Commercial machines use more electricity, require more maintenance, and have higher upfront costs than home models. They’re best suited for high-volume orders of 50+ items.
What’s the difference between a single-head and multi-head commercial embroidery machine?
Single-head machines stitch one item at a time, making them ideal for small businesses or custom orders. Multi-head machines (2–12 heads) stitch multiple items simultaneously, cutting production time by 50–80% for bulk orders.
How often should I oil my commercial embroidery machine?
Oil moving parts every 8–10 hours of use, or daily if you run the machine for full shifts. Use only sewing machine oil approved by your machine’s manufacturer to avoid damaging internal components.
Conclusion
Learning how to use a commercial embroidery machine takes practice, but the payoff is huge: you can produce professional-grade branded apparel, home decor, and promotional products faster and more affordably than outsourcing. Start with small test batches, follow the setup checklist every time, and don’t skip maintenance to extend your machine’s lifespan. For additional support, refer to official Brother commercial embroidery machine resources for model-specific guides and troubleshooting tips. With consistent practice, you’ll be running bulk orders with confidence in no time.