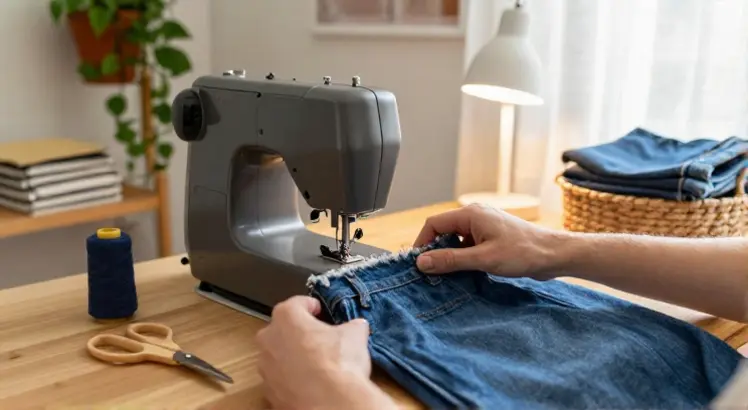
New and experienced sewists alike often pause mid-project to ask: Do you sew or Serge first? It’s a valid question that can make or break the finish of your handmade garment, and the answer depends on your fabric, project type, and desired final look. After 12 years of sewing everything from delicate silk blouses to heavy denim jeans, I’ve tested both orders across hundreds of projects, and I’m breaking down the definitive answer below.
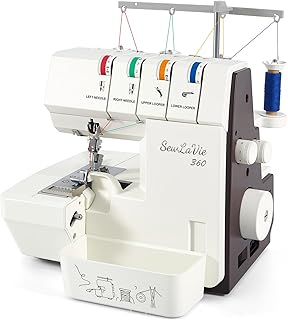
360 Upgraded Serger Overlock Sewing Machine with Wide-Open Threading, 12 Built-in Stitches, 2/3/4 Thread Capability, 1300 SPM High Speed, Differential Feed, Pro Overlocker for Tailors & Pros
Check PriceWhat’s the Difference Between Sewing and Serging?
How a Standard Sewing Machine Works
A standard sewing machine uses a single needle and bobbin to create straight, zigzag, or decorative stitches that run through the body of the fabric. These stitches are designed to hold two or more layers of fabric together structurally, forming the core seams of your garment. Sewing machines can handle everything from lightweight chiffon to heavy canvas, and most home sewists use them for 90% of their construction work.
You can use a sewing machine to finish raw edges with a zigzag stitch or mock overlock stitch, but these finishes are not as durable or neat as true serged edges. For more details on how standard machines compare to sergers, our serger vs standard sewing machine guide covers all the key differences.
How a Serger (Overlocker) Works
A serger (also called an overlocker in many regions) uses 1-5 needles and loopers to create overlock stitches that wrap around the raw edge of the fabric. Its primary job is to finish edges to prevent fraying, trim excess seam allowance, and sometimes add stretch to knit seams. Sergers cannot create long, straight structural seams for garment construction, as their stitches are designed to sit on the edge of the fabric, not through the middle of a seam allowance.
This Guide to Sergers for Beginners from leading craft experts confirms that sergers are finishing tools first, construction tools second. Most serger stitches have built-in stretch, making them ideal for knit fabrics that need to move with the wearer.
The Standard Rule: Do You Sew or Serge First?
For 95% of sewing projects, the answer to Do you sew or Serge first is simple: sew your structural seams first, then serge the raw edges to finish them. This order preserves the integrity of your garment, as the sewing machine creates the strong, permanent seams that hold the garment together, while the serger cleans up the edges to prevent fraying and give a professional finish.
Following this order also makes it easier to adjust fit as you go. If you serge edges first, you may trim off more seam allowance than intended, leaving you with less room to let out a seam if the garment is too tight. Sewing first lets you test the fit, press the seams open or to the side, then serge the edges evenly without distorting the fabric.
Example: If you’re sewing a woven cotton tote bag, you would first sew the side seams and bottom seam with your standard sewing machine, press the seams open, then run the raw edges through your serger to prevent fraying. This ensures the bag can hold heavy items without the seams popping, and the edges won’t unravel after a few washes.
When to Reverse the Order (Serge Before Sewing)

SINGER X5004-HD Metal Frame Serger
Check PriceThere are a few edge cases where serging before sewing is the better choice. These are almost always related to preventing fraying or stabilizing delicate fabrics that are hard to handle after being cut:
- Sheer, delicate fabrics: Chiffon, silk, and lace fray almost immediately after being cut. Serging the raw edge of each fabric piece before sewing the seams prevents the fabric from falling apart as you handle it. You can then sew the seam with a standard machine, and the serger stitch will sit neatly on the edge of the seam allowance.
- Curly, unstable knits: Some lightweight knits curl at the edges as soon as they’re cut, making it impossible to line up seams evenly. Serging the edge first flattens the fabric and stabilizes it, so you can sew a straight, even seam.
- Pre-finished edges for hems: If you’re sewing a knit t-shirt and want a clean, stretchy hem, you can serge the raw edge of the hem first, then fold it up and sew it in place. This prevents the hem from fraying and adds stretch so the shirt doesn’t pop stitches when worn.
For more project-specific examples, check out our guide on when to prioritize a serger over a regular sewing machine for different fabric types and skill levels.
Step-by-Step Examples for Common Projects
Sewing a Woven Cotton Dress
- Cut all fabric pieces according to your pattern.
- Sew all structural seams (shoulders, side seams, sleeves) with a standard sewing machine using a straight stitch.
- Press all seams open or to the side as indicated by the pattern.
- Serge all raw edges of the seams and the neckline/hem edges to prevent fraying.
- Attach the zipper, then finish the zipper seam edges with a serger.
- Hem the dress using a standard sewing machine.
Sewing a Knit T-Shirt
- Cut all knit fabric pieces, using a ballpoint needle on your sewing machine to prevent snags.
- Sew shoulder seams with a standard sewing machine using a stretch stitch, or a serger if you prefer.
- Sew side seams and sleeve seams with a serger, as serger stitches have built-in stretch that works better for knits.
- If you used a sewing machine for shoulders, serge the raw edges of those seams now.
- Serge the raw edge of the hem and sleeve cuffs, then fold up and sew in place with a stretch stitch.
Sewing a Sheer Chiffon Blouse
- Cut all chiffon pieces, then immediately serge the raw edge of each piece to prevent fraying.
- Sew all structural seams with a standard sewing machine using a small straight stitch (2mm length) to prevent puckering.
- Press seams lightly with a low heat iron, using a pressing cloth to avoid melting the chiffon.
- Trim any excess serger thread from the edges, being careful not to cut the fabric.
- Hem the blouse using a narrow rolled hem on your serger for a clean, delicate finish.
Common Mistakes to Avoid
Even experienced sewists make these errors when deciding do you sew or serge first:
- Serging before sewing structural seams: This trims off part of your seam allowance, leaving less room to adjust fit, and can weaken the seam if the serger stitch is not aligned properly.
- Not testing serger tension first: Sergers need different tension settings for different fabrics. Always test on a scrap piece of fabric before serging your final project edges.
- Serging curved seams before sewing: Curved seams need to be eased to fit, and serging first can stretch the fabric out of shape, leading to puckered seams.
- Skipping serging on high-fray fabrics: Even if you’re in a hurry, skipping the serger finish on denim, cotton, or silk will lead to unraveled seams after just a few washes.
Frequently Asked Questions
Can I skip serging altogether if I use a zigzag stitch on my sewing machine?
Yes, you can. A zigzag stitch on a standard sewing machine will prevent fraying, but it is not as durable or neat as a serger finish. This is a good option if you don’t own a serger, but for garments that will be washed frequently, a serger finish will last longer.
Do I need to serge seams on pre-washed fabric?
Yes. Pre-washing fabric removes sizing that prevents fraying, so even pre-washed fabric will unravel if edges are left raw. Serging is still necessary for a long-lasting finish.
Can I sew and serge at the same time with a combo machine?
Some high-end sewing machines have built-in serger functions, but most combo machines require you to switch between sewing and serging modes. You still need to sew structural seams first, then switch to serger mode to finish edges, even with a combo machine.
Should I serge hems before or after sewing them?
For most hems, serge the raw edge first, then fold the hem up and sew it in place. This prevents the hem from fraying and gives a clean edge to fold under. For thick fabrics like denim, you can sew the hem first, then serge the raw edge of the folded hem, but this creates a bulkier finish.
Conclusion
The answer to Do you sew or Serge first is almost always sew first, serge second. This preserves your seam allowance, lets you adjust fit, and creates strong, long-lasting garments. Only reverse the order for delicate, high-fray fabrics or unstable knits that need stabilization before sewing.
Always test your order on a scrap piece of fabric before starting your final project, and adjust based on the specific needs of your fabric and pattern. With a little practice, you’ll never second-guess your sew-or-serger order again.