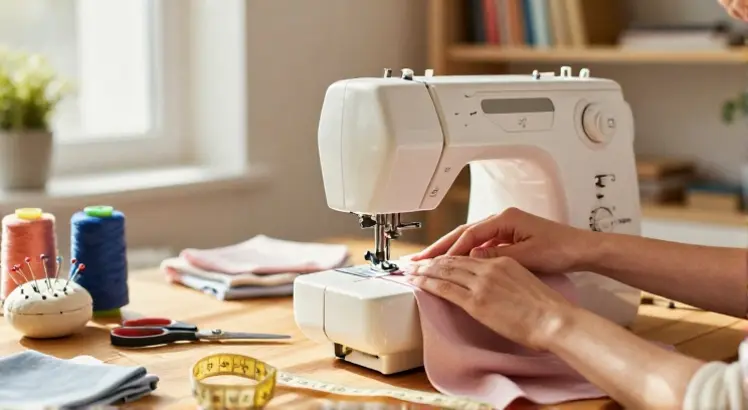
Unboxing your first sewing machine is thrilling. The gleam of the metal, the mystery of the dials, and the faint scent of fresh machine oil spark a certain creative electricity that every sewist knows. But soon, that excitement can quickly tangle into frustration, cue the birds’ nest of thread underneath your fabric. You don’t need to master couture techniques on day one; you just need the right habits to build a solid foundation.
This guide focuses on actionable sewing machine tips for beginners that go beyond the manual. We will dive into how your machine thinks, how to tame tension, and how to make straight-stitching feel like second nature. Let’s turn that confusing machine into your best creative partner.
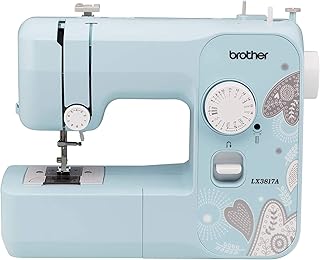
Brother RLX3817A 17-Stitch Sewing Machine (Renewed)
Check PriceSetting Up Your Sewing Station for Success
Before the needle ever pierces the fabric, your environment dictates your stitch quality. Beginners often skip the ergonomics of sewing, treating a dining room chair as an afterthought. But hunching over a low table is the fastest way to lose control of your fabric feed. Your machine should sit on a sturdy table where your elbows naturally rest at a 90-degree angle when your fingers touch the needle area. If you find yourself chasing the machine across the table when it vibrates, a simple non-slip mat underneath stops the drift instantly.
Lighting That Prevents Mistakes
Shadows are the enemy of a straight seam. Overhead room lighting casts shadows exactly where your needle enters the fabric. A dedicated machine light or a strategically placed magnifying lamp changes everything. You want light directed from the left side (if you are right-handed) so the needle bar doesn’t create a dark spot. Good lighting doesn’t just prevent eyestrain; it highlights stray threads and lets you clearly see exactly where the needle enters, drastically reducing crooked first seams.
The No-Scissors Zone
Keep everything within a fingertip’s reach. A common beginner mistake is moving fabric out of the machine’s path just to grab snippers. When you remove your hands, you lose fabric alignment. Place a small thread catcher on the left of your machine and keep a sharp pair of snips permanently on the right. This minimizes upper body twisting, helping you maintain consistent seam allowances without developing back pain during long sessions.
Threading and Needle Know-How
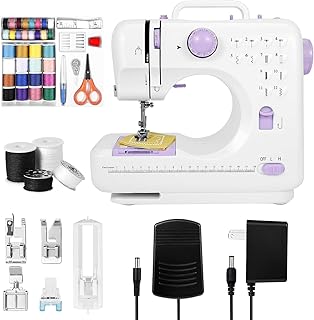
Portable Sewing Machine for Beginners
Check PriceMost problems beginners face, loopy stitches, broken thread, grinding noises, stem from improper threading or the wrong needle. The relationship between the needle, thread, and fabric is a delicate ecosystem you must balance. The sewing machine is a precise instrument, and respecting that precision upfront prevents 90% of troubleshooting later. Forget brand loyalty here; your machine dictates what it needs.
Always Thread with the Presser Foot Up
This is the golden rule of machine mechanics. When the presser foot is down, the tension discs are engaged and closed. Pushing thread through closed discs means the thread can’t truly seat itself inside the tension unit. You’ll think you’ve threaded it correctly, but it’s floating outside the grip of the metal discs. Always raise the presser foot (and the needle to its highest position using the handwheel) to open the tension pathway. You should feel a subtle click or resistance as the thread slides home.
Needle Size vs. Fabric Weight
- Sheer/Delicate (Chiffon, Silk): Size 60/8 or 70/10. A sharp, fine point prevents puckering.
- Medium (Quilting Cotton, Linen): Size 80/12. This is your universal workhorse; stockpile these.
- Heavy (Denim, Canvas): Size 90/14 or 100/16. A wedge point needed to punch through dense weaves.
- Stretchy (Knits, Spandex): Ballpoint or Jersey needle. Rounded tip separates fibers instead of piercing them, avoiding runs.
Changing your needle every 8 hours of sewing or after every major project isn’t optional. A dull needle makes a popping sound in the fabric and can damage the machine’s timing.
Stitching Straight: Mastering Speed and Control
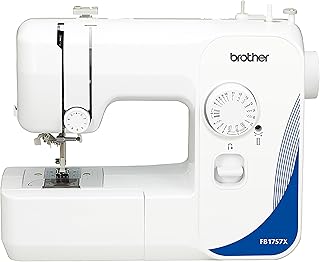
Brother FB1757X Mechanical Sewing Machine
Check PriceRaw speed is a party trick; controlled speed is a skill. The foot pedal isn’t an on/off switch, it’s an accelerator. Learning to modulate speed prevents the fabric from being yanked off course. However, straight stitching isn’t just about the motor; it’s a visual strategy.
Stop Watching the Needle
It sounds counterintuitive, but staring directly at the moving needle causes the human eye to swim, leading to wavy seam allowances. Pick a spot on the throat plate, guided by a magnetic seam guide or a stack of Post-it notes, that marks your desired seam allowance. Line up the raw edge of the fabric with that guide and keep your eyes locked there. Forget the needle tip; by the time the thread enters the hole, the fabric’s position is already history. Guide what’s ahead, not what’s already stitched.
The Hand-Wheel Start
For absolute precision on a tricky corner or over a puffy seam intersection, abandon the foot pedal. Manually turn the handwheel toward you (never away) for the first two or three stitches. This walking of the needle gives you micro-control to sink the needle precisely into the fabric fibers. Once the needle is down, lift the presser foot, pivot the fabric, lower the foot, and continue. This pivot method is the secret to pro-level topstitching.
Tension Troubleshooting: More Than Just the Dial
SINGER M1500 – Lightweight & Portable Sewing Machine
Beginner‑friendly mechanical sewing machine with 57 stitch applications, preset settings and LED light. Ideal for everyday mending and simple crafts.
Check PriceScreaming in frustration at loopy bobbin thread is practically a rite of passage. Beginners inevitably want to crank the tension dial, but true tension is a balanced interplay of three mechanical forces, not one. Before you touch that tension dial, often, the culprit is hiding elsewhere.
The Bobbin Check First
Your bobbin case has its own independent tension, a tiny screw on the metal case that you should rarely touch. Instead, ensure the bobbin unspools in the correct direction (usually counter-clockwise like a P when hanging). The drop test is vital: hold the bobbin thread tail, let the case dangle. A gentle shake should have the case dropping only an inch or two. If it slides down like a spider, it’s too loose. If you can lift the entire machine by the thread, it’s too tight.
Dust Bunnies of Doom
If your top thread is tangling below the needle plate, look for lint. Not just a little fuzz, but compacted layers hiding under the bobbin case. Use a tiny brush (never compressed air, which blows debris deeper inside) to sweep out the feed dogs. Stray threads lodged between the tension discs also cause chaos. Use a scrap of fabric like muslin, floss it gently between the tension discs with the foot up to clear invisible snags. For deeper maintenance on different models, knowing specific cleaning routines is just as critical as learning to thread one correctly.
Fabric Handling and Pressing
Your iron is just as important as your needle. A stitched seam is a sculpted seam, but heat is what sets the memory of the thread into the fabric. Sewing without pressing looks homely and distorted. Pressing is not ironing, it involves lifting and lowering the iron, not sliding it across the grain, which can distort bias edges.
Finger Pressing for Immediate Feedback
While the chain-piecing is underway, use your thumbnail to finger press the seam open right as it exits the feed dogs. This pre-sets the fold and helps the final iron work faster. It’s a small tactile habit that improves accuracy, especially on patchwork projects. It forces you to physically engage with the grain line of the fabric, alerting you if you’ve accidentally twisted a fold under the stitching line.
The Walking Foot Advantage
A standard presser foot feeds fabric from the bottom while the top layer drags behind. When quilting or sewing slippery synthetics, you’ll end up with a puckered seam where the bottom ply is shorter than the top. A walking foot has its own set of feed dogs that move the top fabric in sync with the bottom. If you are working on home décor or clothing with heavy interfacing, switching to a walking foot instantly eliminates the shifting that makes beginners think they can’t sew straight.
The Unspoken Rules of Machine Care
Your machine is a mechanical clock; it needs lubrication and clean power. A lack of basic maintenance is the primary reason cheap machines feel cheap after a month. They aren’t broken, they’re just dry and dusty.
Oiling Rituals
Modern electronics have fewer oil points, but mechanical machines often run bone-dry without you realizing. Use only clear sewing machine oil (not WD-40, not cooking oil). Put a single drop at the hook race, and run a line of zigzag stitches on scrap paper to absorb excess oil. Always oil at the end of a sewing day, letting it settle overnight. For a full walkthrough on specific model adjustments, understanding sewing machine tension and mechanical feedback helps you hear when a machine is running dry before you see visible wear.
Sewing Over Pins: Just Don’t
We all covet the smooth efficiency of seasoned sewists on social media who zip right over pins. They are playing a dangerous game of Russian roulette. Striking a pin can burr the hook tip, throw off the needle bar timing, or shatter a needle sending metal shards toward your eyes. Pull pins just before they hit the presser foot. It takes half a second, and it saves you a $100 repair bill for a timing adjustment.
Frequently Asked Questions (FAQ)
Why does my thread keep bunching up underneath the fabric?
Thread bunching, often called bird-nesting, is almost always a threading error with the top thread. Rethread the machine completely with the presser foot raised. This ensures the thread flosses properly between the tension discs. If it persists, check if the bobbin is backward or using the wrong bobbin type for your machine model.
Which sewing machine is truly easiest for a complete beginner?
The easiest machine is one with a simple mechanical layout, not necessarily the cheapest. Look for a top-loading drop-in bobbin (this stops jamming in its tracks) and an automatic needle threader. A reliable mechanical sewing machine forces you to learn manual speed control, which is better for building fundamental skills than a computerized screen that does the thinking for you.
How often should I change my sewing machine needle?
A good rule of thumb is to change the needle after every project or after about eight hours of active stitching. If you hear a popping sound as the needle pierces the fabric, it’s dull. Using a dull needle bends the fabric fibers, frays your thread, and causes skipped stitches.
Do I really need a walking foot?
If you sew knits, faux leather, or quilted layers, yes. A walking foot actively feeds the top layer of fabric. Without it, the feed dogs drag the bottom layer faster, causing mismatched seams. It’s not a gimmick, it’s the only way to keep stripes and plaids matched when sewing at length.
Conclusion: Your Needle, Your Rhythm
Stitching mastery isn’t about never breaking a needle; it’s about hearing the difference between a thirsty machine and a mis-threaded one. It’s in the muscle memory of your heel hovering on the pedal, slowing to sink the needle exactly on a pivot point. By committing to proper threading rituals, respecting needle sizes, and understanding tension, you transform your machine from a source of anxiety into a tool of pure expression.
Don’t rush to sew a dress tomorrow, spend today sewing straight lines on notebook paper, changing the needle three times, and flossing those tension discs. When the rhythm of the motor becomes a background hum rather than a jarring roar, you’ll know you’ve moved past the beginner stage. Pick a scrap, draw a spiral with a pencil, and stitch it. No stopping. Fall in love with the process, and the finished projects will inevitably follow.

Hi, I’m Safura. What are you sewing today? If you have any questions or need help with anything related to sewing, please feel free to ask. I’m always here to assist you with sewing-related issues.