
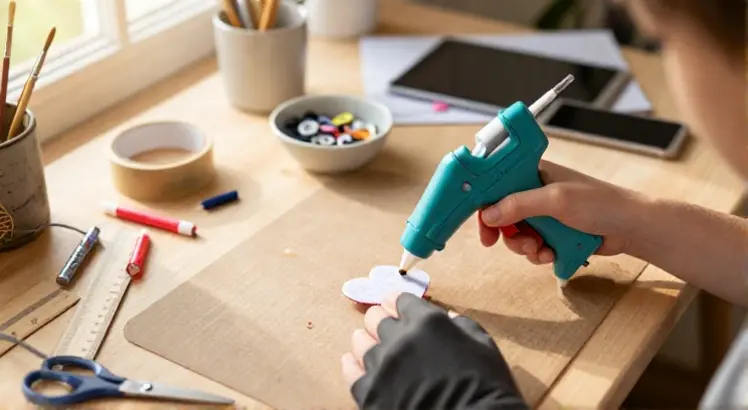
Hot glue guns are among the most versatile tools in any crafting arsenal. They bond materials in seconds, work on everything from fabric to wood, and require almost no skill to start. If you have never picked one up before, the process might seem intimidating, but once you understand the basics, you will wonder how you ever lived without one. This guide will walk you through every step, from selecting the right tool to mastering application techniques that produce clean, durable results.
Understanding Your Hot Glue Gun: Types and Features
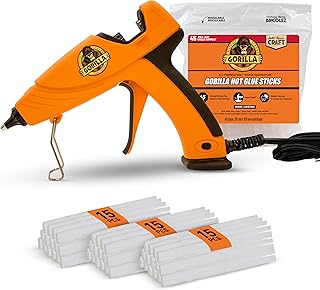
Gorilla Hot Glue Gun Kit, Dual Temp, Full Size
Check PriceBefore you squeeze your first drop of adhesive, it helps to know what kind of tool you are holding. Hot glue guns come in three main categories: mini, full-size, and industrial. Mini guns are lightweight and perfect for delicate crafts, paper projects, and small embellishments. Full-size models offer faster melting and longer work sessions, making them ideal for larger DIY jobs, woodworking, or fabric-based projects. Industrial guns pump out extreme heat for heavy-duty materials but are overkill for most beginners.
Temperature settings also matter. Low-temperature guns typically heat to around 250°F, which is safer for thin or heat-sensitive materials like lace, ribbon, and some synthetics. High-temperature models reach about 380°F and create stronger bonds on wood, metal, and ceramics. Many full-size guns now offer dual temperature settings so you can switch based on the material at hand. Understanding these differences will keep your projects safe and successful.
Safety First: Preparing Your Workspace
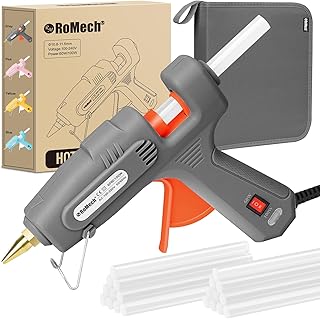
ROMECH Full Size Hot Glue Gun with 60/100W Dual Power
Check PriceHot glue is exactly that: hot. Even low-temperature versions can cause burns if you are careless. Set up on a stable, flat surface away from children and pets. Cover your work area with a silicone mat, parchment paper, or a scrap piece of cardboard. These surfaces resist glue adhesion and make cleanup painless. Never aim the nozzle toward your body, and keep a bowl of cold water nearby in case of accidental skin contact. If a burn occurs, cool the area immediately under running water for several minutes. Do not peel the glue off your skin while it is hot. Wait for it to cool and then gently remove it.
Good ventilation is also key, especially if you are working for extended periods. While most hobbyist glue sticks are non-toxic, overheating can produce mild fumes. A cracked window or a small fan will keep the air fresh. Finally, always unplug the gun when you are finished and let it cool completely before storing. Place it on its built-in stand and never lay it on its side. This simple habit prevents burns and protects your work surface.
For a thorough overview of safety practices, refer to guidelines from trusted sources like the U.S. Consumer Product Safety Commission. Following their recommendations builds a strong foundation for worry-free crafting.
Choosing the Right Glue Sticks for Your Project
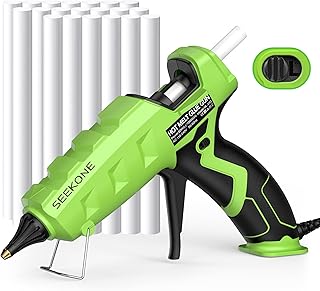
SEEKONE Full Size Hot Glue Gun 60/100W Dual Power
Check PriceNot all glue sticks are created equal. They vary in diameter, chemistry, and color. The two standard diameters are 0.27 inches for mini guns and 0.44 inches for full-size guns. Always check which size your tool requires. Using the wrong diameter prevents proper feeding and can damage the gun.
Clear sticks are the go-to for most general applications. Colored sticks, like white or black, help blend into specific materials. Specialty formulations include slow-set sticks for repositioning, high-strength sticks for outdoor use, and even glitter or metallic options for decorative work. For fabric projects, seek out washable fabric glue sticks that remain flexible after drying and can survive a gentle laundry cycle. If you are repairing items that will live outside, look for weather-resistant formulas. A well-chosen stick, such as those highlighted in our guide to fabric glue sticks, makes a noticeable difference in durability.
Step by Step: How to Load and Heat the Glue Gun
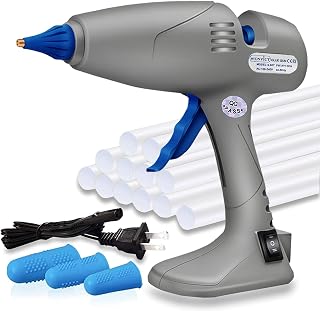
MONVICT Full Size Hot Glue Gun, 120 & 80W Dual Temp
Check PriceBegin with your gun unplugged. Insert a glue stick into the circular opening at the back of the tool. Push it in as far as it will go. Do not force it; a comfortable fit is all you need. Plug the gun in and place it on its stand. Most models require three to five minutes to reach operating temperature. You will know it is ready when a small amount of melted adhesive begins to seep from the nozzle, or when the trigger becomes firm and easy to squeeze.
When you squeeze the trigger, the mechanism pushes the stick forward. Melted glue flows out of the nozzle. Work quickly because hot glue begins to set within seconds. If the flow slows, pause and allow the gun to reheat for a moment. Avoid pushing the stick manually with your thumb; let the trigger and the tool’s internal feed system do the work. After each session, leave the remaining stick in place. Removing it when hot can cause a messy backup.
Mastering Basic Application Techniques
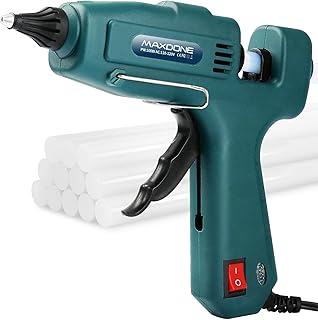
MAXDONE Fireproof 100W Hot Glue Gun Kit
Check PriceApplying the adhesive correctly is the difference between a project that lasts and one that falls apart. Hold the gun at a 45-degree angle to the surface. For porous materials like wood or cardboard, apply a wavy line of glue rather than a single dot. This increases the bonded surface area. For non-porous items like glass or metal, a thin even coat works best.
Press the two surfaces together immediately after applying the glue. Do not slide them around. Hold steady for about 30 seconds while the adhesive cools. If you notice a small gap or an oozing overflow, do not touch it while hot. You can trim away cooled excess glue with a craft knife later. For delicate joins, use a toothpick or a silicone brush to spread the glue precisely before it sets. These small tools give you control and protect your fingers.
Common Beginner Mistakes and How to Avoid Them
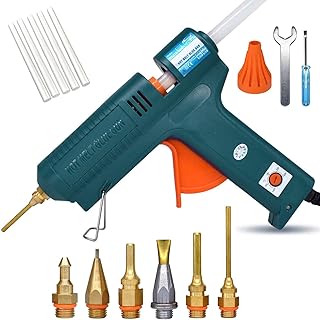
BOSWELL 150W Full Size Hot Glue Gun with 6 Copper Nozzles
Check PriceOne of the biggest errors novices make is using too much glue. A common thought is that more glue equals a stronger bond. In reality, excessive adhesive creates a mess, adds unnecessary bulk, and takes longer to set. A thin, consistent application is almost always better. Another mistake is applying glue to a dirty or dusty surface. Even the strongest adhesive cannot hold if the surface is not clean. Wipe your materials with a dry cloth or rubbing alcohol beforehand.
Many beginners also work too slowly. The open time for hot glue is remarkably short, often less than 30 seconds before a skin forms on the surface. Have all your pieces arranged and ready before you squeeze the trigger. If you are joining multiple small items, work in stages rather than trying to glue everything at once. Finally, avoid the temptation to yank the stick out of a warm gun. If you need to change stick types, feed a small amount of the new stick through while the gun is hot to purge the old adhesive.
Creative Projects to Try After You Learn the Basics
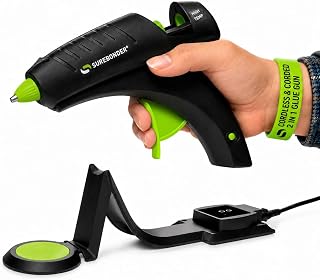
Surebonder Cordless Hot Glue Gun CL-800F
Check PriceOnce you are comfortable with loading, heating, and applying glue, the real fun begins. Start with simple projects like creating custom magnets, embellishing picture frames, or repairing a wobbly chair leg. These quick wins build confidence without requiring advanced technique. Move on to personalized accessories: attach fabric flowers to a plain headband, secure ribbon trims on a lampshade, or assemble a DIY phone stand from scrap wood.
Hot glue is also a secret weapon for sewing and textile projects. Use it to baste hems temporarily before stitching, secure appliqués, or stop fraying edges on canvas and burlap. For paper crafters, a mini glue gun creates dimension on greeting cards and scrapbook layouts. The only limit is your imagination. Keep a notebook of ideas and experiment with different materials to discover new combinations that bond well.
FAQ: Your Top Hot Glue Gun Questions Answered
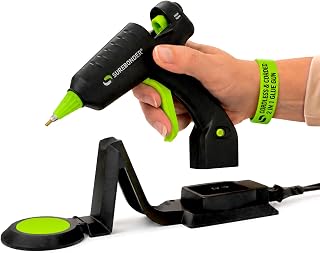
Surebonder Cordless/Corded Mini Hot Glue Gun CL-195F
Check PriceHow long does it take for hot glue to fully dry?
Hot glue does not dry in the traditional sense; it hardens as it cools. A thin layer will set enough for handling in about 20 to 30 seconds. Full strength typically develops within a few minutes. Thicker applications need more time. Avoid stressing the bond for at least five minutes to ensure a reliable hold.
Can I use hot glue on fabric permanently?
Yes, especially if you use a high-quality fabric-specific glue stick. The bond remains flexible after cooling and withstands normal wear. However, washing in hot water or machine drying on high heat can weaken the bond over time. Hand washing or using a gentle cycle is recommended for glued fabric items.
Why is my glue gun dripping even when I am not squeezing the trigger?
Minor dripping is normal as the gun reaches its maximum temperature. If the dripping is constant, the gun may be too hot for the stick you are using, or the stick may not be feeding properly. Try switching to a high-temperature stick that melts at a higher point, or check that the stick diameter matches your gun.
How do I clean dried glue off my work surface?
Wait for the glue to cool completely, then peel it away if the surface is non-porous. Rubbing alcohol can help dissolve stubborn residue on glass or metal. For fabric, place the item in the freezer until the glue becomes brittle, then gently scrape it off. Using a silicone mat from the start eliminates most cleaning hassles.
What should I do if glue gets on my skin?
Stop immediately and submerge the area in cold water. Do not try to wipe the glue while it is hot, as this spreads the burn and pushes adhesive deeper. Let the glue harden; it will create a barrier. Once cool, you can peel or soak it off gently. If a serious burn occurs, seek medical attention.
With these fundamentals, you are ready to turn ideas into tangible creations. Approach each project with patience, respect the heat, and soon the hot glue gun will become your most reached-for tool. The learning curve is short, but the creative payoff lasts a lifetime.
Conclusion
Learning how to use hot glue gun for beginners really comes down to managing heat, pressure, and timing. Give yourself a practice session with scrap cardboard before you tackle anything precious. Set up a proper work surface, warm up the tool fully, test the flow, apply a thin bead, and hold until the bond sets. Most mistakes happen when we rush the cooling time or ignore the temperature rating of the glue stick.
With about ten minutes of hands-on practice, you will find a rhythm that makes hot glue feel as natural as using a tape dispenser. Pick a simple weekend project like a photo frame border or a fabric rosette and apply these steps. You will be surprised how quickly you forget the fear of the hot tip and start focusing on the creative possibilities.
