

If you have ever pushed a needle through thick fabric and felt the blunt end dig painfully into your finger, you already know why learning how to use a thimble matters. A thimble is not just a quaint sewing basket decoration; it is a precision tool that protects your finger and gives you the control to sew faster, straighter, and with far less fatigue. In this guide, I will walk you through everything a beginner or intermediate sewist needs to know about choosing, fitting, and mastering a thimble so it becomes a natural extension of your hand.
Understanding the Purpose of a Thimble
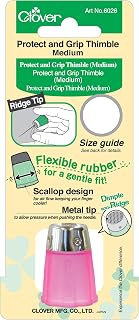
Clover Protect & Grip Thimble Medium
Check PriceAt its core, a thimble is a small shield worn on a finger or thumb to help push a needle through fabric. When you start hand sewing, your instinct may be to push the needle with the soft pad of your finger. That works for a few stitches on lightweight cotton, but as soon as you move to densely woven linen, multiple layers, or quilting onerous seams, the pressure transfers directly to your fingertip nerve endings. A thimble distributes that force across a rigid surface, preventing soreness, calluses, and even puncture wounds.
Beyond pain avoidance, using a thimble unlocks a more efficient sewing rhythm. Because you are not flinching from discomfort, you can maintain a steady stitch length and keep your stitches even. Quilters, tailors, and embroiderers often rely on thimbles to gain the extra pushing power needed for backstitching or working through stabilizer layers without distorting the fabric. Once you grasp how a thimble changes the mechanics of hand sewing, you will wonder how you ever managed without one.
Choosing the Right Thimble for Your Sewing Style
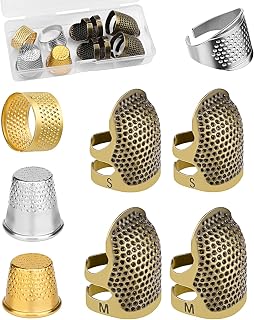
ZMAAGG Thimbles for Hand Sewing, 8 PCS Sewing Thimble
Check PriceNo single thimble works for every project. The material, shape, and texture all influence comfort and performance. Before you can truly understand how to use a thimble, you need the right tool for your hand. Here are the main categories to consider.
Traditional Metal Thimbles
Brass, silver, and nickel-plated metal thimbles are the classic choice. Their dimpled surface grips the eye of the needle so it does not slip sideways mid-push. Metal thimbles are incredibly durable and provide a firm, consistent pushing platform. They work beautifully for quilting, tailoring, and any task requiring precise needle placement. The downside is that a poorly fitted metal thimble can feel cold, heavy, or pinch the skin. That is why fit is paramount, as I will explain shortly. If you want to explore the top-rated options across all materials, you might look through a list of the best thimbles for hand sewing to compare styles.
Leather Thimbles
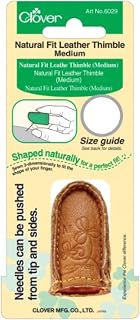
Clover Medium Leather Thimble Natural
Check PriceLeather thimbles mold to the shape of your finger over time, creating a custom, flexible fit. They are breathable and often have a small metal insert or reinforced tip where the needle presses. Leather works especially well for people who find rigid thimbles constricting. Because they flex, they absorb some of the impact, which many sewists prefer during long embroidery sessions. The trade-off is that leather wears out faster and may not offer the same rock-solid stability as metal when you need to drive a needle through very tough seams.
Silicone and Rubber Thimbles
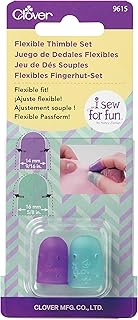
Clover I Sew for Fun Flexible Set Thimble, Purple and Blue
Check PriceModern silicone thimbles have become popular for their grippy texture and ability to stretch over different finger sizes. They are lightweight, affordable, and almost invisible to wear. Many sewists wonder do silicone thimbles work for serious sewing, and the answer is yes, provided you choose a model with a reinforced tip. The flexible nature of silicone means you keep full tactile sensitivity, which is a huge advantage when you are working with delicate fabrics like silk or chiffon. However, very sharp needles can sometimes puncture through the softer versions, so look for ones with a dense, thick cap at the end.
How to Wear a Thimble Correctly
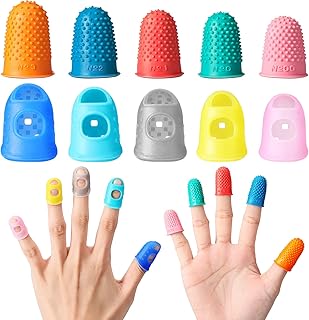
Zonon 20 Pcs Rubber Thimble Finger Protector, Blue
Check PricePlacement and fit determine whether your thimble becomes a helpful partner or an annoying distraction. Most beginners make the mistake of wearing the thimble on the wrong finger or sliding it too far down. Here is how to get it right every time.
Which Finger Should You Wear a Thimble On?
The standard and most versatile placement is on the middle finger of your dominant hand. When you hold a needle between your thumb and index finger, the middle finger naturally curls behind the needle to guide and push. Wearing the thimble on that middle finger aligns the rigid cup with the exact spot where the needle eye makes contact. Some sewists who use a different hand position, such as pushing with the side of the thumb during sashiko or leatherwork, may prefer a thimble on the thumb. However, for general garment sewing, mending, and quilting, start with your dominant middle finger.
How to Find the Perfect Fit
An ill-fitting thimble will fall off, spin around, or squeeze your finger until it turns purple. To measure, wrap a soft tape measure or a strip of paper around the base of the finger you will use, right below the first knuckle. Thimble sizes typically range from small to extra large, often numbered from 6 to 12. The thimble should slide on smoothly and feel snug enough that you can shake your hand gently without it flying off. It should not leave a deep indent in your skin after a few minutes of wear. The rim should sit just above the first knuckle, not crammed into the joint. A properly fitted thimble lets you bend your finger freely while keeping the protective cap exactly where the needle will land.
- Measure the circumference of your finger at the base of the nail bed.
- Use a thimble sizing chart, as metal and silicone sizes can differ between brands.
- Try it with the actual needle and fabric you plan to sew, not just on a bare finger.
- If you are between sizes, size down for metal and up for leather or silicone.
Step-by-Step Technique: How to Use a Thimble
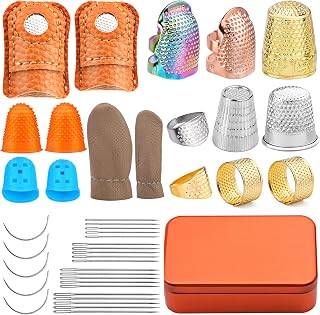
Mnuizu Sewing Thimble Set Thimble Ring, Adjustable Metal Finger Protectors
Check PriceEven with a perfect thimble, the pushing technique is what transforms your stitching. Follow these steps to build a smooth, safe motion.
Holding the Needle
Grip the needle between your thumb and index finger as you normally would. The thimble-wearing middle finger should rest gently behind the needle, ready to advance. The side of the thimble, not the very tip, will do the pushing. Position the needle so its eye sits against the dimpled or textured area on the side of the thimble. This gives you a stable, non-slip contact point.
The Pushing Motion
Instead of jabbing straight down with the tip of your finger, which can cause the thimble to slip, use a rolling or arcing motion. Brace the needle against the thimble and press forward and slightly downward, letting the dimples catch the needle eye. As the needle enters the fabric, the thimble moves along with it, keeping contact until the needle tip emerges on the other side. You do not force the needle through in one harsh movement; you guide it with steady, even pressure. Once the tip is visible, you can pull the needle the rest of the way with your thumb and index finger.
For longer needles or tougher fabrics, you can briefly anchor the needle by resting the thimble-covered finger on top of the fabric as you push. This gives you a double layer of stability and prevents the needle from bending. Practice this on a stack of two or three fabric layers to feel how much easier it becomes compared to using your bare fingertip.
Common Mistakes and How to Avoid Them
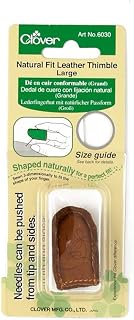
Clover Natural Fit Leather Thimble Large
Check PriceEven experienced sewists can slip into habits that make thimble use frustrating. Recognizing these early will save you sore fingers and tangled thread.
- Wearing the thimble on the tip of the finger. This limits movement and makes you push with the top of the thimble, which is unstable. Always position the rim just above your first knuckle.
- Using a thimble that is too large. A loose thimble spins when you push, causing the needle to slip off sideways. The dimples cannot grip what they cannot stay aligned with.
- Pushing with the thumb in a thumb thimble incorrectly. If you use a thumb thimble, the pushing surface is the outer side of the thumb, not the pad. Bending at the knuckle allows you to drive the needle with a smooth sweep.
- Neglecting to change thimbles for different tasks. The thimble you love for quilting may be too bulky for delicate embroidery. Have a couple of go-to thimbles and switch as needed.
- Ignoring hand fatigue. A thimble reduces fatigue but does not eliminate it. Take breaks, stretch your fingers, and listen to your body.
Pro Tips to Master Thimble Use Quickly
Once you have the basics down, these little adjustments can make a seasoned sewist out of a hesitant beginner.
- Warm up the thimble. Metal thimbles can feel foreign against your skin. Hold it in your palm for a minute before you start sewing so it adjusts to your body temperature and loses its cold edge.
- Use beeswax on the inside rim. A tiny dab of natural beeswax inside a metal thimble adds grip without glue, preventing it from sliding off while remaining comfortable.
- Practice with a simple running stitch sampler. Sew rows of stitches on a scrap of medium-weight cotton. Focus on keeping the needle angle consistent and letting the thimble do the work. You will develop muscle memory much faster than you would on a complex project.
- Experiment with needle types. Sharps, betweens, and milliners needles all feel slightly different against a thimble. Find a combination where the needle eye naturally falls into the dimples.
- Watch experienced sewists. Notice how quilters on YouTube barely glance at their thimbles because the motion is so ingrained. Mimicking that rhythmic push will accelerate your own confidence.
Frequently Asked Questions
Can I use a thimble on my thumb?
Absolutely. Thimble designers make specific thumb thimbles with a curved cap that follows the natural shape of the thumb. They are common in traditional Japanese sashiko stitching and in leatherwork where you push the needle with the side of your thumb. If you find that your thumb does most of the pushing in your natural sewing posture, a thumb thimble can be a game-changer.
How do I stop my thimble from slipping off?
First, confirm you have the right size. If the thimble still spins, place a small piece of double-sided fashion tape or a thin silicone grip pad inside the rim. Some sewists put a few stitches of embroidery floss around the inner edge to create friction. Moisture from your skin can also cause slipping, so keep the inside of the thimble dry.
Do I need a thimble for hand embroidery?
Many embroiderers use a thimble, especially when working with dense stitches or multiple strands of floss on tightly woven ground fabric. The thimble helps push the needle through without straining your finger. A slim leather or silicone thimble is often preferred because it offers protection without interfering with delicate movements.
Can I sew without a thimble?
You can sew without one, but your fingers will pay the price over time. The repetitive pressure can lead to a painful callus or even a needle puncture. Once you learn how to use a thimble properly, you will feel the immediate difference in stamina and control, and you will probably never go back to sewing with bare fingertips.
Building Confidence and Stitching Smoother
Mastering how to use a thimble is one of those quiet breakthroughs that changes your entire hand sewing experience. It is a small shift in setup that amplifies speed, precision, and comfort. Start with a well-fitted thimble in the material that feels most natural to you, practice the rolling pushing motion on simple fabric, and stay patient. Within a few sessions, the thimble will feel like an extension of your finger, not a barrier.
To continue expanding your hand sewing knowledge, you might explore a detailed guide that complements these techniques, or revisit the best thimbles for hand sewing to find the model that fits your next project. The right tool and a bit of practice will take your stitches from hesitant to effortless.
