If you’ve ever wondered how to sew leather with a sewing machine, you’re not alone. Leather is a durable, timeless material for projects ranging from slim wallets to full-length jackets, but it behaves entirely differently than woven cotton or linen. Many sewists avoid working with leather because they assume it requires expensive industrial equipment, but with the right setup, most standard home sewing machines can handle light to medium-weight leather with ease. As a sewist who has crafted leather wallets, tote bags, and motorcycle jackets on home machines for over a decade, I can confirm that most standard machines handle light leather without issue. If you’re unsure whether leather is harder to work with than other fabrics, our guide to sewing leather for the first time breaks down common challenges and how to overcome them.
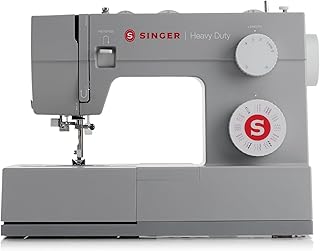
SINGER® Heavy Duty 4452 (Grey) High Speed Sewing Machine + Accessories | 32 Built-In Stitches Deliver 110 Stitch Applications | 50% More Power for Thick Fabrics, 1100 Stitches/Min, 1-Step Buttonhole
Check PriceEssential Tools for Sewing Leather With a Sewing Machine
Leather-Specific Sewing Machine Needles
Regular universal needles will not work for leather. Leather is a non-woven material, so instead of slipping between fibers, a universal needle will punch a large, permanent hole that can tear the leather over time. You need leather-specific needles, often labeled as “leather” or “chisel point” needles. These have a sharp, triangular point designed to pierce through leather cleanly without snagging.
Needle size matters too. For light leather (like garment leather or lambskin), use a size 90/14 needle. For medium-weight leather (like cowhide for bags or shoes), go up to a 100/16 or 110/18. Never use a needle smaller than 90/14 for leather, even if your machine is lightweight—it will bend or break, potentially damaging your machine’s bobbin case or throat plate.
Presser Feet, Thread, and Supporting Supplies
A standard presser foot will stick to leather’s smooth surface, causing uneven feeding and skipped stitches. The two best options are a Teflon (non-stick) foot, which glides over leather without dragging, or a walking foot, which feeds the top and bottom layers of leather at the same rate to prevent shifting. If you plan to sew leather regularly, a walking foot is a worthwhile investment, you can find options compatible with most home machines for under $30.
Thread choice is equally important. All-purpose polyester thread will break under the stress of leather seams. Use heavy-duty nylon or polyester thread designed for leather, or upholstery thread for thicker projects. Waxed thread is also a good option for hand-sewn details, but for machine sewing, smooth, heavy-duty thread reduces friction and skipped stitches.
Other must-haves include sharp fabric scissors (leather dulls regular scissors quickly, so keep a pair dedicated to leather), a leather punch for adding hardware, and clips instead of pins (more on that later). If your home machine is struggling with medium-weight leather, consider upgrading to one of our heavy-duty sewing machines designed for leather that can handle thicker hides without jamming.
Choosing the Right Leather Weight for Your Machine
Not all leather is created equal. Leather weight is measured in ounces per square foot: 1-2 oz leather is thin, garment-weight leather; 4-5 oz is medium-weight, good for bags and wallets; 6 oz and above is heavy-weight, only suitable for industrial machines or very heavy-duty home machines.
Most standard home sewing machines can handle up to 4-5 oz leather. If you’re using a lightweight beginner machine, stick to 2-3 oz leather to avoid burning out the motor. Always check your machine’s manual for maximum recommended fabric thickness before starting a project.
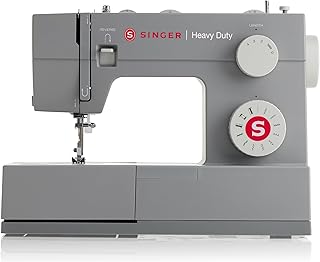
SINGER® Heavy Duty 4411 (Grey) High Speed Sewing Machine + Accessories | 11 Built-In Stitches Deliver 69 Stitch Applications | 50% More Power, 1100 Stitches/Min | Metal Frame, 4-Step Buttonhole
Check PriceStep-by-Step Guide to Sewing Leather With a Sewing Machine
Step 1: Prepare Your Machine and Materials
Start by cleaning your machine’s throat plate and bobbin case to remove any lint or debris—leather dust can build up quickly and cause jams. Install a leather needle (correct size for your leather weight), a Teflon or walking foot, and wind your bobbin with heavy-duty thread that matches your top thread.
Cut your leather pieces using sharp scissors or a rotary cutter with a fresh blade. Leather does not fray, so you do not need to finish seams, but make sure all edges are straight and even. If you’re using a pattern, trace it onto the leather’s wrong side (the rough, suede side) with a water-soluble leather marker—avoid ballpoint pens, which can bleed through.
Step 2: Adjust Tension and Stitch Settings
Leather requires tighter tension than woven fabrics, but not so tight that the thread breaks. Start with a tension setting of 4-5 (on a scale of 0-9) for medium-weight leather, and test on a scrap piece first. If the bobbin thread is pulling to the top, tighten the tension; if the top thread is pulling to the bottom, loosen it.
Stitch length is also critical. Leather does not have fibers that hold stitches in place, so short stitches will perforate the leather and weaken the seam. Use a longer stitch length: 3.0-3.5 mm for light leather, 4.0-4.5 mm for medium-weight leather. Never use a zigzag stitch on leather unless you’re topstitching for decoration—straight stitches are stronger and less likely to tear the leather.
For more detailed guidance on adjusting tension for tough fabrics, you can refer to Singer’s official leather sewing guidelines, which include tension charts for different leather weights.
Step 3: Mark and Secure Leather Pieces
Never use straight pins to secure leather pieces. Pin holes are permanent in leather—even if you remove the pins, the holes will remain, ruining the finished look. Instead, use sewing clips (plastic clips with flat edges) to hold pieces together. Place clips every 2-3 inches along the seam line, making sure they don’t get in the way of the presser foot.
For topstitching or decorative seams, mark lines with a water-soluble leather marker or tailor’s chalk. Avoid using erasable pens that use heat to disappear—leather can scorch easily, so heat-activated markers are risky. A ruler with a non-slip backing will help you keep lines straight.
Step 4: Sew Slow and Steady
Leather requires a slower sewing speed than cotton or linen. If your machine has a speed control slider, set it to low. If not, press the foot pedal gently to avoid jerky movements that can cause skipped stitches or uneven seams.
Start sewing 1/2 inch from the edge of the leather, backstitching for 3-4 stitches to lock the seam in place. Sew at a consistent pace, guiding the leather gently—do not pull or push it, let the machine’s feed dogs do the work. If you need to stop, lower the needle into the leather to hold the layers in place, then lift the presser foot to adjust the fabric.
If you hit a thick seam (like where two layers of leather overlap), use a seam jumper (a small plastic wedge) to lift the presser foot over the thick section, or hand-walk the machine by turning the handwheel toward you one stitch at a time. Never force the machine through thick leather—this can bend the needle or damage the motor.
Step 5: Finish and Press Your Leather Project
Once you’ve sewn all seams, trim any loose threads with sharp embroidery scissors. Do not press leather with a hot iron—leather can scorch, melt, or become stiff. Instead, use a leather-edge burnisher to smooth raw edges, or apply a leather edge paint for a polished look.
If you need to flatten seams, place a pressing cloth between the leather and a low-heat iron, and press for only 1-2 seconds at a time. For best results, avoid steam irons, as moisture can stain or warp leather.
For structured projects like bags or wallets, stuff the interior with tissue paper or fabric scraps to hold the shape while the leather settles. Avoid hanging leather projects up to dry—lay them flat on a clean surface away from direct sunlight, which can fade the leather over time.
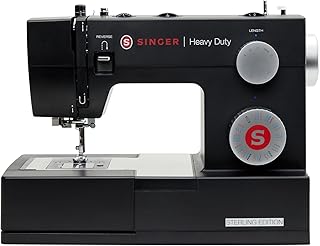
SINGER® HD 4432 Sterling Edition High Speed Sewing Machine +Accessory Kit |32 Built-In Stitches Deliver 110 Stitch Applications | 50% More Power for Thick Fabrics, 1100 Stitches/Min, 1-Step Buttonhole
Check PriceCommon Mistakes to Avoid When Sewing Leather
Even experienced sewists make mistakes when working with leather for the first time. Here are the most common errors and how to avoid them:
- Using a universal needle: As mentioned earlier, universal needles punch large holes in leather that weaken the material. Always use a leather-specific chisel point needle.
- Pinning leather directly: Pin holes are permanent. Use sewing clips instead of pins to secure layers.
- Using short stitch lengths: Stitches shorter than 3.0 mm will perforate leather and cause seams to tear. Use a longer stitch length for all leather projects.
- Skipping a test swatch: Always sew a test swatch of your exact leather and thread combination before starting your project. Adjust tension and stitch length as needed on the scrap first.
- Forcing thick leather through the machine: If your machine struggles with a thick seam, hand-walk the needle or use a seam jumper. Forcing the machine can damage the motor or bend the needle.
How to Fix Skipped Stitches on Leather
Skipped stitches are the most common issue when sewing leather. If you’re getting skipped stitches, check these three things first: 1) Is your needle a fresh leather needle? Dull needles skip stitches. 2) Is your tension adjusted correctly? Test on a scrap piece. 3) Are you using a Teflon or walking foot? A standard foot will drag on leather and cause skipped stitches. If none of these fix the issue, try using a slightly larger needle size, or switch to a heavier thread.
Frequently Asked Questions About Sewing Leather With a Sewing Machine
Can I sew leather on a regular Brother sewing machine?
Yes, most standard Brother home sewing machines can handle light to medium-weight leather (2-4 oz) with the correct setup. Use a leather needle, walking foot, and heavy-duty thread, and stick to lighter leather weights to avoid damaging the motor. For heavy leather projects, consider a heavy-duty Brother model designed for thick materials.
Do I need a walking foot to sew leather?
A walking foot is highly recommended, but not strictly required for very light leather (1-2 oz). A Teflon foot will work for light leather, but a walking foot is better for medium-weight leather or projects with multiple layers, as it prevents the top layer from shifting relative to the bottom layer. Walking feet are affordable and compatible with most home machines.
Can I use regular polyester thread for leather?
Regular all-purpose polyester thread is not strong enough for leather seams. Leather puts more stress on thread than woven fabrics, so all-purpose thread will break after minimal use. Use heavy-duty nylon or polyester upholstery thread, or leather-specific thread, for durable seams that last.
How do I remove stitches from leather?
Removing stitches from leather is tricky because the holes are permanent. Use a sharp seam ripper to carefully cut the thread, then rub the hole area with a leather conditioner to minimize the appearance of the holes. Avoid ripping stitches out quickly, as this can tear the leather.
Conclusion
Learning how to sew leather with a sewing machine opens up a world of durable, custom projects, from handmade wallets to personalized jackets. The key to success is using the right tools: leather needles, a walking or Teflon foot, heavy-duty thread, and clips instead of pins. Always test your settings on a scrap piece of leather first, sew slowly, and avoid forcing thick layers through your machine.
If your current machine struggles with leather, upgrading to a heavy-duty model will make the process much easier. With a little practice, you’ll be creating professional-quality leather goods from the comfort of your home sewing room. Remember: leather is unforgiving of mistakes, so take your time, prepare your materials properly, and don’t skip the test swatch!