
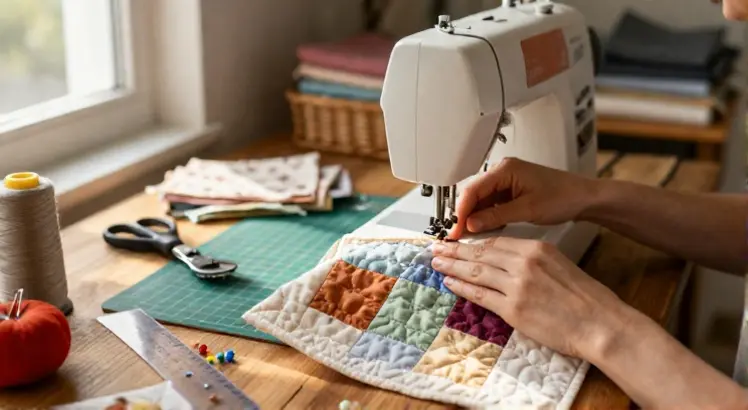
Starting your first quilt feels exciting, not overwhelming, when you have the right tools. You do not need a fancy longarm machine or every ruler on the shelf to begin. Focus on a few high quality basics that make cutting and stitching accurate and safe. Building a small, functional toolkit sets you up for a joyful first project.
A rotary cutter replaces scissors for straight, swift fabric cuts. Pair it with a self healing cutting mat to protect your table and keep blades sharp. A clear acrylic ruler, preferably 6 by 24 inches, helps you measure precisely. Add fine glass head pins and a seam ripper for happy accidents.
Your sewing machine does not need a hundred stitches. A straight stitch and a zigzag option serve almost every beginner quilt pattern. Set up a clean bobbin and a fresh size 80 universal needle. Keep the manual nearby to master threading and tension adjustments before you start stitching.
Understanding Fabric and Quilt Anatomy
The Quilting Book: A Step-By-Step Guide to Patchwork and Quilting
Check PriceA quilt is a textile sandwich made of three distinct layers. The top layer features your decorative patchwork design pieced from fabric. The middle layer, called batting, provides warmth, softness, and a puffy texture. The backing fabric is a single large piece that encases the back of the quilt.
Quilting cotton remains the gold standard for beginners because it presses flat and grips the ruler well. Precut fabric bundles like charm packs or jelly rolls remove the chore of measuring initial squares. They let you jump straight into designing and sewing without large scale yardage cutting. Always prewash your fabric to prevent color bleeding onto light patches later.
Batting comes in cotton, polyester, or a soft cotton blend. Cotton breathes nicely and gives a vintage crinkle after washing, while polyester resists creases. For a first quilt, choose low loft batting because it is easier to manage under the machine. Read the package instructions to learn the recommended quilting distance between lines.
Rotary Cutting and Piecing Perfect Seams
Quilter’s Complete Guide: The definitive how-to manual by two of America’s most trusted quilters
Check PriceAccurate cutting defines the entire look of your finished quilt top. Place the fabric on your mat with the fold aligned to a straight grid line. Square up the raw edge by slicing off a sliver before cutting your strips and shapes. Hold the ruler down with firm fingertips to stop it from shifting during the pass.
Consistent seam allowances hide threads and keep blocks a uniform size. Patchwork relies almost universally on an exact quarter inch seam. Use a special presser foot with a quarter inch guide or mark the throat plate with washi tape. Test your seam by sewing three strips together and measuring the middle one to confirm accuracy.
Chain piecing speeds up your workflow without cutting threads between units. Feed square after square through the machine without lifting the presser foot. After sewing the stack, snip the connecting threads and press the units. This technique saves thread, reduces the bobbin runouts, and keeps blocks organized by the machine.
Mastering Pressing and Nesting Seams
Alice’s Wonderland Sampler Quilt: 100 quilt blocks to improve your sewing skills
Check PricePressing is not the same as casual ironing and it makes blocks crisp and flat. Set the stitch first by pressing the sewn strip closed to meld the thread into the fabric. Then finger press or gently lift the top fabric and press the seam toward the darker side. Dragging a hot iron sideways distorts the bias edges and stretches fabric out of shape.
Nesting seams is the beginner friendly trick for perfectly aligned intersections. Press one row of squares with seams going right and the adjacent row with seams going left. When you place the rows right sides together, the opposing seams lock tightly against each other. Pin right at the intersection and sew slowly to achieve a sharp point where four patches meet.
A tailor’s clapper absorbs steam and sets a bone dry, utterly flat seam. This wooden tool traps heat and moisture to give blocks a sharp, polished finish. Even a beginner can get professional results by placing the clapper on a hot seam for five seconds. Flatter blocks join more smoothly and reduce heavy distortion at the quilting stage.
Layer and Baste Like a Pro
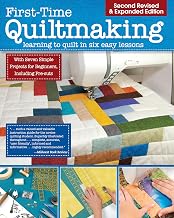
First-Time Quiltmaking, Second Edition, Revised & Expanded: Learning to Quilt in Six Easy Lessons
Check PriceLayering transforms a flimsy patchwork top into the true quilt sandwich. Start by taping the backing fabric taut and perfectly wrinkle free to a hard floor or a large table. Smooth the batting on top and then center the pressed quilt top face up. All three layers must lie glass smooth without trapped folds or threads underneath.
Basting secures the sandwich temporarily until you add permanent quilting stitches. Curved safety pins made for pin basting snap through the fabric layers without shifting. Place a pin roughly every four inches, covering the entire surface in a grid pattern. Alternatively, spray basting adds a temporary mist adhesive that holds layers friction free.
A walking foot attachment evenly feeds the bulky three layers through your sewing machine. It prevents the top fabric from pushing ahead of the bottom layer, eliminating puckers. This tool is essential for straight line quilting on a domestic machine. Take your time and let the feed dogs move the weight of the heavy sandwich forward.
Simple Quilting Designs for Your Machine
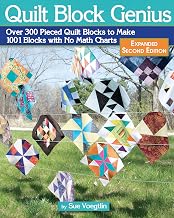
Quilt Block Genius, Expanded Second Edition: Over 300 Pieced Quilt Blocks to Make 1001 Blocks with No Math Charts
Check PriceStraight line quilting remains the most accessible and elegant option for beginners. Use a walking foot and start stitching right next to a central seam ditch. Work outward by spacing lines a presser foot width apart for a uniform grid. This modern geometric finish allows the piecing pattern to stand out beautifully.
Wavy organic lines free you from the stress of keeping perfectly straight stitches. Switch to a free motion or darning foot and drop your machine’s feed dogs. Guide the quilt sandwich with relaxed hands to create gentle, flowing curves across the blanket. This technique hides small wobbles and teaches you the rhythm of free motion movement.
Stitching in the ditch outlines the block seams invisibly by sewing within the seam line itself. This method stabilizes the quilt without adding a visible new pattern on top. Move slowly and wiggle the layers slightly to stay precisely in the shallow crevice. It works beautifully as a preliminary grid before adding decorative motifs.
Binding the Edges for a Clean Finish
Quilting Through Life: Patterns and Prose for Every Stage of Life (Spiral Bound to Lay Flat)
Check PriceBinding wraps the raw perimeter edges in a durable fabric frame. Trim the excess batting and backing square and even with your quilt top edges. Cut binding strips on the straight grain or bias and join them into one continuous long strip. Press the strip in half wrong sides together to prepare it for machine attachment.
Sew the raw binding edge to the front of the quilt using a quarter inch allowance. Miter the corner by stopping a quarter inch from the edge and folding the strip at a diagonal. Wrap the folded edge to the back and use clips or pins to hold it snugly. Hand stitch the folded edge to the back with a blind ladder stitch for an invisible finish.
Many beginners enjoy the speed of a fully machine finished binding. Attach the binding to the back first, wrap it to the front, and topstitch it down close to the fold. A decorative thread or zigzag stitch can add a charming detail. This durable method stands up to rigorous washing and daily cuddle sessions.
Choosing a Beginner Friendly Quilt Pattern
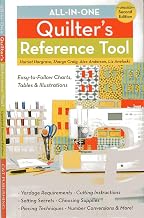
All-in-One Quilter’s Reference Tool, Updated Second Edition: Easy-to-Follow Charts, Tables & Illustrations
Check PriceA simple patchwork layout of equal sized squares is the most forgiving first project. You can arrange charm squares in a rainbow gradient for a stunning visual effect. The lack of angled seams eliminates the struggle of matching triangles. Focus entirely on consistent quarter inch seams and straight pressing.
Strip quilts using jelly rolls allow you to complete a top in a single afternoon. Simply sew the long strips together lengthwise to create a vibrant striped design. This fast style builds your confidence in handling long fabric lengths. Many quilters find the rapid progress deeply encouraging for a first attempt.
Half square triangles introduce diagonal bias edges but unlock endless star and chevron designs. Use the two at a time method to sew squares together and cut them apart. This approach stabilizes the bias so the fabric does not warp while sewing. Trimming the finished units with a square ruler ensures they fit with the other blocks.
Common Beginner Mistakes and How to Fix Them
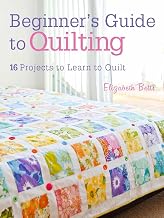
Beginner’s Guide to Quilting: 16 projects to learn to quilt
Check PriceWavy borders happen when you cut a long strip and force it onto a quilt edge. Measure your quilt top through the center vertically and horizontally first. Cut the border strips to that exact average measurement, not the raw edge length. Pin the quilt to the border gently and ease in any tiny fullness without pleats.
Skipping the test block often leads to a whole pile of inconsistently sized units. Sew a single sample block from scrap fabric before cutting into your good yardage. Check that the finished block measures exactly as the pattern describes. Adjust your seam guide or pressing pressure based on that quick test result.
Tension headaches appear as loopy threads on the back or puckered fabric. A clean machine and a fresh needle solve ninety percent of stitch issues. Re-thread the top path with the presser foot raised so the thread sits deep in the discs. Dust the bobbin case with a soft brush to clear trapped lint and oil per the manual instructions.
Frequently Asked Questions on Quilting for Beginners
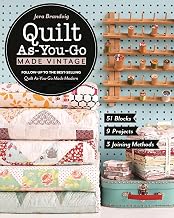
Quilt As-You-Go Made Vintage: 51 Blocks, 9 Projects, 3 Joining Methods
Check PriceWhat is the easiest quilt style for a true beginner? A simple patchwork quilt made from precut squares, known as charm packs, offers the gentlest start. Because the pieces are already cut, you bypass the hardest part of the process entirely. You simply stitch the squares together in rows and press. This project delivers a beautiful heirloom without complex cutting or matching.
Can I quilt on a standard domestic sewing machine? Absolutely, and almost all quilters work this way before upgrading. You need a machine with a straight stitch and an adjustable stitch length. Adding a walking foot helps feed the thick layers evenly. A standard home machine handles a twin quilt size comfortably with proper support.
How do I prevent my fabric from bleeding during the first wash? Color catchers are sheets you toss in the wash that trap loose dyes before they stain light fabric. Using a tablespoon of table salt can also help set dark or saturated colors. Wash with cold water on a gentle cycle to keep fibers tight and colors locked. Remove the quilt promptly from the machine to dry flat.
What thread should I use for piecing and quilting? For piecing, a high quality 50 weight cotton thread creates strong, flat seams without adding bulk. Premium quilting threads like Aurifil or Masterpiece are smooth and produce low lint. For the actual quilting lines, you might switch to a 40 weight cotton for a slightly bolder stitch definition. A good quality thread selection reduces frustrating breaks and fuzzy build up in the bobbin.
Can I wash my handmade quilt normally? Yes, a well stitched quilt is surprisingly durable. Machine wash on a gentle cycle with cold water and a mild liquid detergent. Dry on low heat or lay flat outside to preserve the batting loft. The slight crinkle texture that appears after the first wash is a beloved hallmark of a genuine quilt.
Taking Your Skills to the Next Level
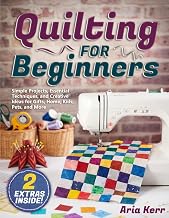
Quilting for Beginners: Simple Projects, Essential Techniques, and Creative Ideas for Gifts, Home, Kids, Pets, and More
Check PriceJoining a local quilt guild or an online block swap builds your skills rapidly. Seeing other beginners work and hearing veteran tips accelerates your learning curve. Swapping blocks exposes you to diverse fabric styles and color combos you might not buy yourself. The social connection turns a solo hobby into a community of encouraging makers.
Challenge yourself with a sampler quilt that features a unique block style in each row. This teaches diverse construction techniques like flying geese, snowballs, or log cabins in one project. You practice cutting various shapes while assembling a stunning reference of your growing expertise. By the end, you feel confident tackling intricate standalone patterns.
Explore the convenience of quilt as you go (QAYG) methods when you feel ready for a new approach. This technique allows you to quilt each individual block completely before joining them together. It eliminates the struggle of maneuvering a huge quilt through a small machine throat. QAYG is a gateway to beautifully detailed custom quilting designs.
Washing and Caring for Your Finished Quilt
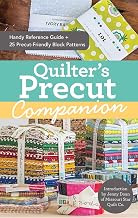
Quilter’s Precut Companion: Handy Reference Guide + 25 Precut-Friendly Block Patterns
Check PriceYour finished quilt deserves a little mindful care to stay vibrant for generations. Always use a gentle, dye free detergent to preserve the fabric colors and prevent fading. Avoid fabric softeners because they coat the cotton fibers and reduce the breathable feel of the natural material. Harsh chemicals can weaken the cotton and cause the batting to clump oddly.
Sunlight is the sworn enemy of textile fibers. Dry your quilt in a shaded area or indoors on a drying rack to keep patterns bright. If you must store the quilt, avoid plastic bins that trap humidity and cause mildew. Fold it loosely with acid free tissue paper inside a cotton pillowcase, and refold it differently every few months to avoid permanent creases.
Small damages like a popped seam or a torn patch are easy to fix early on. Keep a bit of the original fabric or similar scraps for repair patches. Learning the invisible ladder stitch by hand makes rips vanish entirely. Quick repairs stop a tiny hole from becoming a large, unmanageable tear requiring a complete reconstruction.
Conclusion: Stitch Your Story One Block at a Time
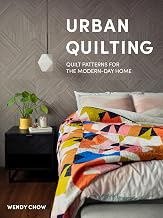
Urban Quilting: Quilt Patterns for the Modern-Day Home
Check PriceLearning how to quilt for beginners is simply about layering fabric with love and thread. Do not chase perfection on your first attempt because the tiny quirks add handmade character. Every expert quilter started right where you are now, cutting imperfect squares and unpicking wobbly seams. Give yourself grace and enjoy the rhythmic hum of the machine.
Focus on mastering one core skill each week, starting with cutting and ending with binding. Finishing a small baby quilt or a lap blanket delivers massive fuel for your creative spirit. The craft connects you to a timeless tradition of resourcefulness. Before long, friends will eagerly receive your beautiful handmade gifts.
Your sewing skills will grow steadily as you experiment with different fabrics and tools. You can find a rich library of guidance in the best quilting books for beginners. These resources provide a tactile reference you can keep right next to your cutting mat. According to the Craftsy beginner quilting guide, picking a small project helps you avoid burnout and guarantees a satisfying finish.
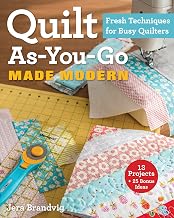
Quilt As-You-Go Made Modern: Fresh Techniques for Busy Quilters
Check Price