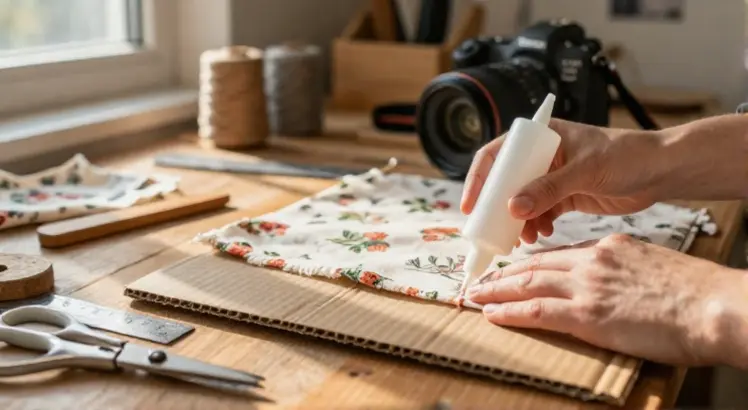
Learning how to glue fabric onto cardboard opens a world of creative possibilities, from custom gift boxes and DIY scrapbooks to durable school projects and home decor. The process seems simple, but if you’ve ever ended up with wrinkled, peeling fabric or soggy cardboard, you know that technique matters just as much as the materials you choose. In this guide, we’ll walk through every step, from picking the right adhesive to achieving a perfectly smooth, permanent bond. By the end, you’ll have the confidence to tackle any fabric-on-cardboard craft with professional results.
FITTDYHE Fabric Glue Permanent, 60 ML Washable Clear Clothing Glue, Super Fabric Glue for Rhinestones, Patches, Clothes, Denim, Leather, Polyester, Fabrics, Doll Repair, Flannel, Cotton
Check Price Why Glue Fabric to Cardboard?
Cardboard is lightweight, inexpensive, and easy to cut, while fabric adds texture, color, and durability. Combining the two lets you create sturdy yet decorative items that plain paper simply can’t match. Common uses include lining jewelry boxes, covering photo album covers, making fabric-covered letters for nursery decor, or reinforcing handmade costume pieces. The key advantage is that fabric glued to cardboard remains flexible enough to wrap around edges yet rigid enough to hold a shape, perfect for three-dimensional crafts.
Because both surfaces are porous, the glue can form a mechanical bond that soaks into the fibers. However, cardboard is also sensitive to moisture. Too much water-based glue can warp the board or cause the adhesive to bleed through thin fabric. That’s why understanding how to control moisture and pressure is essential for a flawless finish.
Choosing the Right Adhesive for Fabric and Cardboard
3Pcs Fabric Glue Permanent, 60 ML Washable Clear Clothing Glue, Super Fabric Glue for Rhinestones, Patches, Clothes, Denim, Leather, Polyester, Fabrics, Doll Repair, Flannel, Cotton
Check Price Not all glues are created equal, and the wrong choice can lead to bubbling, staining, or weak adhesion. When working on how to glue fabric onto cardboard, your goal is an adhesive that dries clear, remains flexible, and won’t warp the backing. Here’s a quick comparison of the most common options.
- PVA (white craft glue): Water-based and easy to find, tacky PVA glues grab quickly and dry clear. They’re ideal for porous materials. Thin them slightly with water for an even coat, but use sparingly to avoid curling cardboard.
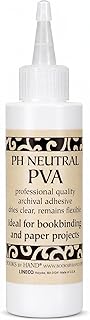
Books By Hand, PH Neutral PVA Adhesive, Bookbinding Glue
Check Price
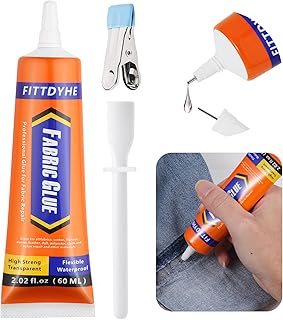
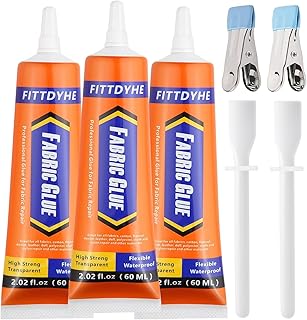
- Fabric glue: Formulated to stay flexible after drying, fabric glues create a strong bond that won’t crack when the cardboard bends. Look for a high-quality permanent fabric glue for projects that need washability or longevity.
3Pcs Fabric Glue Permanent, 60 ML Washable Clear Clothing Glue, Super Fabric Glue for Rhinestones, Patches, Clothes, Denim, Leather, Polyester, Fabrics, Doll Repair, Flannel, Cotton
Check Price
- Spray adhesive: An excellent choice for large, flat areas. A mist of repositionable or permanent spray lays down an even, wrinkle-free coat with zero brush marks. Work in a well-ventilated area and mask off any exposed cardboard you don’t want sticky.
3M Super 77 Multi-Surface Spray Adhesive, 7.35 oz., Low VOC, Quick Bond, Fast Drying, Clear Finish for Foil, Foam, Paper, Metal, Plastic, Fabric, and Cardboard (77-10-NAT)
Check Price
- Hot glue: Fast but risky. Hot glue bonds fabric to cardboard in seconds, which is handy for small accents, but it can create lumps and stiffen the fabric dramatically. It’s best reserved for embellishments rather than full coverage.
Amazon Basics Hot Glue Gun Kit with 30 Glue Sticks
Check Price For most detailed work, I recommend a combination: a dedicated adhesive specially formulated for bonding fabric to paperboard for the main surface, with a low-temp hot glue gun to tack down trims or ribbon. Always test your chosen glue on a scrap piece first to see how it interacts with both the fabric and the cardboard.
What to Look for in a Great Adhesive
- Archival quality (acid-free) if you’re preserving photos or heirlooms.
- Drying time long enough to reposition the fabric but short enough to hold a curved edge.
- Water-resistant once cured, especially for boxes or items that may be handled frequently.
Step-by-Step: How to Glue Fabric onto Cardboard Without Wrinkles
3Pcs Fabric Glue Permanent, 60 ML Washable Clear Clothing Glue, Super Fabric Glue for Rhinestones, Patches, Clothes, Denim, Leather, Polyester, Fabrics, Doll Repair, Flannel, Cotton
Check Price Follow this foolproof method to get a smooth, drum-tight finish every time. Whether you’re wrapping a picture mat or covering a storage box, the principles stay the same.
Materials You’ll Need
- Sheet of cardboard (corrugated, chipboard, or recycled carton)
- Fabric cut roughly 1–2 inches larger on all sides than the cardboard
- Adhesive (PVA, fabric glue, or spray adhesive)
- Disposable brush or foam roller for liquid glues
- Brayer or bone folder for smoothing
- Scissors or rotary cutter
- Scrap paper or parchment to protect your work surface
Preparing the Cardboard and Fabric
Start by wiping the cardboard with a dry cloth to remove any dust. If your cardboard has a glossy coating, rough it up gently with fine-grit sandpaper so the glue can grip. Iron the fabric to eliminate wrinkles, steam can be used, but make sure the fabric is completely cool and dry before gluing. A damp fabric will cause the cardboard to buckle within minutes.
Applying the Adhesive
Place the cardboard on scrap paper. If you’re using a liquid glue, pour a small puddle and spread it quickly with a foam brush in a thin, even layer all the way to the edges. Don’t let puddles form; they’ll soak through and discolor lighter fabrics. For spray adhesive, hold the can about 8 inches away and mist the cardboard in a steady, overlapping pattern. Let the spray become slightly tacky before laying down the fabric, this prevents glue from bleeding through while still giving you a few seconds to reposition.
Positioning and Smoothing the Fabric
Lay the fabric over the glued cardboard, starting from one edge and slowly lowering it to avoid trapping air. Use your palm to press down gently, then go over the entire surface with a brayer or bone folder, working from the center outward. Apply firm, even pressure to push out air bubbles and force the glue into the fabric’s weave. If you see a wrinkle, lift the fabric carefully in that spot and relay it, trying to slide the fabric while it’s wet can stretch or distort it.
Wrapping the Edges
Once the top surface is smooth, flip the piece over. Run a thin line of glue along the cardboard’s outer edges. Fold the excess fabric over the back, pulling gently so it’s taut but not stretched to the point of distortion. Miter the corners by folding them at a 45-degree angle, much like wrapping a gift. Press the folded edges firmly and clamp or weight them down with a heavy book until the glue sets.
Expert Tips for a Professional, Wrinkle-Free Finish
Fabric Glue, Permanent Extra Strong Clear Washable Fabric Adhesive for Clothing Repairs, Patches, Denim, Rhinestones, Felt, Crafts & Upholstery, 1.76 oz
Check Price
- Use a primer layer: For stubborn cardboard that drinks up glue, seal it first with a thin coat of matte Mod Podge or diluted PVA. Let it dry completely; this stops the top layer of adhesive from absorbing unevenly.
- Work in sections: On large pieces, apply glue to only half the cardboard at a time. Press and smooth that half before moving to the other side.
- Choose the right fabric weight: Lightweight cottons, quilting calicos, and broadcloth are easier to bond without bubbles than thick canvas or stretchy knits. If you must use a heavier fabric, switch to a stronger permanent fabric glue that can handle the extra tension.
- Dry under weight: After assembling, place the project between sheets of parchment and stack books on top. The extra pressure ensures sharp edges and a flat surface while the glue cures.
Common Mistakes to Avoid When Gluing Fabric to Cardboard
- Using too much glue: Excess adhesive seeps through the fabric, creating shiny spots or stains. A thin, uniform layer bonds better than a thick, sloppy one.
- Skipping the test piece: Cardboard varies widely, some are highly absorbent, others are coated. A quick trial will tell you if your glue chooses to soak in or sit on top.
- Rushing the dry time: Even if the surface feels dry in 20 minutes, the bond deepens over 24 hours. Handling the piece too early can cause the fabric to peel at the corners.
- Ignoring grain direction: If you’re using corrugated cardboard, keep the grain running parallel to the longest side of your project. Fabric glued across the grain can pull the board out of shape as it cures.
Creative Projects Using Fabric-Covered Cardboard
Once you master how to glue fabric onto cardboard, you’ll start seeing everyday boxes and boards as blank canvases. Try these ideas:
- Custom drawer organizers: Cut cardboard dividers to fit a drawer, cover each with a cheerful print, and assemble them with fabric hinges.
- Fabric-covered notebooks: Replace a flimsy paperback cover with cardboard wrapped in linen or canvas, then sew in the pages for a beautiful journal.
- Wall art panels: Stretch a bold pattern over a cardboard rectangle, frame it with washi tape, and hang it with removable adhesive strips.
- Party favor boxes: Use small jewelry boxes covered in lace and satin for an elegant wedding or baby shower keepsake.
FAQs About Gluing Fabric to Cardboard
Can I use regular white school glue?
Yes, but choose a tacky formula rather than watery school glue. Tacky PVA holds the fabric without making the cardboard soggy, and it dries clear and flexible. If your only option is thin white glue, add a tiny pinch of flour to thicken it slightly—this old bookbinder’s trick helps prevent strike-through.
How do I prevent the fabric from wrinkling as it dries?
Wrinkles happen when the fabric shifts or when the glue releases moisture unevenly. Pre‑iron the fabric, use a brayer to press it firmly, and keep the piece under weight while it dries. If small bubbles appear later, you can lightly mist the fabric and iron over a press cloth to reactivate the adhesive and smooth them out.
Is hot glue a good option for fabric and cardboard?
Hot glue works in a pinch for tiny details or securing trim, but it’s not recommended for entire surfaces. It sets too quickly to correct mistakes, leaves a hard ridge under thin fabric, and may peel away from cardboard over time. Stick with PVA or spray adhesive for the base layer and save hot glue for attaching buttons, beads, or ribbon.
How long does the glue take to fully cure?
Most fabric and PVA glues become touch‑dry within 30 minutes to an hour, but maximum bond strength develops over 24 to 48 hours. For items that will be handled a lot, allow the full curing time before putting them into use. Spray adhesives often bond permanently within a few hours, but weighing the piece down overnight never hurts.
Conclusion
Knowing how to glue fabric onto cardboard comes down to choosing the right adhesive, preparing your surfaces, and working with patience rather than speed. A thin, even layer of glue, careful smoothing with a brayer, and a solid cure under weight will give you a finish that looks clean and lasts for years. Whether you’re making keepsake boxes, decorative panels, or personalized stationery, the same steps apply. For a deeper dive into which product will work best for your specific materials, check out our guide to the top adhesives for bonding fabric to cardboard. And if you’re ready to see the technique in action, this detailed visual tutorial from WikiHow walks you through the process step-by-step. Now grab some fabric scraps and start creating—your next beautiful project is only a glue brush away.