
Before you start gluing or trimming, you need to understand that not all cardboard and fabric combinations play nicely together. The success of your box, picture frame, or craft project hinges entirely on material compatibility. Using a thin, sheer fabric on a dark, printed cardboard box will result in the branding bleeding through, ruining your design. Similarly, using a heavy-duty adhesive on delicate silk can cause unsightly stains. This stage is about setting yourself up for success and avoiding the frustration of a project that looks homemade in the wrong way.
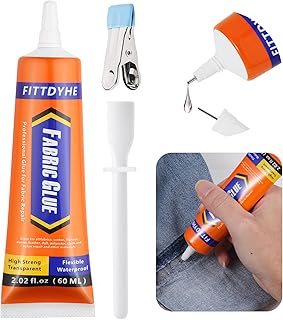
FITTDYHE Fabric Glue Permanent, 60 ML Washable Clear Clothing Glue, Super Fabric Glue for Rhinestones, Patches, Clothes, Denim, Leather, Polyester, Fabrics, Doll Repair, Flannel, Cotton
Check PriceChoosing the Right Materials for a Flawless Finish
Selecting the Best Cardboard for Fabric Covering
Rummaging through your recycling bin might be convenient, but you need to be selective. The ideal cardboard is rigid but not corrugated if you are folding edges, as the flutes inside can collapse, creating lumpy texture under the fabric. Single-ply chipboard or book board is the gold standard for fabric covering because it absorbs glue well without warping instantly.
- Corrugated Cardboard: Great for large flat panels or backdrops where edges remain exposed. It is strong but difficult to fold fabric over the edges cleanly without the “washboard” effect.
- Mat Board / Book Board: The professional’s choice. It is dense, smooth, and resists warping. If you are making custom storage boxes or fabric-bound journals, this is the only substrate you should use.
- Cereal Box Cardboard (Greyboard): This is a hidden gem. It is thin, flexible, very easy to cut with scissors, and perfect for smaller, lightweight projects like drawer organizers or wallet inserts.
Fabric Types: What Works and What to Avoid
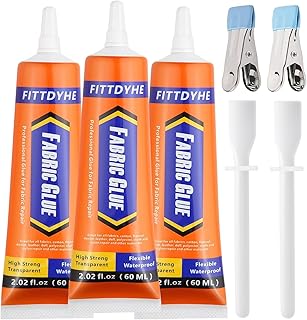
3Pcs Fabric Glue Permanent, 60 ML Washable Clear Clothing Glue, Super Fabric Glue for Rhinestones, Patches, Clothes, Denim, Leather, Polyester, Fabrics, Doll Repair, Flannel, Cotton
Check PriceYour choice of fabric dictates the tactile and visual quality of the final piece. While you might have leftover scraps, you need fibers that can handle adhesive without puckering or staining. If you are looking for the best options, you might want to explore some comprehensive guides on best fabric scissors to prepare your cut pieces perfectly.
- Cotton: The undisputed king for this craft. Quilting cotton is lightweight, has a very tight weave, is easy to cut without fraying, and hides glue marks well. It is washable and comes in infinite patterns.
- Linen: Offers a high-end, organic texture ideal for decorative storage boxes on open shelving. However, raw linen frays heavily, so you must use fabric glue for clothes or a fray-check product on the cut edges before gluing to prevent strings ruining your edge seal.
- Canvas or Denim: If you want to master how to cover cardboard with fabric for high-wear items like pet furniture or toy chests, these heavy-duty fabrics are essential. They require a very strong spray adhesive or contact cement to bind properly without peeling.
- Avoid Synthetics: Silks, polyester satins, and metallic fabrics are difficult to work with. They often repel water-based glues, shift under pressure, and can melt or discolor with solvent-based adhesives.
Adhesive Selection: The Make-or-Break Factor
FITTDYHE Fabric Glue Permanent, 60 ML Washable Clear Clothing Glue, Super Fabric Glue for Rhinestones, Patches, Clothes, Denim, Leather, Polyester, Fabrics, Doll Repair, Flannel, Cotton
Check PriceThe glue aisle can be paralyzing. The wrong glue will warp your board, bleed through your fabric leaving dark spots, or fail to hold after a week. For those new to fabric crafting, understanding different bonding methods is crucial; you might even compare this to learning mechanical vs computerized sewing machines in terms of complexity. Here is the breakdown of the most reliable adhesives for this specific application.
PVA Glue (White School Glue)
PVA glue is water-based, non-toxic, dries clear, and is almost universally available. It is the best choice for porous materials like cotton and linen. However, you cannot simply squirt it on. Pour it into a container, thin it slightly with water (about 1 part water to 3 parts glue), and apply it with a dense foam roller brush. This ensures an ultra-thin, even layer that won’t soak through the fabric. Be aware that the moisture in PVA can warp thin cardboard, so we always recommend you coat both sides of the board initially (a seal coat) to balance the tension.
Spray Adhesive
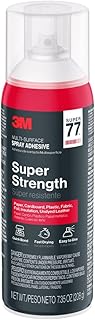
3M Super 77 Multi-Surface Spray Adhesive, 7.35 oz., Low VOC, Quick Bond, Fast Drying, Clear Finish for Foil, Foam, Paper, Metal, Plastic, Fabric, and Cardboard (77-10-NAT)
Check PriceFor rigid materials like book board or corrugated cardboard, a permanent, heavy-bond spray adhesive (like 3M Super 77) is a game-changer. It adds zero moisture, making it the perfect solution for how to cover cardboard with fabric without wrinkles or moisture-induced warping. The technique requires a well-ventilated area and masking tape to protect the edges of your board from overspray. Apply an even, sweeping coat to both the board and the back of the fabric, wait 30 seconds for the tack to develop, and then bond them together perfectly flat.
Hot Glue
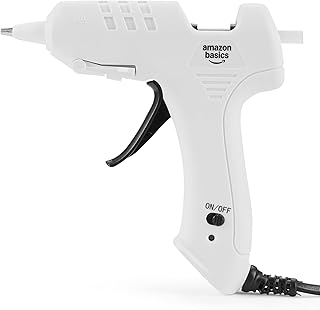
Amazon Basics Hot Glue Gun Kit with 30 Glue Sticks
Check PriceHot glue is rarely appropriate for the flat surface area because it creates bulky, textured lines that are visible through the fabric. However, it is a secret weapon for securing fabric on the inside of a box where speed and a strong instant bond are needed. High-temperature glue grips the cardboard fibers aggressively, keeping the fabric pulled taut around edges.
Step-by-Step Masterclass: The Flat Panel Technique
Fabric Glue, Permanent Extra Strong Clear Washable Fabric Adhesive for Clothing Repairs, Patches, Denim, Rhinestones, Felt, Crafts & Upholstery, 1.76 oz
Check PriceMost beginner attempts at learning how to cover cardboard with fabric fail because of rushing the initial bond. Whether you are creating a custom clipboard, a photo frame, or a drawer divider, this method guarantees professional results with sharp edges.
Cutting and Measuring Accurately
Precision is not optional here; it is the law. Never cut your fabric based solely on the cardboard dimensions. Place the cardboard on the fabric and use a clear quilting ruler to measure a 1.5-inch to 2-inch margin on all four sides. This overhang is functionally named the “turn-over allowance” and is critical for covering the board’s thickness.
- Corner Strategy: Use a sharp rotary cutter or sharp tailor shears. Cut the corners of your fabric at a 45-degree angle, leaving a gap equal to the thickness of the board. This prevents bulky corner overlaps that create lumps under the final fabric layer.
The Application Process
Lay the fabric face down on a protected surface. Center your glued-up board exactly onto the back of the fabric. Press firmly from the center outward to drive out air pockets. A rigid brayer roller is an essential tool here. Flip the assembly over and inspect for any debris or wrinkles on the visible side. If it looks good, flip it back over to secure the flaps.
- Glue the Long Edges First: Pull the fabric flap up and over the board edge. Secure it to the inside using your PVA or spray glue. The tension needs to be firm but not tight enough to pull the fabric weave out of shape.
- Crease the Short Ends: Before folding the short flaps up, use your fingers to create a sharp, 90-degree “hospital corner” fold. This tucks the raw fabric edge in, leaving a perfectly triangular mitered profile that looks crisp from the side.
How to Cover a 3D Box Interior and Exterior
Fabric Glue, Permanent Extra Strong Clear Washable Fabric Adhesive for Clothing Repairs, Patches, Denim, Rhinestones, Felt, Crafts & Upholstery, 1.76 oz
Check PriceCovering a flat board is distinct from wrapping a three-dimensional object. If you are restoring a vintage suitcase or covering a plain shoebox, the sequence of operations differs significantly to hide raw seams.
Pattern Making for Box Ends
Treat this project like sewing a tailored suit for the box. You will need separate pieces for the base, lid rim, and side walls. If you try to wrap a box with one single piece of fabric, you will have massive, ugly folds at the corners. Cut a long strip of fabric for the side perimeter, ensuring the height includes a “turn-over” to wrap over the top rim and down inside the box by at least 1 inch.
Finishing the Raw Interior
Once the exterior wrapping is glued and dried, you are left with unsightly strips of fabric glued to the inside walls. This requires a liner. Cut a separate piece of coordinating cardboard (or thick cardstock) that is sized 1/8-inch smaller than the inner floor dimensions. Cover this insert with a contrasting or matching fabric, turning the edges under so there are no raw cuts visible. Drop this insert into the bottom of the box to cover the raw structure, instantly doubling the perceived quality and craftsmanship of the piece.
Troubleshooting Common Issues and Fixes
Even careful crafters encounter hiccups. The difference between a ruin and a recovery is knowing how to react quickly.
Dealing with Bleed-Through and Warping
If you notice a damp spot forming on the right side of your fabric, do not touch it. You will likely smear the glue. Often, if the PVA glue is applied thinly enough, it dries clear and is invisible once fully cured. To fix warp on a flat panel, once the glue is dry to the touch but still flexible, place parchment paper over both sides, stack heavy books on top, and let it cure fully for 24 hours. The pressure forces the board to dry flat.
Securing Frayed Edges Discreetly
Fabric edges that begin to fray on the inside of a box can look messy very fast. While scissors can trim them, they often make the problem worse by pulling the weave. Instead, run a very thin line of clear-drying tacky glue along the cut edge of the material before you adhere it to the board. As an expert tip, you can also seal the inner raw and fraying edges by applying a satin ribbon as a trim over the join, which looks intentional and adds rigidity.
Frequently Asked Questions
Can I use Mod Podge to cover cardboard with fabric?
Yes, Mod Podge is a PVA-based sealant and glue, making it suitable, especially for decoupage projects. However, standard Mod Podge remains slightly tacky in humid climates. For a hard, non-tacky finish that won’t stick to adjacent books inside a bookcase, use Mod Podge Hard Coat or a spray acrylic sealer over the finished piece.
How do I prevent air bubbles under the fabric?
Never start the bond by laying the fabric down flat all at once. Create a hinge. Lay the board on the fabric. Fold back half the fabric, spray the glue on the board exposed, smooth that half down using a scraper or credit card, then fold back the other half and repeat. This sweeping motion pushes the air out incrementally.
Is it better to glue fabric to cardboard or use staples?
For hard surfaces and thin fabric, glue is superior because staples leave visible punctures and rarely sit flush, creating a bumpy surface. For very thick upholstery fabrics on plywood-heavy projects, a staple gun on the backside offers the mechanical hold that glue sometimes fails to provide over time under stress.
Conclusion
Mastering how to cover cardboard with fabric unlocks an endless world of custom home decor, from personalized storage solutions to high-end-looking gifts. The entire process rests on three pillars: selecting a flat, dense board; pairing it with a non-stretchy, natural fiber; and using a low-moisture, high-bond adhesive.
Remember that the secret lies in the corners. Taking the time to miter them precisely eliminates the clunky, amateur look that plagues so many DIY projects. Don’t be afraid to start small, like wrapping a simple coaster or a small jewelry tray, to practice the tension and folding techniques before moving on to large storage trunks. With the right technique, you can transform a simple shipping box into a piece that rivals high-end boutique storage.