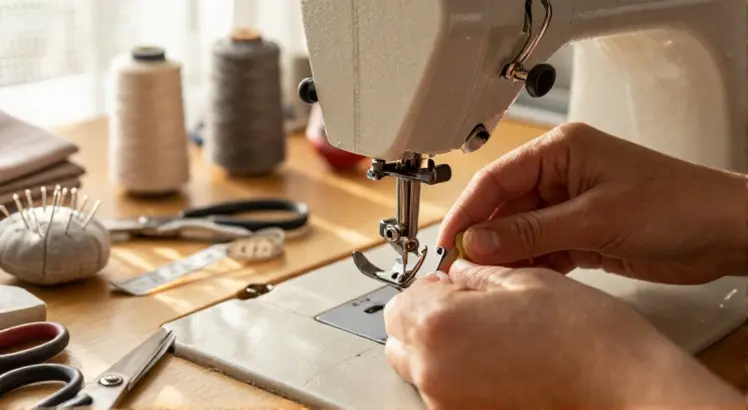
Staring at that clunky walking foot and wondering how to attach it without throwing your machine’s timing off? Take a breath, you’re in good company. Attaching a walking foot feels intimidating the first time, but once you understand the simple mechanics, the whole process takes less than five minutes. In this tutorial, I’ll show you exactly how to attach a walking foot on both low‑shank snap‑on and screw‑on machines, so you can start feeding multiple layers evenly right away.
After 15 years of wrestling with quilts, vinyl, and striped fabrics that shifted no matter how many pins I used, I can promise you this: the walking foot is the unsung hero of even feed. And installing it correctly is the only gatekeeper between you and perfectly matched plaids. I’ll cover everything from the tools you’ll need to the troubleshooting tricks that veteran sewists lean on. Ready? Let’s get your machine kitted out.
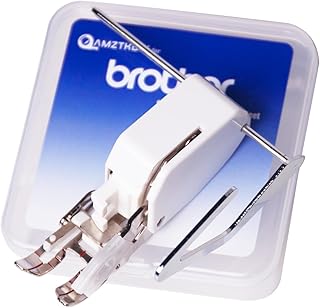
AMZTKDIY Walking Foot Precision Sewing Attachment with Guide for Brother Sewing Machines Even Feeding Quilting and Sewing
Check PriceWhat Is a Walking Foot and Why Bother?
Before we dive into the how, let’s make sure we’re talking about the same tool. A walking foot is a bulky accessory that clips onto your presser bar and uses a set of feed dogs (teeth) on top of the fabric, synchronized with the machine’s lower feed dogs. Together they march layers of fabric through the machine at the same pace, preventing the top layer from shifting ahead of the bottom layer. That’s why it’s sometimes called an even‑feed foot.
If you are brand‑new to this attachment, I recommend reading my in‑depth explanation of what a walking foot is first. It will help you understand exactly how the mechanism differs from a regular presser foot and when you absolutely need one.
Walking Foot vs. Presser Foot: A Quick Reality Check
HONEYSEW Open Toe Walking Foot W/Guide for Brother Sewing Machine Quilting and Sewing Stitch Through Multiple Layers
Check PriceIt’s easy to assume all feet just sit on top of the fabric, but a standard presser foot only applies downward pressure, it doesn’t actively feed the top layer. That’s why quilts ripple, stripes wander, and silk crawls sideways.
A walking foot has its own set of feed dogs that grip and advance the upper fabric. This simple difference is the reason professional quilters and bag makers keep a walking foot installed almost permanently. For a side‑by‑side breakdown, check out how a walking foot compares to a regular presser foot and you’ll see why this swap matters so much.
Before You Begin: Compatibility and Tool Check
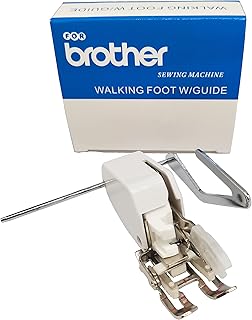
Walking Foot Even Feed Presser Foot with Quilt Guide for Low Shank Sewing Machines, Compatible with Brother, Singer, Janome, Kenmore, Heavy Duty for Quilting, Leather & Thick Fabrics
Check PriceNothing stalls progress faster than discovering your walking foot doesn’t fit your machine. So let’s do a quick pre‑flight.
Check Your Shank Type
Most modern home machines use a low‑shank system, but high‑shank and slant‑shank machines exist too. The walking foot you buy must match your sewing machine’s shank height. Look at the presser bar from the side: a low‑shank machine has a distance of about ½ inch from the screw hole to the needle plate; a high‑shank machine measures around 1 inch or more. If you’re unsure, reference your manual or search for your model number online.
Tools You’ll Need
- The correct walking foot for your shank type (universal low‑shank feet work on most Singers, Brothers, Janomes)
- A small screwdriver (typically the flathead or Phillips that came with your machine)
- The original presser foot shank and screw (if your machine uses a detachable shank)
- Scrap fabric to test the feed
I also like to keep a needle unthreaded and the presser foot lifter dowel handy, it minimizes the risk of stabbing yourself while you work under the shank.
How to Attach a Walking Foot: Step‑by‑Step Instructions
AMZTKDIY Walking Foot Presser Foot– Precision Sewing Attachment W/Guide for Brother Sewing Machines Even Feeding Quilting and Sewing Set
Check PriceThese steps work for the vast majority of domestic machines. Follow them closely, and you’ll have your walking foot mounted securely without any head scratching.
Step 1: Power Off and Raise the Needle
Electricity and fingers near a needle are not friends. Unplug your machine or turn off the power switch. Then manually turn the handwheel toward you until the needle is at its highest position. Raise the presser foot lifter to release tension on the foot.
- Safety first, always kill the power.
- High needle position gives you clearance to work without bending the needle.
Step 2: Remove the Current Presser Foot
How you remove the foot depends on your machine’s system. Most home machines fall into one of two categories: snap‑on feet or screw‑on feet.
- Snap‑on feet: Locate the small lever or button at the back of the ankle. Push it down or to the side and the foot will release downward. If your machine has a plastic ankle that the foot snaps onto, you usually leave the ankle in place.
- Screw‑on feet: Loosen the thumb screw or small set screw on the left side of the presser bar. The entire foot (and often the shank) will come free. Keep the screw nearby because you will reuse it.
If your machine came with a high‑shank adapter, set it aside, most walking feet are designed to mate directly with the presser bar or a low‑shank ankle.
Step 3: Position the Walking Foot
Here’s where a little patience pays off. There are two important engagements to line up: the foot’s fork must straddle the needle clamp screw, and the driving lever (or hook) must sit on top of the needle bar’s screw or clamp.
- Fork over needle clamp: Slide the walking foot in from the front. The metal fork at the back of the foot should go around the needle clamp screw, the round barrel that holds the needle.
- Lever on top: At the same time, the small black or silver lever protruding from the right side of the walking foot needs to rest above the needle clamp screw. This lever is what transfers the up‑and‑down motion from the needle bar to the upper feed dogs.
- Shank alignment: While holding those two positions, guide the shank of the walking foot up against the presser bar.
It may feel a bit like patting your head while rubbing your belly. If the foot doesn’t sit flush against the presser bar, wriggle it gently, usually the fork needs to move a hair left or right.
Step 4: Secure and Tighten
With the foot correctly positioned, hold it steady with one hand and use your screwdriver to tighten the screw.
- For screw‑on machines: Insert the thumb screw through the shank hole and turn clockwise until snug. Do not overtighten, you can strip the threads on older machines.
- For snap‑on machines: Press the ankle lever to snap the walking foot onto the adapter. Then make sure the fork is still positioned correctly around the needle clamp; sometimes snapping changes the alignment slightly.
Once attached, gently rotate the handwheel by hand for one full cycle. Watch the walking foot’s feed dogs. They should move up and back in sync with the needle bar without hitting any part of the machine.
Snap‑On vs. Screw‑On Walking Feet: Attaching Each Type
AMZTKDIY Walking Foot Precision Sewing Attachment with Guide for Brother Sewing Machines Even Feeding Quilting and Sewing
Check PriceMost universal walking feet are sold as a complete set that can be adapted to both systems, but the attachment sequence varies. Knowing your machine’s system prevents frustration.
Attaching a Snap‑On Walking Foot
If your machine normally uses feet that click onto a plastic ankle, you likely have a low‑shank snap‑on system. The walking foot will come with its own ankle, or be designed to click onto the existing one. In either case, after removing the old foot, snap the walking foot onto the ankle. Then carefully guide the fork around the needle clamp screw and check that the lever sits on top. Snap‑on feet are quicker to change but can wobble if the ankle is worn, if you feel play, replace the ankle.
Attaching a Screw‑On Walking Foot
Older mechanical machines (and many heavy‑duty models) use a screw‑on presser foot with a fixed shank. Here, you remove the entire foot and shank together. The walking foot you buy will have a built‑in shank with a hole for the thumb screw. Align the walking foot so the fork and lever are correctly positioned, slide the shank up against the presser bar, and screw it in. I always finish by lowering the presser foot lifter and checking that the walking foot sits parallel to the feed dogs.
For machine‑specific instructions, Brother’s official walking foot installation guide is a helpful resource that walks you through model‑specific variations and includes clear diagrams.
Common Mistakes and Troubleshooting Tips
Even experienced sewists can accidentally put the walking foot on slightly wrong. Here are the most frequent hiccups and how to solve them instantly.
The Needle Hits the Walking Foot
If you hear a sickening clunk while testing, stop immediately. This almost always means the fork isn’t positioned around the needle clamp screw, or the foot is pushed too far forward. Loosen the screw, reposition so the fork straddles the clamp, and tighten again. Also verify you haven’t installed the foot sideways, the toe should point forward.
Fabric Isn’t Feeding Evenly
If the top layer still shifts, the lever may not be resting on the needle clamp screw correctly. Without that connection, the top feed dogs won’t move. Recheck the engagement. Additionally, some walking feet have a small set screw that adjusts the fork width, make sure it’s tight and the fork hugs the clamp snugly.
Walking Foot Makes a Clicking Noise
A rhythmic click is normal; that’s the lever riding up and down on the needle clamp. However, a loud, irregular tapping often means the foot isn’t seated firmly against the presser bar, causing it to bounce. Tighten the thumb screw a bit more or check that the shank is flush.
The Foot Falls Off Mid‑Sew
If using a snap‑on foot, your plastic ankle may be cracked or the metal clamp spring may be tired. Try a different ankle. For screw‑on feet, the thumb screw can slowly loosen with vibration, give it a tiny extra turn after the first few inches of sewing.
Using Your Walking Foot After Attachment
Now that your walking foot is installed, let’s talk about best practices. The walking foot works best at low to medium speeds. High speed can cause the lever to slip off the needle clamp, especially on older machines. For quilting, engage your dual feed (if your machine has it) or simply stitch slowly, allowing the foot to do the work. Avoid using decorative stitches with the walking foot unless your manual specifically permits it, the wide swing of a zigzag can bend the fork.
After your project, remove the walking foot and reinstall the standard presser foot so you don’t accidentally sew a knit with the feed dogs engaged when you don’t need them. Clean out any lint between the fork and lever before storing the foot in a dedicated box.
Frequently Asked Questions
Can I attach a walking foot to any sewing machine?
You can attach a walking foot to almost any low‑shank or high‑shank home sewing machine, as long as you purchase a compatible model. Some mini‑machines and industrial machines have proprietary systems, so always check your manual. Universal low‑shank walking feet fit most popular brands like Singer, Brother, Janome, and Juki.
Do I need a special needle when using a walking foot?
No special needle is required. However, match your needle type and size to the fabric, quilting cotton works well with a 75/11 or 80/12 universal needle, while heavy layers like denim or multiple quilt layers benefit from a 90/14 or denim needle. The walking foot itself doesn’t dictate needle choice.
Why is my walking foot not feeding the top layer?
Nine times out of ten, the lever isn’t on top of the needle clamp screw. Reposition the foot so the lever rides directly on that screw. If the problem persists, verify the foot’s upper feed dogs are clean and moving freely, and that you haven’t accidentally engaged the feed dog drop lever.
Can I leave the walking foot on my machine?
You can, but I wouldn’t recommend it for everyday stitching. The walking foot adds drag and can be louder. For straight‑line quilting or piecing long strips it’s fine to keep it on, but swap back to a standard foot for delicate fabrics or zigzag stitches.
Conclusion: Attach with Confidence and Sew Without Shifting
Learning how to attach a walking foot is a five‑minute skill that will elevate every project that involves multiple layers. Once you’ve done it a couple of times, the process becomes muscle memory: remove the old foot, align the fork around the needle clamp, seat the lever on the clamp screw, and tighten. That’s it. The reward is perfectly even seams, no tucks, and fabric that stays exactly where you put it.
Today, grab your walking foot, a scrap sandwich of cotton and batting, and go through the steps one by one. If you hit a snag, recheck the fork and lever alignment, that’s the trick 90% of beginners miss. And remember, your machine’s manual and the comparison between a walking foot and a presser foot are always there to back you up. Happy even‑feed sewing!