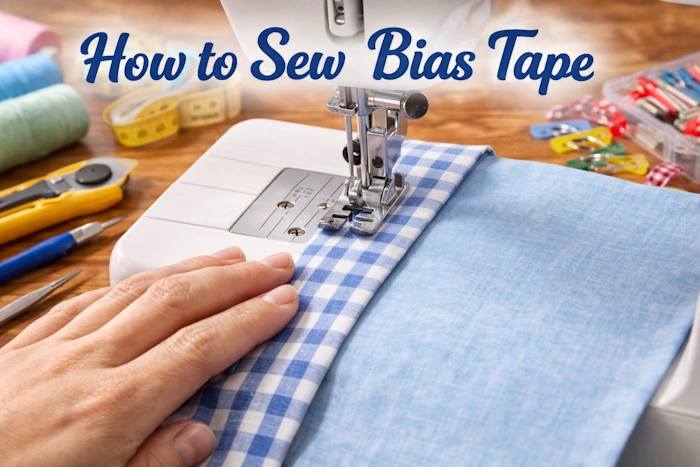
Learning how to sew bias tape is one of the easiest ways to upgrade your sewing projects from simple to professional. Whether you are finishing a quilt, binding a neckline, or adding a decorative edge to home décor, bias tape creates clean, durable, and flexible seams.
Because it is cut on the bias (at a 45-degree angle to the fabric grain), bias tape naturally stretches and curves. This makes it perfect for finishing straight edges, smooth curves, and sharp corners without puckering.
In this beginner-friendly guide, you will learn exactly how to sew bias tape step by step. From understanding the different types to attaching it neatly on quilts and garments, you will gain the confidence to use bias tape in almost any sewing project.
What Is Bias Tape and Why Use It
Bias tape is a long strip of fabric cut on the bias, which means it is cut at a 45‑degree angle to the selvage. Cutting on the bias gives the strip gentle stretch and flexibility. This stretch lets the tape bend smoothly around curves and corners without puckering or distorting.
Single‑fold bias tape
Both raw edges are folded toward the center, wrong side of the fabric inside. It is often used as a decorative trim or facing where only one side is visible.
Double‑fold bias tape
Single‑fold tape folded again through the center so the folded edges meet. This wraps right around a raw edge, making it perfect for finishing quilt edges, necklines, armholes, placemats, and many other projects.
Why use bias tape
- It encloses raw edges so they will not fray.
- It adds a decorative contrast or a subtle matching edge.
- It allows you to bind curved seams smoothly.
- It gives a very strong yet flexible finish, ideal for quilts and garments.
You can buy ready‑made bias tape or create your own using a bias tape maker and your chosen fabric.
Choosing and Preparing Your Bias Tape
Before you start bias tape sewing, choose the right tape for your project and prepare it correctly.
Width
- For most garments, a 12 mm or 1/2 inch finished width of double‑fold tape works well for necklines and armholes.
- For quilts and home décor, 18 mm or 3/4 inch and 25 mm or 1 inch finished widths are popular, giving a more substantial border.
Fabric type
- Use lightweight tape for light fabrics such as cotton lawn or quilting cotton.
- Use wider tape for thicker fabrics like denim, canvas, or thick batting‑filled quilts.
Color and style
- Choose a matching color if you want the finishing to blend in.
- Choose a contrasting color or pattern if you want the binding to stand out and frame your project.
Making your own bias tape
If you want tape that matches your fabric exactly, make your own:
- Press your fabric and lay it flat.
- Fold one corner of the fabric so the cut edge lines up with the selvage. The fold is the bias.
- Cut strips along this fold at the width recommended for your bias tape maker.
- Join strips at 90 degrees with diagonal seams to make a long continuous strip. Press the seams open.
- Feed the strip through your bias tape maker and press with an iron as it comes out.
- For double‑fold tape, fold the single‑fold tape in half again and press.
Basic Bias Tape Sewing Technique
Most bias tape sewing follows this simple structure, whether on straight or curved edges:
- Open one folded edge of the tape.
- Sew that edge to the raw edge of your fabric, usually right sides together.
- Fold the tape over the raw edge to the other side.
- Sew the folded edge down to secure the binding.
Get comfortable with this method on scrap fabric before moving to your main project.
How to Sew Bias Tape on Straight Edges
Straight edges are the best place to practice bias tape sewing for beginners.
Step 1: Prepare your edge
Trim your fabric edge so it is straight and even. Press it flat. A clean, flat edge makes a big difference to the final finish.
Step 2: Position the bias tape
- Open one folded edge of your double‑fold bias tape.
- Place the right side of the tape against the right side of the fabric.
- Align the raw edge of the tape with the raw edge of the fabric.
- Pin or clip along the entire length, making sure the tape lies flat without stretching.
Step 3: Stitch the first side
- Set your sewing machine to a straight stitch with a normal length (around 2.4 to 2.8 mm).
- Sew along the crease line of the opened edge of the tape. This crease is your guide.
- Keep your stitching smooth and even, and remove pins or clips as you go.
- Backstitch at the beginning and the end.
Step 4: Wrap and press
- Fold the tape away from the fabric so that it extends out from the seam. Press this seam to set the stitches.
- Now wrap the bias tape over the raw edge to the wrong side of the fabric. The fold on the free edge of the tape should cover the stitching line on the back.
- Press the tape flat on both sides.
Step 5: Sew the second side
From the right side of the fabric, you can either:
- Stitch in the ditch – Sew right on top of the seam line where the tape meets the fabric. If done accurately, the stitch will barely be visible from the front and will catch the folded edge on the back.
or
- Topstitch the tape – Sew a narrow line of stitching close to the folded edge of the tape on the right side, usually 1 to 2 mm from the edge.
In both methods, move slowly and keep your edge aligned. When finished, give everything a final press.
How to Sew Bias Tape on Curved Edges
Curved edges are where bias tape really shines. Think necklines, armholes, and curved hems in garments, or round edges on placemats and potholders.
Step 1: Prepare the curve
- Staystitch around the curve about 1/8 inch from the raw edge to prevent stretching, especially on garment necklines and armholes.
- Press the curve smoothly so there are no creases or distortions.
Step 2: Pin the tape to the curve
- Open one folded edge of your bias tape.
- Place the right side of the tape to the right side of the fabric, aligning raw edges.
- Because both are on the bias, the tape will naturally bend as you guide it around the curve.
- Do not pull the tape tight. Let it relax into the curve.
- Use many small pins or clips, especially on tight curves, to keep the tape in place.
Step 3: Sew the first side
Stitch along the crease line as before, gently guiding the fabric and tape around the curve.
Keep an even seam allowance and avoid stretching either the tape or the fabric. Let the feed dogs do most of the work.
Step 4: Clip or notch the curve if needed
On very tight inside curves, you may need to clip the seam allowance of the main fabric up to (but not through) the stitching line.
Make small clips every 1 cm or so. This helps the fabric spread and prevents puckers when the tape is turned to the other side.
Step 5: Fold and press
Fold the tape up and away from the fabric, then wrap it around to the wrong side as you did with straight edges.
Press carefully, using a tailor’s ham or rolled towel to maintain the curve shape.
Step 6: Sew the second side
Stitch in the ditch from the right side or topstitch near the inner or outer edge of the tape, following the curve.
Move slowly, pivoting slightly as needed to keep your stitching line smooth.
How to Sew Bias Tape Around Corners
Mitered corners give a clean, crisp look on napkins, placemats, table runners, and quilts.
Step 1: Start on one side
- Open one edge of the bias tape and place it right side to the right side of the fabric along the first side.
- Leave a tail of several inches unsewn at the start so you have room to join the ends later if needed.
- Sew along the crease until you are about 3/8 to 1/2 inch from the corner. Stop with the needle down, backstitch a couple of stitches, then cut the thread.
Step 2: Fold the tape to form the miter
- Lift the tape away from the corner.
- Fold the tape up at a 45‑degree angle so it points away from the corner. The raw edges of tape and fabric should line up, forming a straight line across the corner.
- Then fold the tape back down along the next side of the fabric, keeping that new fold aligned with the fabric edge.
Step 3: Continue along the next side
Start stitching again right at the corner fold on the second side.
Repeat this process at each corner.
Step 4: Wrap and sew the second side
Once all sides and corners are sewn, wrap the tape to the back.
At each corner you will see a natural miter form as the tape folds. Use your finger or a point turner to adjust the fold so it looks neat and even.
Press all around.
Sew the second side by stitching in the ditch or topstitching close to the inner edge of the tape. At the corners, pivot with the needle down so your stitching remains sharp and square.
Bias Tape Sewing for Quilts
Quilt binding is one of the most popular uses for double‑fold bias tape.
Step 1: Prepare the quilt edge
Trim the quilt layers (top, batting, backing) so they are even and square.
If you like, baste or zigzag around the perimeter to keep all layers together.
Step 2: Make or cut enough bias tape
Measure the perimeter of your quilt and add at least 10 inches for joining the ends.
Cut or prepare bias tape in your chosen width, most often 2 1/2 inch strips for a finished binding of about 3/4 to 1 inch, depending on your seam allowance and fold.
Step 3: Attach the tape to the quilt front
- Fold the binding in half lengthwise and press if it is not already double folded.
- Place the raw edges of the binding against the raw edge of the quilt, right sides together.
- Start in the middle of one side, leaving a tail of around 8 to 10 inches unsewn at the beginning.
- Sew with a consistent seam allowance, usually 1/4 inch.
- Use the miter technique described earlier at each corner.
- Stop sewing a few inches before you reach the starting point, leaving another tail to join.
Step 4: Join the binding ends
- Lay the two tails so they overlap.
- Mark a spot where the overlap equals the width of your original binding strip (for example, 2 1/2 inches).
- Cut the excess from the tails so they meet at that measurement.
- Place them right sides together at a 90‑degree angle and sew a diagonal seam.
- Press the seam open and then finish stitching the binding to the quilt.
Step 5: Wrap to the back and sew
Fold the binding over the raw edge to the back of the quilt.
At each corner, form a mitered fold.
Secure with clips or pins all around.
You can hand sew the binding using a blind stitch for an invisible finish, or machine sew close to the folded edge.
A walking foot can help feed the thick quilt sandwich evenly while you stitch.
Bias Tape Sewing on Garments
Bias tape is widely used to finish garment necklines, armholes, and occasionally hems and seams.
Finishing a neckline with bias tape
Step 1: Prepare the neckline
Staystitch around the neckline just inside the seam allowance to prevent stretching.
If your pattern includes a specific seam allowance, such as 3/8 inch, keep that in mind for where you will attach the tape.
Press the neckline so it lies flat.
Step 2: Attach the tape
Use narrow bias tape, usually 1/2 inch finished width.
With right sides together, align one edge of the opened tape with the neckline edge.
Start at one shoulder seam or the center back, leaving a small tail unsewn.
Pin or clip the tape around the neckline, easing it into the curves without stretching it tight.
Sew along the crease line.
Step 3: Join the ends
When you reach your starting point, overlap the tape ends, trim them so they overlap by about 1/2 inch, then stitch them together.
Trim any excess and press the join open.
Step 4: Turn and finish
Press the tape and seam allowance away from the garment.
Fold the tape completely to the inside, enclosing the raw edge.
The folded edge should sit just past the stitching line.
Topstitch close to the folded edge on the inside, or stitch in the ditch from the outside to hide the stitches.
Give the neckline a final press over a tailor’s ham to maintain the curve.
Finishing armholes and other edges
Use the same method as for the neckline. Staystitch, attach the tape right sides together, fold it to the inside, and then stitch it down.
On sleeveless garments, this gives a clean, comfortable edge that sits flat against the body.
Practical Tips for Better Bias Tape Sewing
- Press at every stage. Pressing the tape and the fabric before, during, and after sewing gives a much sharper, neater edge.
- Use lots of pins or clips on curves and corners so nothing shifts while stitching.
- Choose matching thread if you are new to bias tape sewing. It hides small wobbles in your stitching.
- Test on a scrap. Try a short section of bias tape on a spare piece of the same fabric first, especially on curves, to check your tension and stitch length.
- Go slowly around curves and corners. There is no rush. Controlling the tape is more important than speed.
- Consider using a bias binder foot once you understand the basics. It can speed up attaching bias tape on long edges like quilts and hems.
Troubleshooting Common Problems
Puckers on curves
Usually caused by stretching the tape too much or not clipping the seam allowance on tight inside curves. Let the tape relax as you sew and clip the fabric carefully.
Uneven binding width on the back
Happens when the folded edge is not covering the stitching line evenly or when the seam allowance wobbles. Use a consistent seam allowance and, when wrapping, make sure the back edge of the tape extends slightly beyond the stitching line before you sew.
Twisted tape
If your tape twists as you sew, stop, raise the presser foot, and straighten it. Make sure your tape is pressed flat before you start.
Bulky joins
Trim seam allowances on joined bias strips to 1/4 inch and press them open before feeding through the bias tape maker or sewing them onto your project.
Bringing It All Together
Bias tape sewing opens up a wide range of finishing options for both quilts and garments. By learning how to attach bias tape to straight edges, ease it smoothly around curves, create sharp mitered corners, and use it as binding on quilts and facings on garments, you gain a flexible, professional‑looking technique that works on many different projects.
Start by practicing on small, simple pieces like pot holders or small quilted squares. Then move on to binding a quilt or finishing a neckline on a simple top. With each project, your confidence and skill with bias tape sewing will grow, and you will quickly see the difference in how clean and durable your finished edges look.

Hi, I’m Safura. What are you sewing today? If you have any questions or need help with anything related to sewing, please feel free to ask. I’m always here to assist you with sewing-related issues.