
If you’ve ever struggled to sew a neat, narrow hem on delicate fabrics like chiffon or silk, you’ve probably asked: what does a rolled hem foot do? This small, specialized sewing machine attachment is a game-changer for creating professional-looking rolled hems in a fraction of the time it takes to sew them by hand or with a standard presser foot. Unlike bulky hems that add extra weight to lightweight projects, a rolled hem curls the raw edge of the fabric under itself and secures it with a single line of stitching, resulting in a clean, nearly invisible finish perfect for scarves, lingerie, napkins, and sheer curtains.
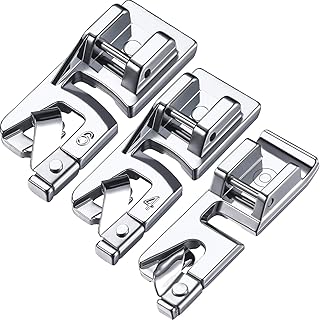
Boao 3 Pcs Narrow Rolled Hem Sewing Machine Presser Foot Set Includes 3mm, 4mm and 6mm Suitable for Household Multi-Function Sewing Machines Accessories
Check PriceWhat Does a Rolled Hem Foot Do?
The core function of a rolled hem foot is to automate the process of rolling and stitching narrow hems, typically 1/8 inch (3mm) or smaller. Most standard rolled hem feet have a spiral or curved metal lip that guides the raw edge of the fabric under the foot, folding it twice as you sew: first, the foot curls the edge under slightly, then it folds it again to enclose the raw edge completely before the needle passes through. This eliminates the need to pre-fold and pin hems for lightweight fabrics, which is time-consuming and often leads to uneven results.
For example, sewing chiffon – which is notoriously slippery and prone to puckering – becomes much easier with a rolled hem foot, as the attachment holds the fabric taut and guides it evenly as you sew. Same with working with silk, which can snag or shift under a standard presser foot. For more technical details on presser foot compatibility, you can refer to an expert guide to rolled hem feet to confirm fit for your machine.
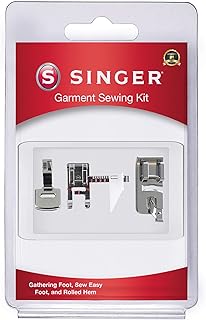
SINGER Garment Presser Feet Kit | Ideal for Garment Sewing, Alterations, and Repairs | Includes Gathering, Rolled Hem & Sew Easy Feet
Check PriceKey Features of a Rolled Hem Foot
Most rolled hem feet are made of durable metal (though budget plastic versions exist for occasional use) and come in 3 standard sizes: 1/8 inch (3mm), 1/4 inch (6mm), and 1/2 inch (12mm). The 1/8 inch size is the most popular, as it works for almost all delicate hemming projects. Key features include:
- A curved or spiral guide lip: This is the defining feature of the foot, which rolls the fabric edge as you sew without manual folding.
- A narrow toe: The front of the foot is thinner than a standard presser foot, allowing it to fit into tight corners or curved edges like scalloped napkins.
- Universal compatibility: Rolled hem feet work with most modern sewing machines, as long as they use standard snap-on or screw-on presser foot systems.
- Etched alignment markings: Many high-quality rolled hem feet have laser-etched lines to help you align your fabric for even, consistent stitching.
What Fabrics Work Best With a Rolled Hem Foot?
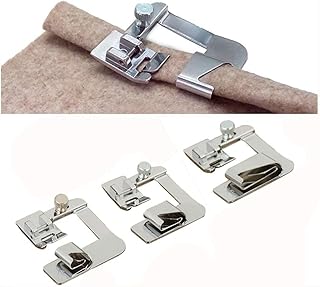
Windman 3 Sizes Wide Rolled Hem Pressure Foot Sewing Machine Presser Foot Hemmer Foot Set 1/2 Inch, 3/4 Inch, 1 Inch Low Shank Sewing Machine Presser Foot for Brother Singer
Check PriceDelicate Fabrics for Rolled Hems
Rolled hem feet are designed for lightweight, sheer, or delicate fabrics that would look bulky with a standard folded hem. Top options include:
- Chiffon: Sheer, lightweight chiffon hems lie flat with a rolled hem, avoiding the bulky, uneven look of a standard hem.
- Silk: Fine silk fabrics like charmeuse or chiffon silk benefit from the gentle guidance of a rolled hem foot to avoid snags and pulls.
- Organza: Stiff, sheer organza holds its shape well with a rolled hem, perfect for evening wear, bridal projects, or decorative curtains.
- Satin: Lightweight satin for lingerie or scarves gets a smooth, shiny finish with a rolled hem that doesn’t add extra bulk.
- Lace: Delicate lace edges are easily finished with a rolled hem foot, which prevents fraying without covering the lace pattern.
Fabrics to Avoid
Thick, heavy, or stretchy fabrics do not work well with a rolled hem foot, as they cannot fit into the curved guide lip. Avoid:
- Denim: Too thick to roll into the small guide lip of the foot, and will jam or break needles.
- Canvas: Heavyweight canvas will not fit into the foot’s guide, and may damage the metal lip.
- Spandex or jersey: Stretchy fabrics will stretch out of shape as the foot guides them, leading to wavy, uneven hems.
- Leather: Thick leather cannot be rolled by the foot, and may scratch or dent the metal guide lip.
How to Use a Rolled Hem Foot (Step-by-Step)
Using a rolled hem foot takes a little practice, but once you get the hang of it, you’ll never go back to hand-rolling hems. Follow these steps for perfect results:
Step 1: Prep Your Fabric
Start by washing and pressing your fabric to remove any wrinkles or sizing. For very slippery fabrics like chiffon, apply a small strip of washable fabric stabilizer along the raw edge you plan to hem, or use a temporary fabric spray adhesive to hold the edge in place. Trim any loose threads from the raw edge to prevent jamming the foot. Use a size 9/70 sharp needle and fine polyester or silk thread to match your fabric – heavy thread will create bulky stitches that ruin the look of the rolled hem.
Step 2: Attach the Rolled Hem Foot
Turn off your sewing machine and remove your standard presser foot. Snap or screw on the rolled hem foot – most 1/8 inch rolled hem feet are snap-on, but check your machine’s manual if you’re unsure. Set your stitch length to 2.5mm (standard straight stitch) and lower the presser foot pressure slightly if your machine allows it, to avoid stretching delicate fabrics.
Step 3: Start Sewing
Fold the first 1/2 inch of your fabric edge to the wrong side by hand, and tuck it into the curved guide lip of the rolled hem foot. Hold the thread tails (both top and bobbin) to the back of the machine with your left hand, and guide the fabric gently with your right hand – do not pull the fabric, let the feed dogs move it. Sew slowly for the first 2-3 inches until the foot catches the fabric edge consistently. Once the hem is feeding smoothly, you can increase your speed slightly, but keep guiding the fabric gently to avoid puckering.
Step 4: Finish the Hem
When you reach the end of your hem, sew off the edge of the fabric, then pull the thread tails to the wrong side and tie them in a small knot, or backstitch 2-3 stitches to secure. Press the finished hem with a low-heat iron (use a pressing cloth for delicate fabrics like silk) to set the stitches and flatten the hem.
Rolled Hem Foot vs. Standard Presser Foot: What’s the Difference?
Many beginners wonder if they can just use a standard presser foot to sew rolled hems. While it’s possible to hand-fold and pin a narrow hem and sew it with a standard foot, the results are almost never as neat or consistent as those from a rolled hem foot. Here’s a quick comparison:
- Consistency: A rolled hem foot guides the fabric edge automatically, so every inch of your hem is the same width. A standard foot requires you to fold and pin every inch, leading to uneven widths.
- Speed: You can sew a rolled hem in one step with the specialized foot, while a standard foot requires pre-folding, pinning, sewing, then removing pins – which takes 3x as long.
- Puckering: The rolled hem foot holds the fabric taut as it sews, reducing puckering on delicate fabrics. A standard foot often lets slippery fabrics shift, leading to puckered, uneven hems.
- Finish: Rolled hems sewn with the specialized foot have a smooth, curled edge with no visible raw edges. Standard foot hems often have small raw edges peeking out, or bulky folds.
Common Rolled Hem Foot Mistakes (and How to Fix Them)
Even experienced sewers make mistakes when using a rolled hem foot for the first time. Here are the most common issues and how to fix them:
- Fabric not feeding into the foot: If the raw edge won’t tuck into the guide lip, pre-fold the first 1 inch of the edge by hand and hold it in place as you start sewing. You can also use a seam ripper to gently guide the edge into the lip.
- Puckered hems: Reduce your presser foot pressure, use a smaller needle (size 9/70), and sew slower. If the fabric is very slippery, add a strip of washable stabilizer along the edge.
- Needle breaking: Make sure you’re using the right size needle for your fabric, and that the foot is attached correctly. Thick fabrics will break needles – switch to a standard foot for heavy fabrics.
- Uneven hem width: Make sure you’re guiding the fabric straight, not pulling it to one side. Use the etched alignment lines on the foot to keep your fabric straight.
Frequently Asked Questions
Can I use a rolled hem foot on stretchy fabrics?
No, stretchy fabrics like jersey or spandex will stretch out of shape as the foot guides them, leading to wavy, uneven hems. Use a twin needle and a standard presser foot for stretchy fabrics instead.
Is a rolled hem foot the same as a narrow hem foot?
No, while both are used for narrow hems, a narrow hem foot typically creates hems 1/4 inch or wider, and does not roll the edge as tightly as a rolled hem foot. Rolled hem feet are designed for the tightest possible hems, 1/8 inch or smaller.
Do I need a special sewing machine to use a rolled hem foot?
No, rolled hem feet are compatible with almost all modern sewing machines, from basic beginner models to advanced computerized machines. Just make sure the foot is compatible with your machine’s presser foot attachment system (snap-on or screw-on).
Can beginners use a rolled hem foot?
Yes! While it takes 10-15 minutes of practice on scrap fabric to get the hang of it, beginners can absolutely use a rolled hem foot. Start with a medium-weight cotton scrap before moving to delicate fabrics like chiffon or silk.
Conclusion
A rolled hem foot is one of the most useful specialized presser feet you can add to your sewing kit, especially if you work with delicate fabrics regularly. Now that you know what a rolled hem foot does, you can stop struggling with hand-rolled hems and create professional-looking finishes in a fraction of the time. Start by practicing on scrap fabric for 10 minutes, then try hemming a simple project like a chiffon scarf or silk napkin. With a little practice, you’ll wonder how you ever sewed without it.