Drawstrings are a common feature in clothing like hoodies, joggers, sweatpants, shorts, and even fabric bags, helping you adjust fit and maintain comfort. However, when a drawstring slips inside the casing, it can quickly become frustrating to pull it back out.
Many people try using safety pins or their fingers, but this method is often slow and unreliable, as the string can get twisted or stuck inside the fabric tunnel. This is where understanding how to use a drawstring threader can make the process much easier.
A drawstring threader is a simple yet effective tool designed to guide the string smoothly through the fabric channel without damaging the material or wasting time. In this guide, you’ll learn how to use a drawstring threader step by step, along with practical tips to fix any drawstring quickly and efficiently.
What Is a Drawstring Threader?
Ciqkuic 6pcs Drawstring Threader Tool Set
Check PriceA drawstring threader is a sewing helper tool designed to pull strings, cords, or elastic through narrow fabric tunnels. Instead of pushing the string manually, the tool carries it from one end to the other in a controlled motion.
It is commonly used in clothing repair, tailoring, and DIY sewing projects. The biggest advantage of this tool is that it removes guesswork and makes the process much faster and cleaner.
Types of Drawstring Threaders
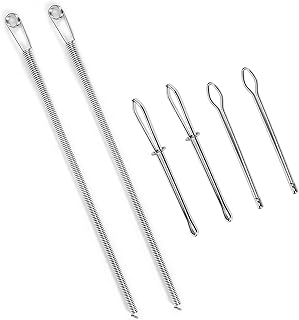
There are different types of drawstring threaders, and each one works slightly differently depending on the material and usage.
A flexible plastic threader is the most common type. It bends easily and can pass through long or curved fabric tunnels without much effort. It is lightweight and perfect for home use.
A metal clamp threader has a stronger grip mechanism. It holds the drawstring tightly so it does not slip while pulling through the fabric. This type is especially useful for slippery or smooth cords.
A bodkin-style threader is a traditional sewing tool made of metal or hard plastic. It is strong, durable, and suitable for repeated use, especially in thicker fabrics or heavier drawstrings.
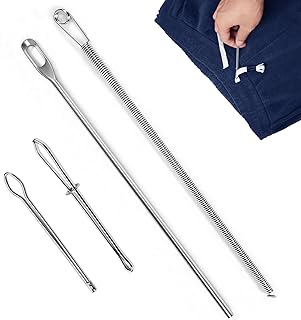
4Pcs Stainless Steel Drawstring Threader Kit
Check PriceKey Parts of a Drawstring Threader
Every drawstring threader has a few basic parts that help it function properly.
The handle or grip area is what you hold while working. It gives you control over the movement of the tool inside the fabric.
The long shaft or body allows the tool to travel through the entire fabric casing smoothly without getting stuck.
The clip, hook, or eye at the end is the part that holds the drawstring securely so it can be pulled through the fabric tunnel.
Step-by-Step: How to Use a Drawstring Threader
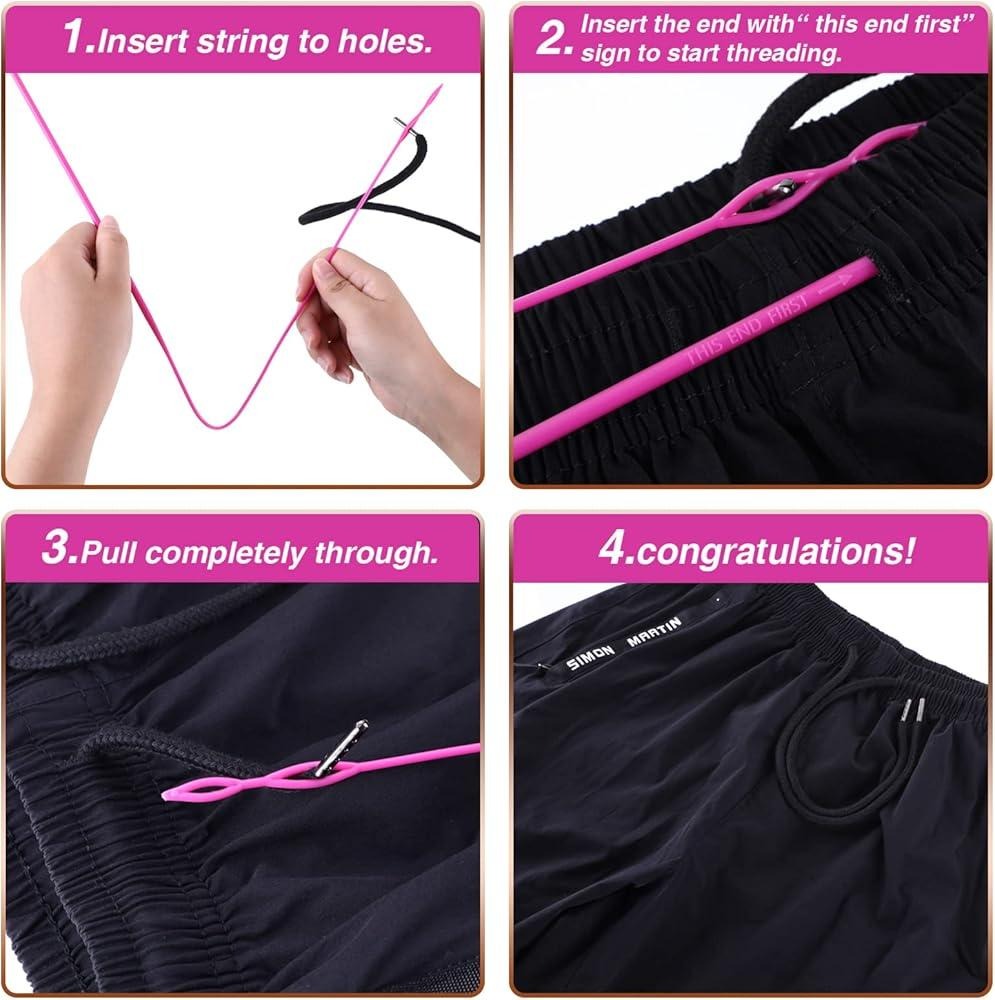
Step 1: Prepare the Drawstring and Threader Properly
Before starting, always check the condition of the drawstring. If the end is frayed or soft, it will not pass easily through the tool or fabric. In that case, trim it neatly or wrap a small piece of tape around the end to make it stiff. This simple trick makes insertion much easier.
Also inspect your drawstring threader. Make sure there is no damage, and the clamp or loop is working properly. A weak grip can cause the string to slip during the process.
Step 2: Attach the Drawstring Securely to the Tool
Now fix the drawstring into the threader carefully.
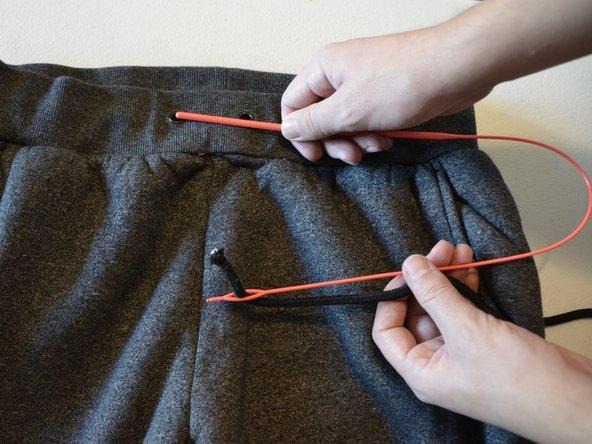
If you are using a loop-type threader, pass the string through the loop and fold it slightly so it stays locked in place while moving.
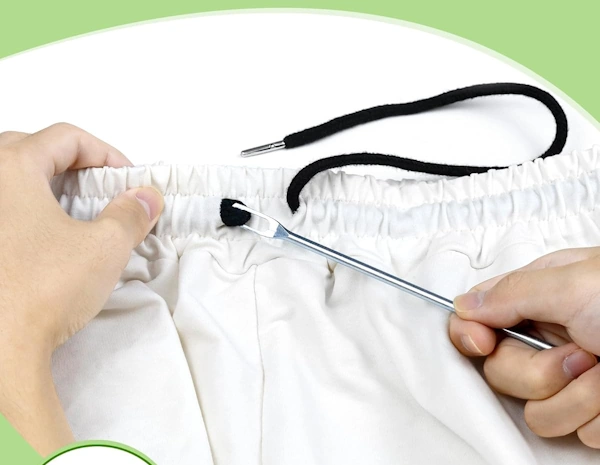
If you are using a clamp-style threader, press the grip tightly so the string is held firmly. It should not move or slip even if pulled gently.
This step is very important because if the string comes loose inside the fabric, it becomes harder to recover.
Step 3: Insert the Threader into the Fabric Opening
Find the opening of the casing where the drawstring goes. This is usually located at the waistband, hoodie hood, or bag tunnel.
Hold the fabric firmly with one hand so it does not shift. Now gently insert the threader into the opening.
Do not push aggressively. Instead, guide it slowly so it enters the tunnel without creating folds or tension in the fabric.
Step 4: Move the Threader Through the Entire Fabric Tunnel
This is the most important and time-consuming step.
Slowly guide the threader through the entire casing. You can either push it forward or pull the fabric over it depending on what feels more comfortable.
Keep your movement steady and controlled. If you rush, the fabric may twist inside or the string may come loose. If you feel resistance, do not force it. Instead, slightly adjust the fabric and continue.
The goal is smooth movement from one end to the other without disturbing the inside structure of the fabric.
Step 5: Pull the Threader Out Carefully
Once the threader reaches the opposite opening, slowly pull it out.
As you remove it, the drawstring will naturally follow through the fabric tunnel. Make sure you do this step slowly so the string does not get stuck halfway.
Step 6: Detach and Adjust the Drawstring
Now remove the drawstring from the threader completely.
After that, adjust both sides of the drawstring so they are equal in length. If the fabric has bunched up during the process, gently smooth it out with your fingers.
This ensures the final look is clean and balanced.
Step 7: Final Movement Check
At the end, test the drawstring by pulling it back and forth.
It should move freely inside the casing without resistance. If it feels tight, gently massage the fabric along the tunnel to fix any internal folding.
Tips for Better Results
Working with a drawstring threader becomes much easier when you follow a few practical habits.
Always make sure the drawstring end is stiff before starting. A soft or frayed end creates friction and makes it harder to insert into the tool.
Work slowly instead of rushing through the fabric. Controlled movement helps you avoid internal twisting and keeps the string aligned properly inside the casing.
Keeping the fabric straight during the process is also very important. If the fabric folds or twists, the threader may get stuck halfway and require restarting the process.
Good lighting makes a big difference because it helps you clearly see the opening and track the movement of the tool inside the fabric.
Finally, always choose the right type of threader depending on your fabric thickness. A flexible one works better for light fabrics, while metal types are better for thicker materials.
Common Mistakes to Avoid
One of the most common mistakes is not securing the drawstring properly at the start. If it is loosely attached, it can slip off inside the fabric, making recovery difficult.
Another mistake is forcing the tool through tight or folded areas. This can damage the fabric or bend the threader.
Many people also pull too quickly when the tool reaches the other side. This often causes the string to twist or detach halfway through the casing.
Ignoring fabric bunching is another issue. If the fabric gathers inside the tunnel, the drawstring will not move smoothly even after insertion.
When to Use a Drawstring Threader
A drawstring threader is especially useful when working with hoodies and sweatshirts, where the drawstring is hidden inside a long hood channel. It saves time and avoids frustration.
It is also helpful for sweatpants and shorts where waistbands have tight elastic casings that are difficult to access manually.
In fabric bags and pouches, drawstring threaders make it easy to replace cords without opening stitches or damaging seams.
It is also commonly used when replacing lost or damaged drawstrings in everyday clothing.
Advantages of Using a Drawstring Threader
The biggest advantage of using a drawstring threader is the amount of time it saves. What normally takes several minutes or even longer can be done in a very short time.
It also prevents damage to the fabric because you are not forcing fingers or sharp objects through the casing.
For beginners, it makes sewing tasks much easier and less frustrating because it removes guesswork from the process.
It also works well on long fabric tunnels where manual threading is almost impossible.
Overall, it simplifies clothing repair and makes the process smooth and efficient even for non-professionals.
Conclusion
A drawstring threader may look like a small and simple tool, but it is extremely useful in everyday sewing and clothing repair. Once you understand the correct step-by-step method, you can fix any drawstring quickly without frustration.
By using proper preparation, slow movement, and correct handling, you can make the process smooth and professional every time.