
If you sew or use a serger regularly, you probably have a growing collection of thread cones taking up space on your work surface. Learning how to organize thread cones is the key to keeping your sewing area clutter-free, avoiding frustrating tangles, and making it easy to find the color you need mid-project. Whether you have a small stash of 10 cones or a commercial collection of 200, these strategies will work for you.

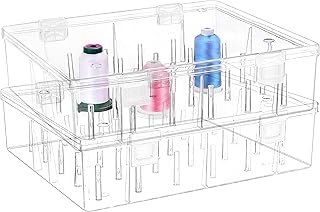
ArtBin 6901AB Cone Thread Tray, Sewing & Embroidery Serger Cone Thread Spool Assortment Organizer
Check PriceWhy Proper Thread Cone Organization Matters
Thread cones are taller, heavier, and bulkier than standard thread spools, which makes them far more likely to tip over, roll off tables, and tangle with neighboring cones if left unorganized. In my 12 years of sewing and serging, I’ve tripped over fallen cones, spent 10 minutes untangling two cones that rolled together, and wasted hours searching for a specific shade of navy polyester thread in a messy pile. A simple organization system fixes all of these issues, and offers additional benefits too.
Common Problems With Unorganized Thread Cones
- Tangled thread ends that fray or knot when you try to use them
- Wasted time searching for specific colors or fiber types mid-project
- Dust and lint buildup on cone surfaces that transfers to fabric
- Knocked-over cones spilling thread across your work surface
- Premature thread fading from exposure to direct sunlight
These issues may seem small individually, but they add up to lost time, wasted thread, and unnecessary frustration every time you sew. A good organization system eliminates all of these problems for less than $50 for most home sewers.
Prep Your Thread Cones Before Organizing
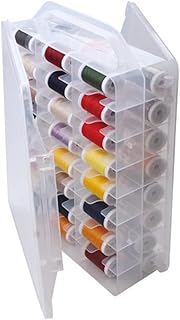
New brothread Pack of 2 Tall and Clear Storage Box/Organizer for 2×30 Home Embroidery & Cotton Thread Spools
Check PriceJumping straight into storage without prepping your cones first will lead to a messy system that falls apart in a few weeks. Take 30 minutes to sort, label, and inspect your stash before you put anything away.
Sort Cones by Type and Color
Start by grouping cones by fiber type: polyester (the most common for sergers), cotton, silk, metallic, and specialty threads like wooly nylon. Next, sort each fiber group by color family: reds, blues, greens, neutrals, etc. If you sew professionally, sort by thread weight (40wt, 60wt, 80wt) as well, since different weights are used for different projects. This step makes it easy to grab exactly what you need without digging through unrelated cones.
Label Each Cone Clearly
Most cone thread comes with a small paper label listing the color number, brand, and fiber type, but these labels often fall off or fade over time. Re-label each cone with a small adhesive label on the base or top of the cone, using a permanent, acid-free marker. Include the color name/number, brand, and fiber type so you can reorder the exact same thread later. For pre-wound cones, add a label noting how much thread is left if you’ve used part of the cone.
- Use ½-inch round adhesive labels to avoid covering the thread itself
- Write labels in block letters so they are easy to read from a distance
- Avoid using tape, which leaves sticky residue on cones over time
Top 7 Thread Cone Storage Solutions
46 Grids Sewing Organizer, Double Sided Thread Box Storage, Portable Clear Plastic Organizer Box
Check PriceThese seven storage solutions work for every stash size and budget. For pre-made options designed specifically for cone shapes, check out our guide to the best cone thread storage boxes for every budget. If you use serger thread cones primarily, our roundup of creative serger thread storage ideas includes DIY and store-bought options for small spaces.
1. Wall-Mounted Cone Racks
Wall-mounted racks feature horizontal pegs that slide through the center hole of each cone, holding them vertically against the wall. They are the most space-efficient option for small sewing rooms, as they use empty wall space instead of desk or floor space.
- Pros: Saves desk space, keeps all cones visible at eye level, easy to install in most homes
- Cons: Requires permanent wall mounting (not ideal for renters), pegs may not fit extra-large industrial cones
2. Stackable Divided Plastic Boxes
Clear plastic boxes with deep, divided sections are designed to fit tall cones without tipping. They stack on top of each other to save floor space, and the clear plastic lets you see all your colors without opening the box.
- Pros: Protects cones from dust and sunlight, portable for taking to sewing classes, affordable for large stashes
- Cons: Divider sizes vary, so measure your largest cone before buying, plastic can crack if dropped
3. Custom Drawer Inserts
If you have empty drawers in your sewing table, custom foam or plastic inserts with circular cutouts fit cones perfectly. The cones sit flush with the drawer surface, so you can slide the drawer closed without crushing thread ends.
- Pros: Keeps cones out of sight for a tidy room, protects thread from dust, uses existing furniture
- Cons: Only works if you have spare drawer space, custom inserts can be expensive for large drawers
4. Over-the-Door Shoe Organizers
Clear plastic shoe organizers that hang over a door have 24+ small pockets that fit one cone each. They are the cheapest option for large stashes, costing less than $15 for most models.
- Pros: Extremely affordable, no installation required, holds 24+ cones in a small footprint
- Cons: Pockets can stretch over time, cones may fall out if the door is slammed
5. Pegboard Storage
Pegboards mounted to the wall with small hooks or pegs hold cones horizontally or vertically. You can rearrange the pegs as your stash grows, making this a flexible option for sewers who buy new thread often.
- Pros: Fully customizable, cheap to set up, works for cones and other sewing notions
- Cons: Requires wall mounting, pegs may not fit all cone sizes
6. Color-Coded Storage Bins
Large lidded bins labeled by color family (e.g., “Red Cones”, “Blue Cones”) are ideal for storing 50+ cones. Use small dividers inside the bin to keep cones from rolling around, and stack bins on a shelf to save space.
- Pros: Holds very large stashes, protects cones from dust and sunlight, easy to move
- Cons: Hard to see individual colors without opening the bin, bins take up floor or shelf space
7. Rotating Cone Carousels
Lazy Susan-style carousels with tiered pegs hold 30+ cones and spin 360 degrees, so you can see all your colors from one spot. They sit on your desk or sewing table for easy access while you work.
- Pros: Easy to access while sewing, compact footprint, no installation required
- Cons: Takes up desk space, may tip over if overloaded with heavy cones
Tips for Small Sewing Spaces
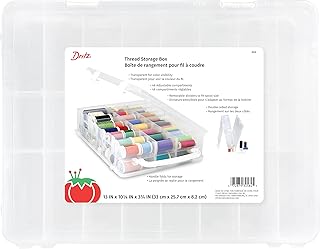
Dritz Thread Storage Box Organizer – Double-Sided 48 Adjustable Compartments
Check PriceIf you sew in a corner of a bedroom or a small apartment, you don’t have room for large storage units. These space-saving hacks work for stashes of 50 cones or less.
Vertical Storage Hacks
- Use wall-mounted racks or pegboards to keep cones off your work surface
- Stack narrow plastic boxes on a bookshelf instead of a floor-standing unit
- Hang an over-the-door shoe organizer on the back of your sewing room door
Multi-Purpose Storage Options
Choose storage that also holds other sewing notions to maximize space. For example, a drawer insert for cones can also hold small scissors, seam rippers, and extra needles in the empty sections. A wall-mounted pegboard can hold cones, rulers, and cutting mats on the same surface.
How to Maintain Your Organized Thread Cone Stash
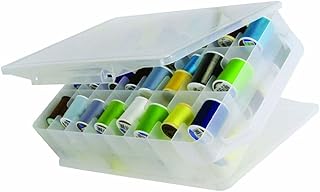
Double-Sided Sewing Organizer Box with 46 Grids – Clear Plastic Thread Storage Case
Check PriceOnce you’ve set up your storage system, a few simple habits will keep it tidy for years. Most sewing thread lasts 2-5 years if stored properly, according to trusted guidelines from leading craft experts, so proper maintenance also extends the life of your thread.
Rotate Stock Regularly
When you buy new cones, move older cones to the front of your storage area so you use them first. This prevents thread from drying out and becoming brittle, which causes breakage while sewing. If you have cones that are more than 5 years old, test them on a scrap piece of fabric before using them on a project to check for brittleness.
Clean Your Storage Area Monthly
Dust builds up on cone thread quickly, especially if your storage is open. Wipe down wall racks and pegboards with a dry microfiber cloth once a month, and vacuum out plastic boxes or bins every 3 months. This keeps lint and dust from transferring to your fabric when you sew.
Tidy Up After Every Project
After you finish a project, return all cones to their labeled spot immediately, instead of leaving them on your work surface. Tuck the thread end into the center hole of the cone or use a small cone cap to keep it from unraveling. This 2-minute habit prevents most tangles and messes before they start.
Frequently Asked Questions About Thread Cone Organization
Can I store thread cones in a plastic bin without dividers?
Yes, but only if you wrap each cone individually in acid-free tissue paper or place them in small plastic bags. Without dividers, cones will roll around and tangle every time you move the bin. Divided bins are a better long-term option for stashes larger than 10 cones.
How do I keep thread cones from unraveling when stored?
First, tuck the loose thread end into the center hole of the cone. If the end slips out, use a small rubber cone cap (sold for less than $0.50 each) to cover the top of the cone, or clip the end to the cone with a small binder clip. Avoid using tape, which leaves sticky residue on the thread.
Is it better to store thread cones horizontally or vertically?
Vertical storage (cones standing on their base) is better for 90% of users. It takes up less space, keeps labels facing up for easy reading, and prevents cones from rolling. Horizontal storage (cones lying on their side) only works if you have shallow drawers with dividers that hold cones in place.
How often should I reorganize my thread cone stash?
Do a full reorganization every 6 months, or whenever you add 10+ new cones to your collection. Quick weekly tidies—returning stray cones to their spots and re-wrapping unraveled ends—will keep your system intact between full reorganizations.
Can I store thread cones in direct sunlight?
No, direct sunlight fades thread dye quickly, especially for bright colors like red and orange. Store cones in a dark closet or use opaque storage bins if your sewing room gets a lot of natural light. If you use open wall racks, hang them on a wall that does not get direct sun during the day.
Final Tips for Organizing Thread Cones
Organizing your thread cone stash does not have to be expensive or time-consuming. Start with a 30-minute sort and label session, then pick one storage solution that fits your space and budget. If you are unsure where to start, our guide to the best cone thread storage boxes breaks down top-rated options for every stash size, and our serger thread storage ideas include DIY hacks that cost less than $10. Remember to tidy up after every project, and your sewing room will stay clutter-free for years to come.