Whether you’re brand new to sewing or an experienced quilter, a bias tape maker is one of those small tools that can make your projects look much more professional with far less effort. This guide walks you through everything you need to know: what a bias tape maker is, how to choose one, exactly how to use it step by step, common problems and fixes, and a quick overview of popular brands like Clover and Simplicity.
Use this as your main reference article, then branch into more specific tutorials or product reviews as needed.
What Is a Bias Tape Maker?
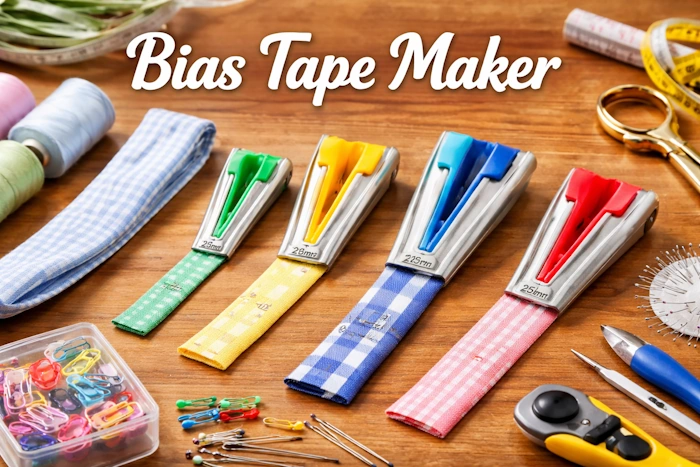
A bias tape maker is a small tool, usually metal or heat‑resistant plastic, that folds a strip of fabric into neat bias tape as you pull it through. You press the folded strip with an iron as it exits the tool, and you get perfectly even bias tape ready for sewing.
Bias tape itself is fabric cut on the bias (at a 45° angle to the selvage). Cutting on the bias gives the strip stretch and flexibility, which makes it perfect for:
- Finishing quilt edges
- Binding necklines and armholes
- Finishing curved hems
- Adding decorative edges to placemats, bags, aprons, etc.
What the tool actually does:
- You cut bias strips from fabric.
- You feed a strip into the bias tape maker.
- As you pull it through, the tool folds the raw edges toward the center.
- You press the folded strip with an iron.
- You get consistent, professional‑looking bias tape ready for sewing.
Without a bias tape maker, you’d have to fold both edges by hand and press them evenly, which is slow and often uneven.
Why Use a Bias Tape Maker? (Benefits)
A bias tape maker helps with:
- Speed – Make several meters of bias tape in minutes rather than folding each strip by hand.
- Consistency – Your tape will be the same width for its entire length.
- Professional finish – Clean, crisp folds for tidy, durable edges.
- Savings – Making your own tape from fabric you already have is usually cheaper than buying pre‑made bias tape.
- Customization – Match bias tape exactly to your project using your own fabric, prints, or colors.
For quilters, this is especially important: quilt binding often needs long continuous tape in specific colors or prints. A bias tape maker lets you make that easily and consistently.
Types of Bias Tape Makers
There are two main types: manual and electric bias tape makers. Both do the same basic job but in slightly different ways.
Manual Bias Tape Makers
These are the most common. They’re usually a small metal shell with a slot at one end and a shaped opening at the other.
How they work:
- You feed the fabric strip into the back slot.
- Pull the strip through the front.
- As it exits, the tool folds the raw edges to the center.
- You hold an iron at the exit point to press the folds down.
Pros:
- Very affordable (often under $10–$20).
- Portable and simple, no electricity.
- Great for beginners and occasional use.
Cons:
- You must pull the strip by hand.
- Takes more time if you need lots of bias tape.
- Requires a bit of rhythm coordinating tool + iron.
Manual bias tape makers come in several fixed sizes, such as:
- 6 mm / 1⁄4″
- 12 mm / 1⁄2″
- 18 mm / 3⁄4″
- 25 mm / 1″
Most quilting and garment projects are well covered with 1⁄2″ and 3⁄4″ sizes.
Electric Bias Tape Makers
These are small electric machines (like a mini press with a feed mechanism). They pull the strip through automatically and often include a heated plate so you don’t need a separate iron.
How they work:
- You insert the fabric strip into a special tip (different tips for different widths).
- The machine pulls the strip through the heated area.
- It folds and presses the strip in one pass.
- Finished bias tape exits on the other side.
Pros:
- Much faster for large quantities (quilt shops, production sewing, frequent quilting).
- Less hand strain and more consistent pressure/heat.
- Excellent for making long continuous bias tape.
Cons:
- More expensive (typically $40–$100+).
- Requires a power outlet and dedicated space.
- Slight learning curve to get speed and temperature just right.
Simplicity bias tape maker and some models from Clover and other brands are popular electric options.
Bias Tape Widths Explained
When you see sizes like 12 mm bias tape maker, that usually refers to the finished width of the tape after it’s sewn on and folded.
Common widths:
- 6 mm (1⁄4″) finished – Very narrow; great for tiny edges or piping.
- 12 mm (1⁄2″) finished – Good all‑purpose size for clothing and lightweight projects.
- 18 mm (3⁄4″) finished – Excellent for quilt bindings and medium‑weight projects.
- 25 mm (1″) finished – Great for thicker fabrics, bags, and home décor.
You will cut your strips wider than the finished width. Each brand gives a chart, but a simple rule of thumb is:
Strip width ≈ 2 × finished width (for single‑fold tape),
or ≈ 4 × finished width (for double‑fold binding around an edge).
How to Choose the Right Bias Tape Maker
When you’re deciding which bias tape maker to buy (or which size to use), consider:
- Project type
- Quilts: 18 mm / 3⁄4″ or 25 mm / 1″ are popular for sturdy binding.
- Garments: 12 mm / 1⁄2″ bias tape is common for necklines, armholes, and facings.
- Bags/home décor: 18–25 mm for thicker seams and visible trim.
- How much tape you need
- Occasional small projects → Manual maker is enough.
- Regular quilting or production sewing → An electric bias tape maker (like the Simplicity bias tape maker) can save a lot of time.
- Fabric type
- Lightweight cottons and quilting cotton → Any decent tool works.
- Thicker fabrics (canvas, denim) → Larger size (18–25 mm) and a sturdy, preferably metal, maker.
- Budget
- Very low budget → Get a basic manual kit with several sizes.
- Higher budget / heavy use → Consider investing in a reliable electric unit plus multiple tips.
Step‑by‑Step: How to Use a Manual Bias Tape Maker
This section focuses on bias tape sewing using a manual bias tape maker, as that’s the most common starting point.
1. Gather Tools and Materials
You’ll need:
- Bias tape maker (choose your width)
- Fabric (pre‑washed and pressed)
- Rotary cutter + mat, or sharp scissors
- Quilting ruler
- Iron and ironing board (or heat‑resistant pressing surface)
- Pins or clips (optional)
- Thread and sewing machine (for attaching the tape later)
2. Cut Strips on the Bias
- Square up your fabric. Press it flat.
- Fold on the bias. Bring one corner over so the selvage aligns with another edge, creating a triangle. The fold is the 45° bias.
- Cut along the bias. Use your ruler and rotary cutter to cut strips at the width recommended for your bias tape maker (check the packaging). For example, for a 12 mm (1⁄2″) maker, you might cut strips around 1″–1 1⁄8″ wide.
- Join strips if needed.
- Place two strips right sides together at 90°.
- Sew diagonally corner to corner.
- Trim seam allowances to about 1⁄4″ and press open.
This gives you longer, continuous strips without bulky joins stacked in one spot.
3. Load the Strip into the Bias Tape Maker
- Trim one end of the strip into a point. This helps it feed in more easily.
- Insert the point into the narrow end (back) of the bias tape maker.
- Use a pin or awl (or the little poker some kits include) to gently push the fabric until it appears at the wide exit.
- Pull a few centimeters/inches through so you can grip it.
4. Press as You Pull
- Set your iron to a temperature suitable for your fabric (e.g., cotton setting for quilting cotton).
- Position the bias tape maker on your ironing board with the folded tape end pointing toward the iron.
- With one hand, pull the maker slowly so the strip comes out folded at the front.
- With the other hand, follow immediately with the iron, pressing the folded tape as it emerges. Keep the iron close to the tool to lock in the folds quickly.
- Continue pulling and pressing until you reach the end of the strip.
You now have single‑fold bias tape: both raw edges are folded in toward the center, wrong sides together.
5. Make Double‑Fold Binding (Optional)
If you’re binding a quilt or an edge:
- Take your single‑fold bias tape.
- Fold it in half again, with the folded edges together and one side slightly shorter than the other if you like (makes stitching easier).
- Press this fold along the entire length.
Now you have double‑fold bias binding, ready to sew onto an edge.
How to Attach Bias Tape (Quick Overview)
Attaching bias tape is its own tutorial, but here’s the short version for context:
- Open one folded edge of the tape.
- Align that raw edge with the raw edge of your project, right sides together.
- Sew along the crease line (usually the inner fold).
- Fold the tape over the raw edge to the other side, covering the seam.
- Stitch in the ditch from the front, or topstitch close to the edge on the back, catching the tape on the underside.
This is the basics of bias tape sewing. You can refine this further for perfect corners, curves, and invisible stitching in separate articles.
Pro Tips for Perfect Bias Tape
- Pre‑wash your fabric so your handmade bias tape doesn’t shrink later.
- Starch spray can help flimsy or slippery fabrics behave better when feeding through the maker.
- Cut accurately. Uneven strip widths give uneven folds.
- Go slowly at first. Pull the tool smoothly; jerky movement can distort the folds.
- Use the right size maker. Too narrow a maker for thick fabric = jammed or distorted tape.
- Mark the bias direction on leftover fabric, next time you cut, it’s easier to line up.
- For curves (like armholes and necklines), bias (45°) is much better than straight grain; it stretches and lays flat.
Common Problems & How to Fix Them
| Problem | Likely Cause | Solution |
|---|---|---|
| Tape isn’t folding evenly | Strip too wide or uneven; tool size mismatch | Recut strips to correct width; check tool instructions |
| Fabric jams in the tool | Strip too thick or edges fraying | Trim frayed edges, use lighter fabric, or press strip flat before feeding |
| Wavy / distorted tape | Pulling too quickly or not pressing right behind the tool | Slow down, keep consistent tension, follow closely with iron |
| Seams in the tape are bulky | Seam allowances not trimmed or pressed open | Trim seams to 1⁄4″ and press seams open before feeding through |
| Tape shrinks after washing | Fabric not pre‑washed | Pre‑wash fabrics before making tape |
Popular Bias Tape Maker Brands & Options
Clover Bias Tape Makers
Clover is one of the best‑known brands for manual bias tape makers. Their tools are generally metal, sturdy, and smooth.
Why people like Clover:
- Reliable, consistent folding
- Available in multiple fixed sizes
- Widely stocked in fabric and quilt shops
- Good value for money
They also sell sets that include several sizes in one pack, which is a good start if you sew a variety of projects.
Simplicity Bias Tape Maker (Manual and Electric)
Simplicity offers both traditional manual tools and an electric bias tape maker that many quilters and dressmakers use when they need to produce a lot of tape.
The Simplicity bias tape maker (electric) generally includes:
- A base unit with a heated plate
- Interchangeable tips for different widths
- A feed mechanism that pulls the fabric through while heating and folding
Advantages:
- Much faster than doing it all by hand
- More consistent folds over very long lengths
- Good choice if you make lots of quilt bindings or run a small sewing business
If you don’t need the speed, Simplicity’s regular manual bias tape makers are also easy to use and beginner‑friendly.
Generic and Multi‑Size Kits
You’ll also find many generic bias tape maker kits that include several sizes plus extras like:
- Awl or poker
- Clips
- Measuring gauge
These can be fine for starting out, especially on a budget. The main difference is often in how smoothly the fabric glides through and how long the tool lasts.
Continuous Bias Tape for Quilts (Overview)
For quilters, continuous bias tape is a big time‑saver: instead of sewing many short strips together, you create one long continuous strip from a single square of fabric.
Basic idea:
- Start with a square of fabric.
- Mark and cut it into a bias tube using a special method (cutting and resewing at an angle).
- You end up with a continuous spiral of bias strip.
- Feed this long strip through your bias tape maker exactly as you would a shorter strip.
The electric bias tape maker (like the Simplicity model) is particularly handy here, since it will pull and press many meters of tape without your hands getting tired.
Caring for Your Bias Tape Maker
To keep your tool working smoothly:
- Remove lint regularly with a small brush or toothpick.
- Don’t use oil or lubricants, they can stain fabric.
- If the tool is metal, store it dry to prevent rust.
- Keep all sizes together in a pouch or box so they don’t get lost.
- For electric units, let them cool fully before storing and follow the manufacturer’s cleaning instructions.
Final Thoughts
A bias tape maker is a small, inexpensive tool that can dramatically improve your bias tape sewing and overall project finish:
- It saves time.
- It gives you perfectly even bias tape in any fabric you choose.
- It allows you to customize bindings and trims to match your quilts and garments.
For most beginners and home quilters:
- Start with a manual bias tape maker in 12 mm (1⁄2″) and 18 mm (3⁄4″).
- Learn the basics of cutting bias strips, feeding them through, and pressing as you go.
- As you sew more quilts or garments, consider upgrading to an electric model such as the Simplicity bias tape maker for faster production.
From here, you can spin off dedicated articles on topics like:
- Best Bias Tape Maker: Top Picks Compared
- How to Sew Bias Tape on Curves and Corners
- Simplicity Bias Tape Maker Review
But this guide gives you the full foundation you need to understand, choose, and confidently use a bias tape maker in your sewing and quilting projects.

Hi, I’m Safura. What are you sewing today? If you have any questions or need help with anything related to sewing, please feel free to ask. I’m always here to assist you with sewing-related issues.