
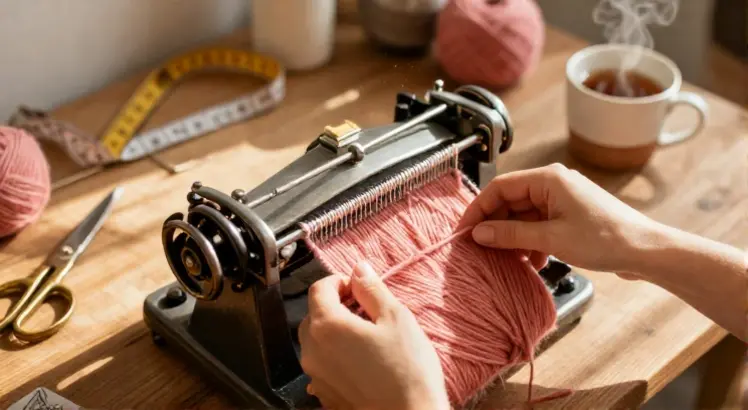
Learning how to use knitting machine turns long hours of hand knitting into efficient, creative sessions. Whether you want to make cozy scarves, chunky sweaters, or delicate lace panels, a knitting machine gives you speed and consistency that hand needles simply cannot match. Yet many beginners feel overwhelmed when they first unbox the machine. This guide breaks the process into clear steps, from setting up your device to finishing your first fabric, so you can knit with confidence.
Understanding Your Knitting Machine
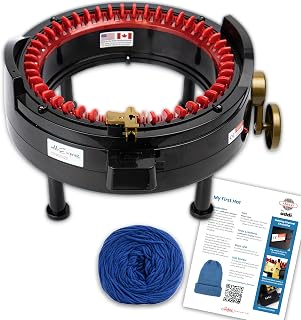
Addi Express King Size Knitting Machine Set
Check PriceBefore you start clicking away, it helps to know what type of machine you own. Knitting machines generally fall into two categories: flatbed and circular. Flatbed machines have a row of latch needles set in a metal bed, and a carriage slides across to knit stitches. Circular machines create tubes of fabric and are often used for socks, hats, or seamless garments. Entry-level machines usually have a fixed gauge, while more advanced models let you switch needle arrangements for different yarn weights.
Flatbed vs. Circular Machines
- A flatbed machine works like a tiny factory loom, knitting a flat panel row by row. It excels at sweaters, blankets, and shaped pieces.
- A circular machine uses a cylinder of needles and a revolving cam to knit in the round. It is brilliant for hats, cowls, and socks but limited for large flat items.
Choose the model that fits your projects. If you need help picking the right one, our guide to the best knitting machines compares popular home models. You can also read whether a knitting machine is a good investment before you buy.
Setting Up Your Knitting Machine
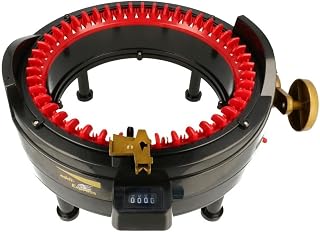
Addi Express Kingsize Knitting Machine
Check PriceA stable setup prevents dropped stitches and uneven tension. Most flatbed machines come with a table clamp. Attach the clamp to a sturdy table or desk so the machine does not wobble. Sit at a height that lets your arms move freely without hunching. If you own a circular machine, mount it securely on the included stand or a heavy base.
Assembling and Adjusting
Spread out the included components: needle bed, carriage, yarn mast, weights, and tension dial. Slide the needle bed into its housing and lock it. Attach the carriage to the rail and check that it glides smoothly. Insert the yarn mast into the designated slot and tighten the screw. Place the row counter if your machine has one. This initial assembly takes about ten minutes on most models.
Positioning the Yarn Mast and Tension Unit
The yarn mast guides the thread from the cone or ball through a series of tension discs. Run the yarn through the disc slot, then through the guide hooks down to the carriage. Proper threading prevents snags. Adjust the tension dial to a middle setting at first. You can tighten or loosen it as you test your sample swatch.
Threading the Yarn and Casting On
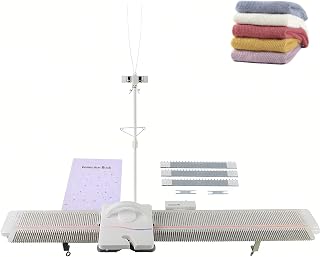
LK150 6.5mm Mid Gauge Knitting Machine
Check PriceThreading correctly is the number one skill for mastering how to use knitting machine. Every machine has a threading path marked on the mast or in the manual. Follow it precisely: yarn from the cone goes up through the top eyelet, down through the tension discs, around the check spring, then through the lower guide and into the carriage feeder. Pull a tail of about 10 inches.
The E-Wrap Cast On
The e-wrap method is the most common cast on for flatbed machines. Start with all needles in the working position. Take the yarn tail and, starting with the first needle on the left, wrap the yarn counterclockwise around the needle, moving to the right. Wrap every other needle if you want a loose cast on, or every needle for a firm edge. After you wrap the last needle, thread the yarn into the carriage and set the tension. Push the carriage slowly across the bed. The first row secures the wraps and forms the foundation.
Using a Cast On Comb
A cast on comb and weights help keep even tension. After the first row, hang the comb onto the stitches so the teeth catch the yarn between each needle. Clip on the weights. This prevents the fabric from riding up and keeps the knit uniform.
Knitting Basic Stitches
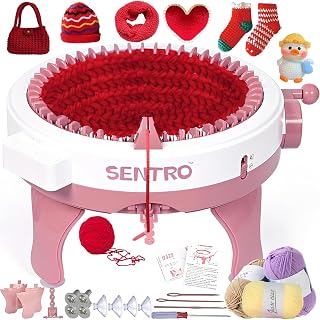
PKYOHYI Sentro 40 Needles Knitting Machine
Check PriceOnce the foundation is secure, you can start knitting. Move the carriage from left to right, then right to left, with a smooth, steady speed. Each pass creates one row. Watch the row counter to keep track. The most basic stitch is stockinette, which forms a smooth face and pebbled reverse. To switch to reverse stockinette, you simply turn the fabric over, because the machine knits stockinette on one side.
Ribbing with a Ribber Attachment
Many flatbed machines accept a ribber, a second needle bed that attaches to the main bed. With a ribber, you can knit true 1×1 or 2×2 ribbing by alternating needles between the main bed and ribber. The carriage passes over both beds simultaneously. This adds stretch and professional finish to cuffs and hems.
Changing Stitch Patterns
Most machines come with built-in stitch pattern cams or a punch card reader. Set the pattern dial, then knit. The carriage automatically selects which needles to knit or slip each row, creating tuck stitch, slip stitch, or fair isle patterns. If your machine has a punch card or electronic patterning, insert the card and select the pattern repeat. You can knit intricate motifs without counting manually.
Tension, Stitch Size, and Speed
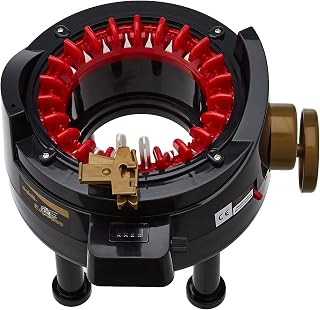
Addi Express Professional Knitting Machine
Check PriceTension is the balance between the yarn feed and the needle loop size. Dial a higher number for looser stitches and a lower number for tighter stitches. Always knit a gauge swatch before starting a project. Measure how many stitches and rows you get over 4 inches. Compare with the pattern gauge. Adjust the tension dial or change yarn weight if the numbers do not match.
Finding Your Pace
Moving the carriage too fast can cause yarn breakage or dropped stitches. Start with a slow, fluid motion. Listen for an even clicking sound. As muscle memory builds, your speed will increase naturally. Avoid jerky stops at the edges because they create tight selvages.
Common Mistakes and Quick Fixes
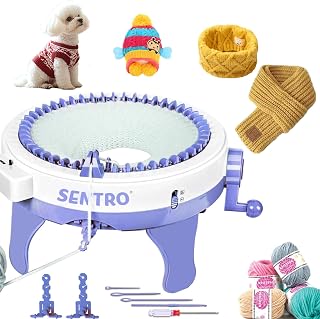
Sentro 48 Needles Double Knit Loom Machine Kit
Check PriceEven experienced machine knitters hit snags. Recognizing the common hiccups saves time and frustration.
Dropped Stitches
A dropped stitch happens when the yarn fails to catch on a needle, leaving a runaway ladder. Stop the carriage immediately. Use a latch tool or crochet hook to ladder up the stitch by hooking the loop and pulling it through the dropped strand, working upward to the current row. Then place the stitch back on the needle.
Uneven Tension
If one side of the fabric is looser than the other, check the yarn feed path. Make sure the yarn cone turns freely and does not snag. Ensure the weights hang evenly. A bent needle can also cause irregular loops, so replace any damaged needles.
Yarn Breakage
This often occurs when the tension is set too tight for the yarn thickness. Reduce the tension dial number slightly. Knots in the yarn or a rough cone edge can also snap the thread. Use smooth, quality yarns and avoid heavily textured novelty yarns if you are still learning how to use a knitting machine.
Exploring Advanced Techniques
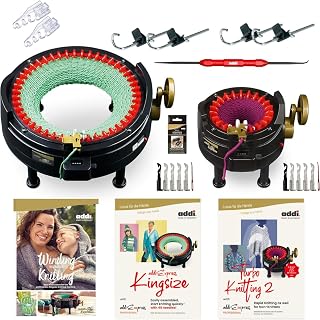
Addi I Want IT All Knitting Machine Pro Set
Check PriceOnce you are comfortable with plain knitting, try adding new skills to your repertoire.
Short Rows for Shaping
Short rows create darts, shoulder slopes, and three-dimensional shaping without cutting the yarn. You push specific needles to the hold position, knit only a portion of the row, and repeat. This technique is essential for fitted garments and bust darts.
Lace Panels and Hand Manipulation
By manually transferring stitches between needles with a transfer tool, you create eyelet holes and lace patterns. This works beautifully on sheer summer tops and decorative shawls. Practice simple eyelet rows before moving on to complex motifs.
Punch Card and Electronic Patterns
Higher-end machines read pre-punched cards or digital files. Insert the card, select the pattern length, and knit. The carriage reads the card row by row, selecting needles automatically. This opens the door to intricate fair isle, tuck stitch, and slip stitch designs without manual counting.
Frequently Asked Questions
Can I use any yarn in a knitting machine?
Most machines work best with smooth, evenly spun yarns like wool, acrylic, cotton, and blends. Thick novelty yarns can jam the carriage. Check your machine manual for the recommended yarn thickness range, usually sport, DK, or worsted weight. Cone yarns offer the most consistent feed and save time over rewinding balls.
How do I prevent the edges from curling?
Stockinette fabric naturally curls at the edges. To combat this, add a border of garter stitch (by manually transferring stitches) or knit a hem. Using a ribber to start with several rows of ribbing also creates a flat, stretchy edge. Blocking the finished piece with steam helps the fabric lie flat as well.
Do I need a lot of space for a knitting machine?
A flatbed machine requires a sturdy table about 4 feet wide and 2 feet deep for comfortable operation. Circular machines have a smaller footprint. Many knitters set up a dedicated foldable table or a sewing cabinet. Store the machine in its case when not in use to keep needles dust-free.
Is it faster to use a knitting machine than hand knitting?
Absolutely. A knitting machine can knit a sweater back in under two hours, compared to several days by hand. The machine maintains consistent tension and speed. You still need to finish seams, weave in ends, and block the piece, but the knitting itself is dramatically quicker. This is why many small batch clothing producers rely on them.
Where can I find more detailed tutorials?
Once you grasp the basics, you can explore advanced patterning and maintenance guides. For a visual walkthrough of machine knitting techniques, visit this comprehensive machine knitting beginner’s guide from a trusted crafting resource. It covers video demonstrations and project ideas that complement the steps shared here.
Conclusion
Mastering how to use knitting machine is a rewarding skill that blends craft with technology. Start with a clean setup, thread carefully, and practice simple stockinette until the rhythm feels natural. Experiment with tension, switch patterns, and gradually add ribbing and lace. Keep your machine clean and oiled per the manual, and swap needles as they wear. With consistent practice, you will be able to produce heirloom-quality knits in a fraction of the time. Pick a small first project like a scarf or dishcloth, and enjoy watching the fabric grow with each pass of the carriage.
