Oiling a sewing machine is one of the most important yet often ignored maintenance tasks. Many sewing problems, like noise, skipped stitches, or rough movement, happen simply because the machine is dry. Regular oiling keeps the internal metal parts moving smoothly, reduces friction, and extends the life of your machine. Whether you sew occasionally or daily, learning how to oil your sewing machine correctly can save you from costly repairs and frustrating stitch issues.
Why Oiling a Sewing Machine Is Important
A sewing machine has multiple metal parts that move at high speed. Without proper lubrication, these parts rub against each other, causing friction and wear. Oiling reduces heat buildup, prevents rust, and ensures smooth operation. A well-oiled machine runs quietly, produces even stitches, and responds better to fabric movement. Ignoring oiling can lead to stiff hand wheels, thread breakage, and even permanent internal damage over time.
Tools You Need Before Oiling
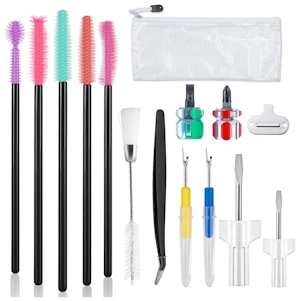
Before starting, gather everything you need to avoid interruptions. You will need sewing machine oil (clear and lightweight), a small lint brush or soft paintbrush, a clean lint-free cloth, and a screwdriver if your machine requires opening panels. Having these tools ready ensures proper cleaning before oiling, which is just as important as the oil itself.
When Should You Oil Your Sewing Machine
The timing depends on how often you sew. If you use your machine regularly, oiling once every few weeks is ideal. Occasional users can oil every few months. If the machine sounds louder than usual, feels stiff, or hasn’t been used for a long time, it likely needs oil. Always check your machine manual, as some modern machines require less frequent oiling.
Parts of a Sewing Machine That Need Oil
The most important areas for oil are moving metal parts. These usually include the bobbin race, hook assembly, needle bar, presser bar, and any visible joints where metal parts slide or rotate. A single drop of oil is usually enough for each point. These areas experience the most movement and benefit the most from proper lubrication.
Parts You Should Never Oil
Not all parts of a sewing machine should be oiled. Never oil plastic gears, rubber belts, electronic components, or the motor. Avoid oiling tension discs, feed dogs, or areas where oil could drip onto fabric. Applying oil to the wrong parts can attract lint, cause slipping, or damage sensitive components.
Step-by-Step Guide: How To Oil a Sewing Machine
Step 1: Unplug and Prepare the Machine
Always unplug the machine before maintenance. This prevents accidents and allows safe access to internal parts. Place the machine on a clean, flat surface with good lighting so you can clearly see what you are doing.
Step 2: Remove Needle, Presser Foot, and Bobbin Case
Remove the needle, presser foot, and bobbin case to access the bobbin area easily. This step also prevents oil from accidentally touching these parts during application.
Step 3: Clean Lint and Dust First
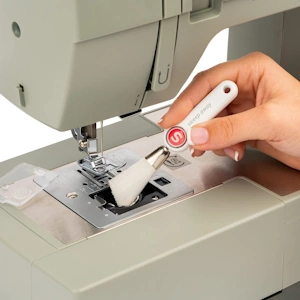
Use a lint brush to remove dust, thread bits, and fabric lint from the bobbin area and other exposed parts. Never oil over lint, as it can turn into sticky residue and cause jams.
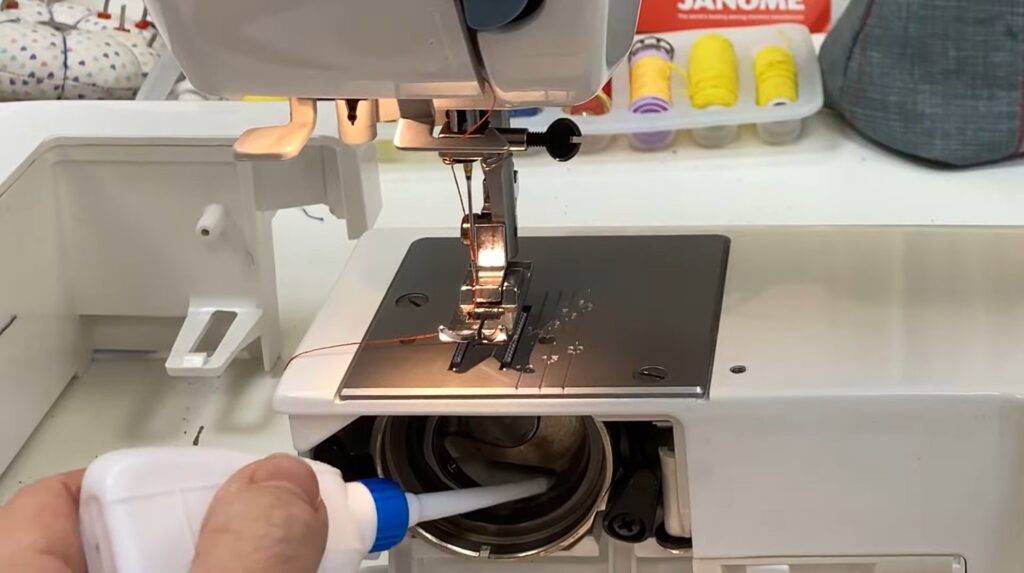
Step 4: Apply Sewing Machine Oil Correctly
Apply only one small drop of oil to each recommended oiling point. Do not flood the machine with oil. Focus on metal joints and moving parts. If oil drips or pools, wipe off the excess immediately with a clean cloth.
Step 5: Run the Machine to Distribute Oil
After oiling, reassemble the machine and run it for a few minutes without thread or fabric. This helps spread the oil evenly. Wipe away any excess oil that appears afterward.
How Much Oil Is Enough (Common Over-Oiling Mistakes)
More oil does not mean better performance. Over-oiling can cause oil stains on fabric, attract lint, and lead to messy buildup inside the machine. One drop per oiling point is usually sufficient. If oil leaks out after running the machine, you’ve likely used too much.
Signs Your Sewing Machine Needs Oiling
Common signs include squeaking or grinding noises, stiff hand wheel movement, uneven stitching, slow operation, and frequent thread breakage. If your machine hasn’t been used for months, oiling before sewing is highly recommended.
Common Sewing Machine Problems Caused by Lack of Oil
A dry machine can cause skipped stitches, tension issues, noisy operation, and overheating. In severe cases, parts may seize or wear out prematurely. Regular oiling prevents these problems and keeps your machine running efficiently.
Oiling Frequency for Different Types of Users
Beginners who sew occasionally may oil every 2–3 months. Regular users should oil every few weeks, especially after long sessions. Heavy users, such as tailors or quilters, may need weekly oiling depending on machine usage. Always adjust frequency based on performance and sound.
Can You Use Alternatives Instead of Sewing Machine Oil?
Household oils like cooking oil, WD-40, or motor oil should never be used. These oils are too heavy, can gum up the machine, and may cause long-term damage. Use only oil specifically designed for sewing machines to ensure safe and smooth operation. Learn about sewing machine oil and how it protects your machine.
Tips to Keep Your Sewing Machine Smooth Between Oilings
Cover your machine when not in use to prevent dust buildup. Clean lint regularly, especially around the bobbin area. Store the machine in a dry place to avoid rust. Avoid forcing fabric through the machine, as this strains internal parts.
Conclusion
Oiling your sewing machine is a simple but essential maintenance task that ensures smooth stitching, quiet operation, and long machine life. By oiling the correct parts, avoiding over-oiling, and maintaining a regular schedule, you can prevent the most common sewing problems. A well-oiled machine not only performs better but also makes sewing more enjoyable and stress-free.