
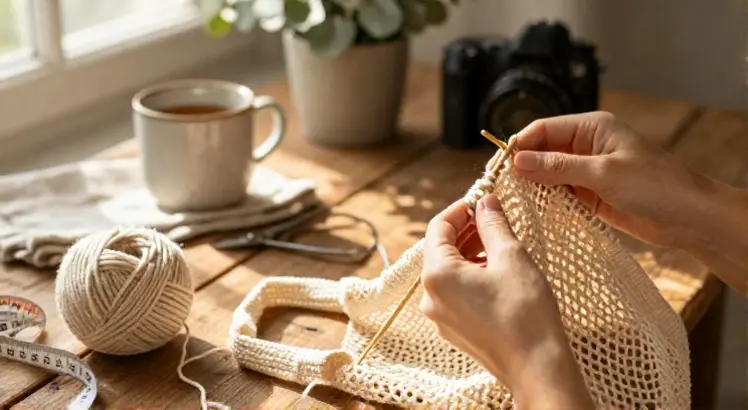
Learning how to knit a shopping bag is a fantastic project for crafters who care about sustainability. This project results in a sturdy, reusable market tote you can carry with pride. The process is simpler than you might think, even if you are still building your knitting skills. You will get to practice essential techniques while making something genuinely useful. Once you finish, you may never want a plastic bag again.
Our guide walks you through each stage, from yarn selection to final finishing. No complicated jargon, just clear, actionable steps you can follow at your own pace. You will learn how to knit a stretchy mesh body, shape a bag base, and craft comfortable handles. By the end, you will have a custom market bag that stands up to heavy groceries. Let us cast on together and create a bag that matches your style.
Why Knit Your Own Shopping Bag?
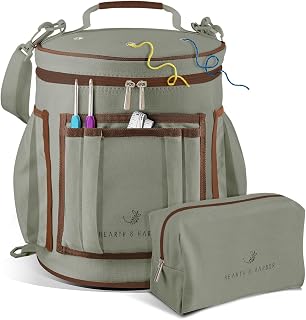
Hearth & Harbor Crochet Bag Organizer – Durable Canvas Yarn Organizer
Check PriceMaking your own shopping bag reduces reliance on single use plastics in a beautifully creative way. A handmade knit bag is a statement of personal style and environmental awareness. You can tailor the color, size, and handle length exactly to your taste. It also makes a thoughtful gift that friends and family genuinely adore. Plus, the repetitive knit pattern is wonderfully relaxing for evenings on the couch.
Unlike store bought totes, your knitted version will have a soft, flexible drape that expands to hold oddly shaped items. It collapses into a tiny bundle, so it fits easily in a purse or glove box for impulsive market trips. This portability means you are always prepared to say no to plastic. The satisfaction of using something you crafted with your own two hands is unmatched. You can also coordinate your bag with a matching knit produce pouch for a complete zero waste kit.
Choosing the Right Yarn for Market Bags
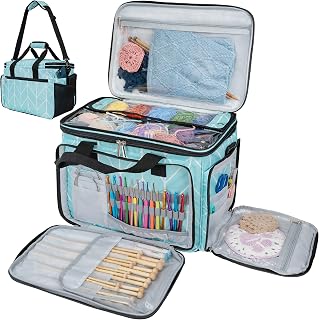
PAVILIA Large Knitting Yarn Storage Bag – Spacious Teal Tote
Check PriceSelecting the best yarn is the foundation of a durable bag. You need a fiber that is strong, does not stretch out of shape under weight, and can handle frequent use. Cotton is the most popular choice because it has virtually no elasticity when dry, giving your bag excellent structure. Linen and hemp blends are also superb options for a rustic, eco friendly feel. Avoid superwash wool and acrylic, as they can sag too much once filled with groceries.
Look for a worsted or DK weight cotton with a tight twist so the stitches stay defined. Brands that offer recycled cotton or organic options add an extra sustainable touch. For a practical deep dive into top quality yarns, see our guide on the best cotton yarns for crochet, which also work beautifully for knit market bags. You will typically need around 200 to 300 yards of yarn, depending on the bag size. Buy an extra skein, as running short mid project is always frustrating.
Color is another fun decision. Bright, variegated yarns highlight the mesh texture, while neutral tones keep the bag looking crisp and clean. Remember that lighter shades may show dirt faster, but they are easy to pop in the wash. Test a small swatch to see how the fabric behaves after blocking. A yarn with a slight sheen can give your finished bag an elevated, boutique look.
Essential Knitting Tools You Will Need
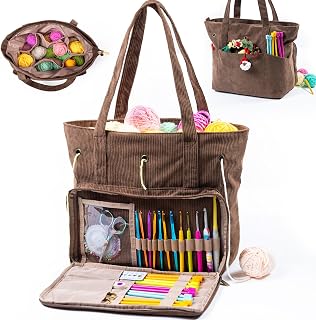
MYBAGZING Large Yarn Bag with Hook Case – Integrated Storage for Hooks
Check PriceGathering the right supplies before you cast on saves time and keeps the experience joyful. You will need a pair of circular knitting needles in the size recommended by your yarn label, usually around US 6 to 8. Circulars let you knit in the round effortlessly and hold a large number of stitches as the bag grows. Stitch markers are vital for keeping track of the beginning of the round and any pattern repeats. A tapestry needle for weaving in ends and a pair of sharp scissors complete the core kit.
A dedicated project bag is a game changer for staying organized on the go. It keeps your yarn cake clean, prevents tangles, and holds your notions securely. Explore our top picks for the best knitting project bags to find a stylish tote that makes taking this project to the park a breeze. A measuring tape is also crucial for checking your gauge and the final bag dimensions. Finally, a row counter, whether a digital clicker or a phone app, helps you avoid losing your place in lengthy stockinette sections.
Understanding the Pattern: Gauge and Stitch
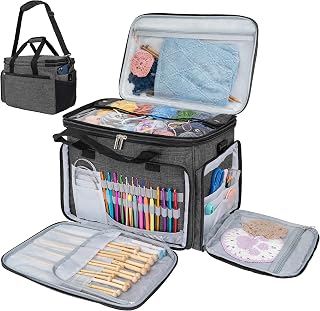
PAVILIA Knitting Yarn Storage Bag – Sleek Dark Grey Tote
Check PriceBefore you dive into the main knitting, you must knit a gauge swatch. This small square reveals how many stitches and rows you get per inch with your chosen yarn and needles. Skipping this step often leads to a bag that is far larger or smaller than intended. A market bag relies on a specific, airy gauge for the mesh to stretch correctly without losing its shape. Aim for a gauge that feels firm but not stiff after blocking.
Most shopping bag patterns use a simple stitch pattern, such as alternating rows of yarn overs and knit two togethers to create the mesh. This openwork construction is what gives the bag its signature stretch and ability to hold bulky produce. A common repeat is a 4 to 6 stitch pattern that is easily memorized. For a free, detailed pattern with clear schematics, visit The Spruce Crafts market bag tutorial. Their instructions break down the repeats beautifully. If you prefer a denser fabric, you can substitute a seed stitch base and stockinette sides, but the bag will be less collapsible.
Read through the entire pattern once to understand the construction. Many bags are knit from the base up with seamless rounds, then split for handles. Highlight the stitch count at key points so you can catch mistakes early. If the pattern uses abbreviations, keep a short key nearby. Taking these few prep minutes makes the actual knitting flow smoothly and boosts your confidence.
How to Cast On and Knit the Base
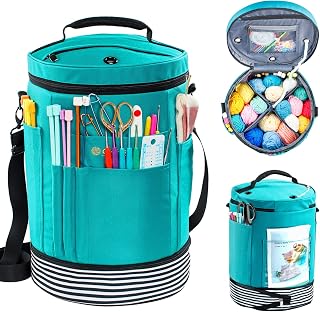
MYBAGZING Expandable Crochet Bag Organizer with Yarn Grommets
Check PriceA sturdy base is the anchor of your shopping bag. Begin by using a long tail cast on or a provisional cast on if you plan to graft the bottom closed later. The number of stitches you cast on determines the width of the bag, so measure against your swatch. You will work back and forth in garter stitch for a flat, non curling rectangle. This garter ridge gives the base a reinforced, durable feel that won’t roll under weight.
Keep your tension even and check frequently that the edge stitches are not too tight. After completing the desired length, you will pick up stitches around all four sides of the rectangle. This creates a continuous loop on your circular needle so you can begin knitting in the round. Use stitch markers to clearly mark each corner. Then transition to the mesh pattern for the body of the bag without breaking your yarn. This pickup step is where many beginners feel a surge of accomplishment, as the project suddenly takes its three dimensional shape.
Knitting the Mesh Body
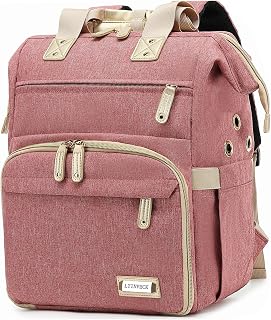
LTINVECK Knitting Bag Backpack – Hands-Free Travel Companion
Check PriceWith the base complete, you can settle into the relaxing rhythm of the mesh body. You will knit in continuous rounds, repeating a simple eyelet sequence. The most common pattern is to knit one round, then on the next round do a yarn over followed by a knit two together all the way around. This creates a series of holes that form a diamond or ladder like mesh. The effect is stretchy, breathable, and surprisingly strong.
Place a distinct marker at the beginning of the round so you never lose your spot. As the fabric grows, try it over your arm or fill it with a few cans to test the stretch. The body should measure around ten to fourteen inches in height, depending on your preferred bag depth. If you want a taller tote for farmers market hauls, simply add more rounds. Avoid making it too long, as overly heavy contents could cause the bag to drag on the ground.
Check your stitch count every few rounds to ensure no accidental increases slipped in. The yarn over and decrease pair keeps the count perfectly stable. This project is a wonderful lesson in how simple repeats can build into a elegant, functional textile. Play an audiobook or your favorite podcast and you will have a finished body in just a couple of evenings.
Shaping the Bag and Creating Handles
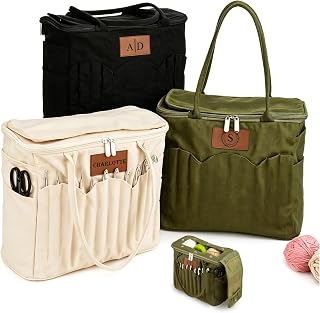
Phexilo Personalized Knitting Bag with Leather Patch – Customizable Canvas Organizer
Check PriceAfter the body reaches the right height, you transition to the handle section. The bag mouth is shaped by binding off a set number of stitches for the handle gap, then continuing to knit the remaining stitches. You will typically work two separate strips that become the handles, knitting them back and forth in a sturdy stitch like double seed stitch or garter rib. This creates a firm strap that resists curling and feels comfortable on your shoulder.
The length of the handle is personal. A typical over the shoulder strap measures around eighteen to twenty two inches. Try holding the bag with the partial handle to gauge where it falls on your body. Knit each strap to the same length, counting rows carefully. Then you will join the handle ends back to the main bag using a three needle bind off or by grafting, creating a seamless circular opening. This method yields a clean, professional finish without any awkward seams.
Dont rush the handle bind off, tight stitches can snap and loose ones can stretch out of shape. Work at a relaxed pace and block the handles later to even out any tension quirks. A well made handle transforms a simple knitted tube into a bag you genuinely enjoy carrying. Some knitters like to add an eyelet row before the handle split to thread a drawstring ribbon for extra security, which is a lovely customizable detail.
Seaming and Finishing Techniques
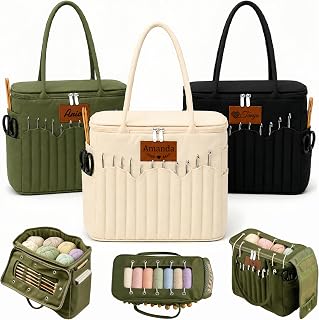
Personalized Knitting Bag with Leather Patch – Spacious Customizable Tote
Check PriceOnce all knitting is done, you will have a few yarn ends to secure. Thread each tail onto a tapestry needle and weave it in a zigzag path along the stitch pattern on the wrong side. Avoid trimming the yarn too close, a tiny bit of give prevents the end from working loose over time. If your bag base was knit flat, you will need to seam the bottom closed with mattress stitch. This method creates an invisible, flat join from the right side that is practically invisible.
Blocking is the secret to making your bag look polished. Soak the finished piece in cool water with a little wool wash for around twenty minutes. Gently squeeze out excess water, never wring, then roll in a towel to remove moisture. Lay the bag flat on blocking mats and pat it into a neat rectangular shape, paying special attention to straightening the mesh rows. Allow it to dry completely before using, this sets the stitches and gives the fabric a uniform drape.
Steam blocking is another option for cotton, but test on your swatch first. The heat can relax the cotton fibers nicely, but too much steam will compromise the crisp texture. After blocking, trim any last tiny fuzzies and give the bag a gentle shake. You now have a beautifully finished shopping tote ready for its maiden voyage. The time spent on these final details separates a homespun craft from an heirloom quality accessory.
How to Customize Your Knit Shopping Bag
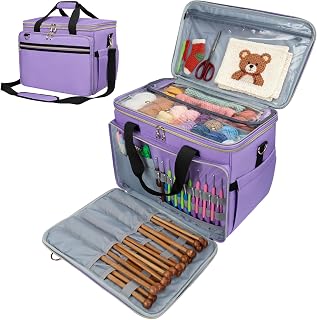
Anitor Large Crochet Bag – Vibrant Purple Tote
Check PriceMaking the bag truly yours is half the fun. You can easily modify the pattern by switching to a multicolored yarn or adding stripes. Small touches, like a contrasting color for the handles or a crocheted edging around the top rim, give the bag extra personality. You might knit a small pocket on the inside of the handle strap to hold a shopping list or keys. Using a bold, variegated cotton creates a tie dye effect without any complicated colorwork.
Embellishments can be applied after blocking. Sew on a wooden button or a handmade leather tag for a rustic accent. Some knitters weave a thin ribbon through the mesh holes to add a touch of shimmer or to reinforce the bottom edge. Be mindful not to add anything that could snag delicate produce like leafy greens. The bag remains functional first, fashion second, but you absolutely can have both.
If you are comfortable with embroidery, you can duplicate stitch a simple monogram or a tiny leaf motif onto the solid base. This is a lovely way to personalize a gift. Keep detailed notes on your modifications so you can recreate your favorite version later. A customized knit bag becomes a signature accessory that reflects your craft skill and creative voice.
Caring for Your Handmade Bag
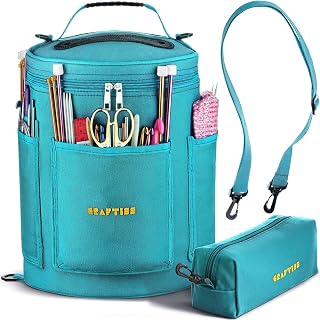
CRAFTISS Crochet Bag Organizer – Turquoise Yarn Storage
Check PriceA well cared for knit shopping bag can last for years of weekly use. Most cotton and linen bags are machine washable on a gentle cycle with cold water. Place the bag in a mesh laundry bag to protect the handles from twisting. Lay it flat to dry rather than tumble drying, heat can shrink natural fibers and distort the mesh pattern. For a quick refresh between washes, you can hand wash in the sink and roll in a towel.
If your bag gets stretched out from carrying heavy bottles, simply reblock it. Soak in cool water, reshape, and let it dry flat, the cotton will return to its original measurements. Store the bag folded loosely in a drawer or your knitting project tote, never hung by the handles, which can cause stretching over time. A light spritz of fabric freshener keeps it smelling clean. With regular care, your handmade market bag will develop a soft, lived in character that only adds to its appeal.
Keep a darning needle handy to quickly mend any snagged stitches before they become holes. A couple of duplicate stitches worked over the damaged area can restore the fabric invisibly. This proactive maintenance is much simpler than reknitting an entire section. Treat your bag as the hardworking textile it is and it will repay you with reliability and charm.
Troubleshooting Common Mistakes
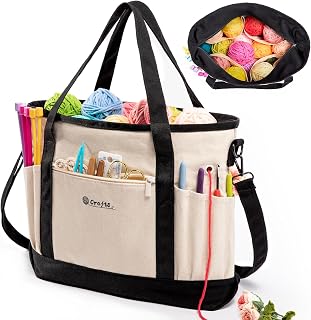
MYBAGZING Canvas Yarn Storage Organizer – Washable and Spacious
Check PriceEven careful knitters encounter hiccups, and knowing how to fix them keeps frustration away. A dropped stitch in the mesh is usually visible as a long ladder. You can pick it up with a crochet hook, recreating the yarn overs and decreases back up the column. If you notice a yarn over that got knit instead of dropped, simply drop that stitch down intentionally and rework it with the correct yarn over ladder. Take your time and use good light when doing stitch surgery.
Uneven tension in the mesh can happen if you knit loosely on the yarn over rounds and tightly on the knit rounds. The solution is to focus on even breathing and to block the bag thoroughly, which can forgive a multitude of tension sins. If the bag base is curling despite the garter ridge, your edge stitches might be too tight. Go up a needle size for the cast on edge only to combat this. Always check that your stitch count remains correct after every few rounds, a simple counting error can silently shift the pattern.
Should your handles end up different lengths, it is possible to carefully unpick and reknit just the longer one. If the difference is minimal, blocking can gently stretch the shorter handle to match. Under no circumstances should you just pull hard on a finished handle, as this will irreversibly distort the stitches. Remaining patient and fixing mistakes methodically builds your confidence as a knitter.
Comparing Different Knitting Patterns
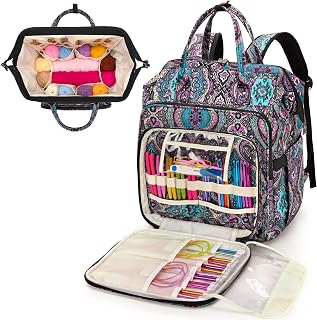
LoDrid Knitting Backpack with Oversized Grommets
Check PriceNot all market bag patterns are created equal, and exploring a few options can help you find your ideal project. The classic ‘French market bag’ pattern features a deep, open mesh and wide slouchy silhouette. This style expands dramatically but may not suit someone who prefers a more structured shape. Another popular variation is the ‘string bag’ with very fine yarn and tiny eyelets, producing a lightweight sack that folds into a pocket. It knits up quickly but requires concentration due to the thin yarn.
Some patterns start with a circular base knit outward like a doily, eliminating the need to pick up stitches. This seamless start is perfect if you hate seaming. Others use a rectangular base with mitered corners for a boxy bottom that sits flat. Compare the construction method to your skill level and patience for finishing details. A pattern with clear charts and written instructions is ideal if you are new to knitting in the round. Downloading a few free patterns from Ravelry lets you read through before committing to a skein of yarn.
Frequently Asked Questions
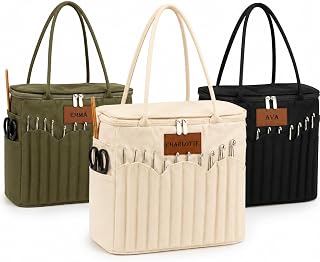
Canvas Yarn Storage Bag with Personalized Leather Patch
Check PriceIs a knit shopping bag strong enough for heavy groceries? Yes, when made with the right yarn and tight gauge, these bags can comfortably hold several pounds. Cotton and linen have minimal stretch, so they support weight without sagging to the floor. Many knitters regularly carry milk jugs and cans. Just be sure to distribute weight evenly and use a dense stitch for the base and handles.
Can beginners knit a shopping bag? Absolutely. The mesh pattern uses only basic stitches, knit, yarn over, and knit two together. You will also learn to knit in the round and pick up stitches, which are valuable skills. If you can knit a dishcloth, you have the skills for a market bag. Start with a smaller size and take it step by step; you will be so proud of the result.
How long does it take to knit a shopping bag? For an average knitter, a medium sized bag takes around eight to twelve hours of total knitting time. The mesh body works up quickly because of the openwork. A simple pattern without complex handles can be finished in a weekend. Blocking and drying add a few extra hours, but they are entirely hands off.
Can I add a lining to my knit bag? Adding a fabric lining is a wonderful way to prevent small items from poking through the mesh. Use a light cotton fabric and sew a simple drawstring pouch that fits inside. Insert it so the drawstring sits near the top, and tack it at the handles to keep it in place. This customization makes the bag ideal for carrying things like loose nuts or berries.
What if my bag stretches out after use? Simply wash and reblock the bag, and it will snap back to its original dimensions. Cotton has excellent memory when blocked. If stretching is a recurring issue, switch to a tighter gauge or a thicker yarn for your next bag. Adding a strip of cotton webbing inside the handle can also prevent elongation without affecting the look.
Bringing It All Together
You now have a complete roadmap to knit a chic, sustainable shopping bag from start to finish. The journey from a simple skein of cotton to a functional market tote is deeply satisfying. Each step, from casting on the sturdy base to weaving in the final end, builds on fundamental knitting skills that serve you for a lifetime. Celebrate your finished bag by filling it with fresh farmers market finds. You have created something beautiful, useful, and kind to the planet.
Keep this guide bookmarked for future projects. You can easily adapt the techniques to produce bags in different sizes, as gifts or for your own collection. Pair your finished bag with a matching produce pouch or knit dishcloths to complete your zero waste kitchen set. The knitting community is full of inspiring variations, so share your creation and encourage others to ditch plastic. Your needles are now a tool for positive change, and that is something to be truly proud of.
