Walking Foot vs Presser Foot — what’s the real difference, and does it actually matter for your sewing projects? If you’ve ever struggled with uneven fabric feeding, puckered seams, or mismatched layers, the answer is yes.
Choosing between these two sewing machine feet can significantly impact the appearance of your stitches and the behavior of your fabric. In this complete guide, we’ll break down the differences, uses, and best practices for both feet so you can sew more evenly, professionally, and confidently.
For more sewing machine tips and professional guides, visit our full sewing resource hub at SewingWorker.com
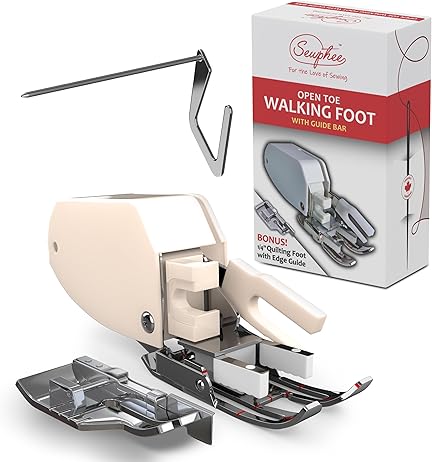
Open Toe Walking Foot with Guide
Check Price
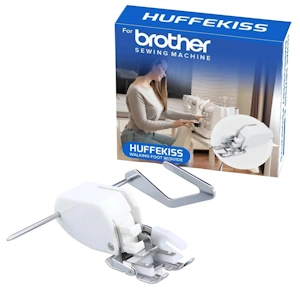
Universal Walking Foot Sewing Machine Presser Foot,
Check Price1. What is a Presser Foot?
A presser foot is the attachment that sits on top of your fabric (just ahead of the needle) and holds it down against the throat plate and the feed dogs as the machine stitches.
Its main job: to keep the fabric flat and prevent it from rising or shifting as the needle penetrates and the feed dogs move the fabric. Examples: Your machine likely comes with an “all-purpose” or “standard” presser foot, which works well for basic straight stitching on one or two layers of fabric.
1.1 How a Regular Presser Foot Works
With a regular presser foot, only the feed dogs (the little toothed bars beneath the fabric) are doing the active feeding motion. The presser foot simply applies pressure from above and holds the fabric steady. The top layer of fabric is passively held, but is not actively “walked” along.
In many fabrics and simple seams, this works perfectly fine. But when you introduce multiple layers, bulky seams, slippery fabrics, or directional prints, problems can arise.
2. What is a Walking Foot?
A walking foot (also sometimes called an “even-feed foot”) is a specialized presser foot attachment designed to help feed multiple layers of fabric more evenly.
2.1 How the Walking Foot Works
The mechanism: underneath the walking foot is an extra set of feed teeth (or a moving sole) that grips the top layer of fabric and synchronises its movement with the machine feed dogs, which grip the bottom layer.
In effect, both the top and bottom layers are moved forward at the same rate, reducing shifting, puckering, or misalignment. yizemachinery.com+1
Thus, the difference: whereas with a regular foot, the top layer might lag or get pushed ahead, the walking foot “walks” all layers evenly through the machine.
2.2 When the Walking Foot Typically Appears
Originally, the walking foot was heavily used in quilting (many layers of quilt top + batting + backing) because of the feeding challenges.
But as sewing has advanced, it’s used in garment-sewing, bag making, matching prints, sewing slippery fabrics, and more.

3. Key Differences: Walking Foot vs Regular Presser Foot
Let’s compare side by side the main practical differences.
| Feature | Regular Presser Foot | Walking Foot |
|---|---|---|
| Feeding mechanism | More likely for the top and bottom layers to shift relative to each other, especially with multiple layers or slippery fabrics. | Extra feed on the top layer moves it in sync with the bottom layer. |
| Fabric layer alignment | Better layer alignment: both layers moved together, reducing misalignment. | A bulkier foot, attachment may require a screwdriver, and sometimes a slower sewing speed. |
| Ideal use | Single or double layers, standard fabrics, simple seams. | Multiple layers (quilts, bag straps), slippery/sticky fabrics, matching prints/stripes. |
| Complexity | Not ideal for reverse stitching, free-motion quilting, or stitches requiring lateral fabric movement. | Simpler, usually smaller foot, uses a regular mechanism. |
| Limitations | Might struggle with very thick layers, slippery surfaces, or very stretchy fabrics. | Not ideal for reverse stitching, free-motion quilting, or stitches requiring lateral fabric movement. |
3.1 Real-world Example
One blog explains:
“When you’re working with multiple layers … the top layers may not move as fast or as easily as the bottom layers … A walking foot … corrects this by scooting the top layer at the same pace as the bottom layer.”
In contrast, a regular foot might press down and drag the fabric slightly rather than feed it smoothly.
4. When to Use Each – Practical Guidance
Here are practical guidelines on when you’d use a walking foot vs a regular presser foot.
4.1 Use a Regular Presser Foot When:
- You are sewing one or two layers of standard-weight fabric (cotton, linen, etc).
- You are doing basic straight seams or zig-zag stitching, and the fabric behaves well.
- You are doing free-motion work or decorative stitches that require side-to-side fabric movement (in which a walking foot may hinder).
- Your fabric is stable, not slippery, and the layers are thin.
4.2 Use a Walking Foot When:
- You are sewing multiple layers (for example, quilt top + batting + backing).
- You are working with slippery or sticky fabrics (e.g., satin, vinyl, faux leather, oil-cloth) where the top layer might slide.
- You are working with knits or stretchy fabrics where feed differential causes stretching or distortion.
- You need to match prints or stripes across seams and cannot afford a shift.
- You are sewing deep hems, bindings, and topstitching through folded layers where the top layer might be dragged ahead of the bottom.
4.3 When Not to Use a Walking Foot
- When you need reverse stitching (a walking foot may not support back-feed properly).
- For free-motion quilting, where you need to move fabric in all directions, not just forward feed.
- When you are sewing very fine lightweight fabrics that may get “chewed up” by the walking mechanism (some user reports).
5. How to Attach and Use a Walking Foot
Getting the walking foot set up correctly is essential for it to function properly.
5.1 Attaching It
- Remove the regular presser foot and its holder screw.
- Slide the walking foot into place, ensuring the lever of the walking foot aligns over the needle clamp screw (or appropriate part of your machine) so that the mechanism moves with the needle bar.
- Tighten the screw securely.
- Confirm that the walking foot’s “claw” or lever sits correctly and raises/lowers with the needle movement.
5.2 Sewing with It
- Use slower sewing speed if possible—since the extra mechanism requires more time to feed smoothly, going too fast may cause skipped stitches or shifting.
- Start your stitch near the edge and go forward—walking feet often are not designed for heavy backstitching.
- Use the appropriate stitch length and appropriate needle for the fabrics. If sewing thick or bulky layers, use a thicker needle.
- Practice on scrap layers first to get a feel for how it moves your fabric.
5.3 Troubleshooting Common Issues
- If the walking foot “grabs” too hard or slips: check attachment alignment and screw.
- If you skip stitches, check that the needle is suitable, that the fabric isn’t being dragged, and that the foot is correctly seated.
- If your fabric still shifts: ensure you are sewing slowly enough, that the feed mechanism is synchronised, and that layers are pinned/clipped securely.
6. Benefits of Using a Walking Foot (and Why It Matters)
Here are the real advantages that make a walking foot worth considering.
6.1 Better Layer Management
When you sew quilts or multiple layers (bag straps + lining + interfacing, etc), the walking foot keeps the layers moving together, reducing puckering or “dragging” of one layer behind another.
6.2 Improved Print & Pattern Matching
If you are matching plaids, stripes, checks, or directional prints, any slight shift in one layer affects the alignment. A walking foot helps keep layers in sync and your seams crisp.
6.3 Safer for Slippery or Textured Fabrics
Fabrics like vinyl, faux leather, oil‐cloth, or very smooth knits can slide under a regular foot, causing skipped stitches or irregular feed. The walking foot grips the top and bottom layers more evenly, reducing that sliding.
6.4 More Professional Results
When your feed is even and your layers are aligned, your seams look flatter, get fewer puckers, and your overall finish is cleaner—important for quilting, handbags, upholstery, and garment sewing.
7. Downsides and Considerations
While the walking foot is a powerful tool, it’s not perfect for every situation.
- It tends to be bulkier and may obstruct visibility or tighter curves.
- It may require slower sewing speeds due to the added mechanism.
- It may not play well with decorative stitches that rely on lateral fabric movement.
- Some lightweight fabrics may not need it and might be better served by a regular foot or a specialized alternative like a Teflon/roller foot for slippery fabric.
- You must ensure compatibility with your machine’s shank type (low shank, high shank) and ensure the correct fit.
8. Which Machine Foot Should You Have?
Depending on your sewing habits and projects, your foot collection may include:
- A standard all-purpose presser foot (for everyday sewing).
- A walking foot (for when you have multiple layers, slippery fabrics, matching prints).
- A Teflon foot or non-stick foot (for leather, vinyl, plastics) as an alternative.
- Possibly an open-toe walking foot (which gives better visibility for quilting or stitch-in-the-ditch) if you do a lot of quilting.
Decision checklist:
- Do you regularly sew quilts, multiple layers, bag projects, or upholstery? → Walking foot is highly recommended.
- Do you mostly sew single-layer garments, standard fabrics, basic seams? → Regular presser foot is likely sufficient.
- Do you encounter many slippery or sticky fabrics (leather, vinyl, satin)? → Consider walking foot and/or a non-stick foot depending on the task.
- Do you use decorative stitches, free-motion quilting, or heavy back-stitching? → You’ll likely revert to a regular presser foot for those tasks.
9. Summary & Final Takeaways
In short:
- A regular presser foot is the default tool and works well for everyday sewing on standard fabrics and seams.
- A walking foot is a specialised tool that “walks” the top and bottom fabric layers together, giving you improved feed control, better alignment, and smoother results, especially when dealing with multiple layers, tricky fabrics, or matched patterns.
- Use the walking foot when your project presents feeding challenges — many layers, slippery surfaces, directional prints — and revert to the regular foot when simplicity or lateral motion is needed.
- Make sure your machine is compatible, attach the walking foot properly, sew at a manageable speed, and practice with scrap material to get comfortable with how it behaves.
Conclusion: Walking Foot vs Presser Foot
Choosing between a walking foot and a regular presser foot may seem like a small decision, but it can be the difference between a frustrating sewing session and a beautifully finished project. Next time you’re about to sew something with multiple layers, tricky fabrics, or matching prints, pause and ask: Will my fabric feed evenly? If the answer is “maybe not”, reach for the walking foot — your machine (and your seams) will thank you. And when you’re back to more standard tasks, the regular presser foot continues to serve you well.
Frequently Asked Questions (FAQ)
1. Can I use a walking foot for all my sewing projects?
Technically, yes, but it’s not always ideal. A walking foot can handle most projects that use straight stitches and medium to heavy fabrics. However, for lightweight or delicate fabrics, decorative stitches, or free-motion work, a regular presser foot usually gives better control and visibility.
2. Does a walking foot fit every sewing machine?
No. Walking feet come in different types—low shank, high shank, and slant shank—depending on your sewing machine model. Always check your machine’s manual or manufacturer’s website before purchasing to ensure compatibility.
3. What’s the main advantage of using a walking foot?
The biggest benefit is even fabric feeding. It prevents layers from shifting, puckering, or stretching. This makes it ideal for quilting, sewing slippery fabrics, and matching patterned seams like plaids and stripes.
4. When should I switch back to a regular presser foot?
Switch to a regular foot when you need:
- Free-motion quilting or embroidery.
- Reverse stitching or back-tacking.
- Decorative or zigzag stitches requiring side-to-side movement.
The regular presser foot gives better flexibility and stitch accuracy for these cases.
5. Can I use a walking foot for quilting?
Absolutely. Quilters love the walking foot because it keeps the top, batting, and backing layers moving together, preventing puckers and misalignment. It’s especially helpful for “stitch-in-the-ditch” and straight-line quilting.
6. Is a walking foot the same as an even feed foot?
Yes. “Walking foot” and “even feed foot” refer to the same attachment. Both describe a presser foot with a built-in feeding mechanism that moves the top fabric layer in sync with the bottom feed dogs.
7. Do I need a walking foot for stretchy fabrics like knits?
Yes, it can help. Stretchy fabrics tend to get pulled out of shape with a regular foot. A walking foot keeps the fabric layers aligned and prevents stretching or “wavy” seams, especially on jersey and spandex.
8. How do I know if my walking foot is installed correctly?
The small lever (or fork) on the walking foot should rest on top of the needle clamp screw. If it’s underneath or misaligned, the foot won’t “walk.” Test it by turning the handwheel—if the top feed mechanism moves up and down, it’s correctly installed.
9. Why is my walking foot noisy?
That’s normal. Walking feet often make a “clicking” or “thumping” sound during use because of the internal feed mechanism. It doesn’t affect performance. If the sound becomes unusually loud or uneven, check that the foot is tightly secured.
10. What’s better for leather or vinyl — a walking foot or a Teflon foot?
Both can help, but for sticky fabrics like vinyl or faux leather, a Teflon foot glides more smoothly across the surface. A walking foot also works well if you’re sewing multiple layers or quilting with leather.
11. How do I clean or maintain a walking foot?
Brush away lint and threads regularly, and keep it stored in a dry place. Avoid oiling it unless specified by the manufacturer. Some walking feet have removable soles for cleaning—check your user manual for details.
12. Is a walking foot worth buying?
Yes—if you often sew quilts, thick fabrics, slippery materials, or patterned seams, a walking foot is one of the best sewing investments you can make. It’s a time-saver and a quality-booster in one small attachment.
✅ Pro Tip: If you’re unsure whether a walking foot is right for your machine or project type, test-sew the same seam with both feet. You’ll instantly feel the difference in how smoothly the layers feed.

Hi, I’m Safura. What are you sewing today? If you have any questions or need help with anything related to sewing, please feel free to ask. I’m always here to assist you with sewing-related issues.